Learning to roller set natural hair is a very healthy method of achieving straight hair whether you’re curly, wavy, or kinky.
It is especially an easy style for those with relaxed hair but it can also be achieved on natural hair. Setting your hair is a great alternative to flat ironing and curling hair.
A few things to know before you start:
- The easiest way I have found to roller set natural hair is to part your hair down the middle. Parting hair down the middle is easier especially if your hair long vs doing it the standard mohawk method.
- Using mesh rollers will allow your hair to dry faster. Additionally, they are a little easier to use than magnetic rollers.
- You can buy mesh rollers in all different sizes. The size of mesh rollers I use are 1.5 inch. Buy a set of hair pins to go with them. Not bobby pins.
- Set aside an hour and a half to shampoo, condition, and roll your hair. Set aside another 2 hours to dry your hair and style it.
- Make sure you have all of your tools before you get started.
- If you get frustrated, don’t fret. Just start over again another day.
Step 1: Wash and Condition your hair as usual
Supplies needed: Clarifying shampoo, moisturizing shampoo, moisturizing conditioner, shower comb, plastic cap, hooded hair dryer.
- Wash your hair with a moisturizing shampoo.
- Apply a moisturizing conditioner and detangle with a shower comb.
- Deep condition under the hooded dryer for 15 minutes before rinsingout. (Tip: In order to get the bounciest set, make sure to rinse all of the conditioner out.) Read Also: Most common Benefits of Hooded Hair Dryers
Step 2: Detangling
Supplies needed: Leave-In Conditioner , Hair Clips, Wide Tooth Seamless Comb , and a rat tail comb.
- Use your favorite leave-in conditioner and detangle your hair in sections.
- Get some hair clips and clip your hair up in the various sections that you’ll be using to roll.
- If you’re going to roll using my middle part method, then you should have two sections on each side with hair clips. To roller set natural hair, I have found that middle part method will make it a little easier to pull your hair taut.
- If you’re going to roll the traditional mohawk method, then,you should have your hair in 3 clips (1 down the middle and 1 on each side).
Step 3: Preparing your Work Area
Supplies needed: Setting lotion, oil, end papers, mesh rollers, roller pins, wide tooth comb, rattail comb.
(You can do all of this before step 1 if you’d like but I tend to do it at Step 3 so that I can place all products from step 1-2 back in my cabinet.)
- You need to prepare your setting lotion should you decide to use one. I find that with natural hair, setting lotion tends to help hold the curl and help the hair resist reverting.
Make sure you dilute the setting lotion appropriately. Using too much can make your hair hard. I typically just use a spray bottle.
- Take out all of your mesh rollers and lay them out on a towelin sink for easy access. Put the container of your roller pins nearby.
Optional: If you choose to put oil on your ends before rolling,put a little bit in the bottle cap to get to easily with your fingertip.
(I sometimes use oil on my ends and sometimes not. My ends do seem more moisturized when I do so I will suggest that you at least give it a try for your first roller set.)
Optional: Take out your end papers if you will be using those as well.
(I tend not to use end papers. They tend to slow me down but there may be some benefit to using them if your hair is uneven or you’re concerned about dryness to the ends from the hair dryer.)
Keep your wide-tooth comb and get out your rattail comb toplace near your rollers.
Step 4: Sectioning and Rolling
Supplies needed: Wide triangular hair net
- The easiest way I find to section and roll my hair is starting at the back of one of the sides.
- Make a part that is perpendicular to the middle part and dividethat part in half. Pin up the section next to the middle part and work on the other section first.
- Get your spray bottle of setting lotion and thoroughly saturatethe hair.
- Take you wide tooth comb to eliminate any tangles. This is a must-do when you roller set natural hair.
- Comb through again with your rattail comb. (This should be relatively easy if you detangled already with your leave-in conditioner.) Keep your hair stretched and take a dab of oil to apply to the ends
- Starting with your ends, begin rolling your hair upwards towards the scalp. Tip: Make sure your ends lay flat against the roller!
Roll and Secure Taughtly
Get a hair pin and attach it to the roller through the hair to the scalp.
When you roller set natural hair, you want to make sure to secure it taughtly in order to get your roots as straight as possible.
(This might take a bit of practice. The best way I learned to do this was start the pin going in from end of the roll pushing it downward towards the scalp out the other end of the roller.
Take down the next section of hair and do the same thing.
Continue parting your hair perpendicular to the middle part. Roll”up” the section closest to the middle part first.
Go to the other side and do the same thing.
Once you finish, use a wide triangle hair net to secure your rollers in place while they dry. Put all of your tools and products away. 🙂
Guess what? You just set your hair on rollers.
Step 5: Drying
Supplies needed: Hard hat hooded dryer or soft bonnet dryer, bottle of water, a computer, plenty of patience
Using either a bonnet dryer or a hooded dryer, put the temperature on low heat for the first 15 minutes then switch it to cool.
The amount of time it takes for your hair to dry will depend on how long your hair is, how thick it is, and how much hair you put on each roller.
When you roller set natural hair, it can take longer to dry due to the hair holding more water. My hair typically takes about an hour and 45 minutes to dry.
If you have the queen of hair dryers, a Pibbs, then it will probably reduce the time you need to dry in half!
Remove the triangle hair net and each roller once by one. Your hair is now ready for final styling.
Step 6: Styling
Supplies needed: Hard hat hooded dryer or soft bonnet dryer, saran wrap, hair clips, serum (oil or moisturizer)
One of the biggest problems when you roller set natural hair is getting straight roots. There are a few methods but the one I suggest you use is wrapping. This is sometimes called the silk wrap method or doobie wrap.
Silk Wrapping Method
- Put a tiny bit of oil on your hands and loosen up your curls.
- Comb them down with a wide-tooth comb.
- Take a serum or a light oil and rub through your hair concentrating on your roots.
- Now, wrap your hair around your head. Make sure to wrap tightly and secure with duckbill clips.
- Apply several wrappings of saran wrap. Make sure the saran wrap is fitting snugly.
- Sit back under the dryer for 15-20 minutes. (If your scalp tends to sweat or begins to sweat then reduce the time to 5-10 minutes)
- Comb down wrap gently. Your hair should be pretty straight with plenty of bounce and curl.
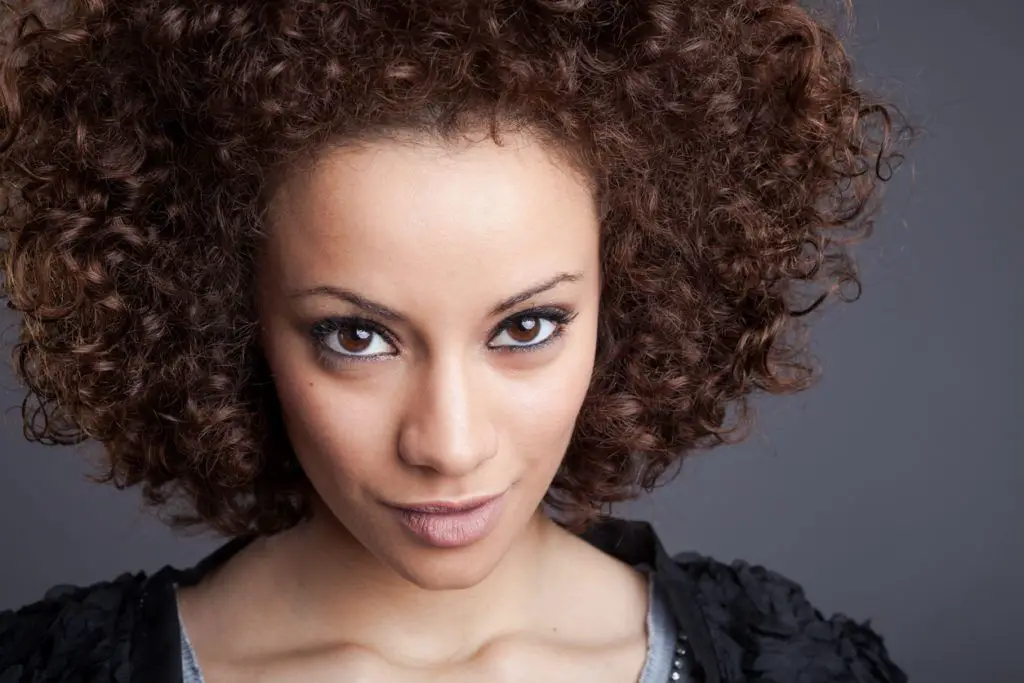
Final Results
Here are several other methods you can use to straighten your roots: blow drying and flat ironing:
To blow dry, part your hair in sections and with a round brush and blow dryer – lightly blow dry your roots section by section.
Related: How to Blow Dry Thick Hair Fast
To flatiron, part your hair in sections and flat iron just the roots to silky straight hair with loads of bounce.
Whether you choose to silk wrap, blow dry, or flat iron, you should end up with straight bouncy hair. This style should last you about a week.
Remember to oil your ends nightly and lightly with serum or oil. Neutrogena has a great serum.
Add a few rollers if your hair starts to fall. Make sure to use satin covered rollers and not sponge rollers.
Other Tips to Roller Set Natural Hair:
- Your hair should be super wet and slick with your leave-in and setting lotion to provide the smoothest set.
- Use a moisturizing hair setting lotion to keep your hair from getting dry.
- Make sure your ends are not frizzy when you put them on the roller.
- Practice using the hair pins so that they are secure.
- The more secure and taut you get the rollers, the straighter your roots will be (potentially eliminating the need for flat ironing afterwards).
- Don’t put too much hair on each roller.
- If you remove a roller for a test of dryness and it’s limp, that means that it isn’t dry. Curls should be firm and bounce into place. Go back under the dryer for another 20 minutes and try again.
- Never tear through your hair with the rat tail comb. If it’s catching, stop and use your wide-tooth comb to detangle. Try spraying a little more setting lotion.
- Try my wax stick method to get a nice and smooth hair line.
I hope this tutorial on how to roller set natural hair has been helpful to you. Good luck!