The best Halloween nails don’t need to scream costume to feel on-theme. A great set can be subtle enough for the office, fun enough for a party, and durable enough to last through candy-bag duty. Think in finishes (matte vs. gloss), restrained color stories (black, bone, pumpkin, violet, acid green), and small art moments placed where they count—like a single accent nail or a slender French line. Whether you paint at home or book with a pro, these ideas respect real-life schedules and different skill levels while still delivering a sharp, seasonal look.
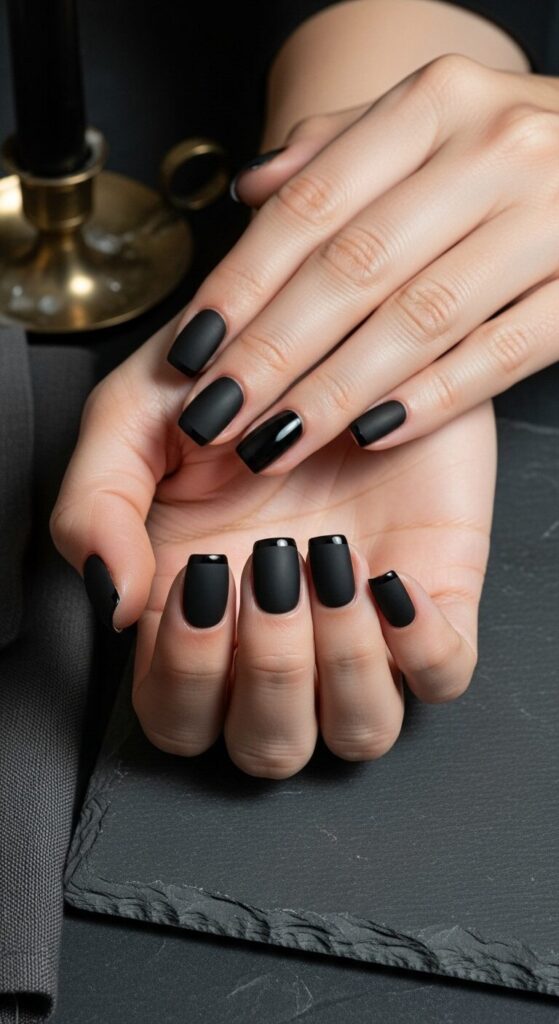
Matte Black French with Bone-White Tips
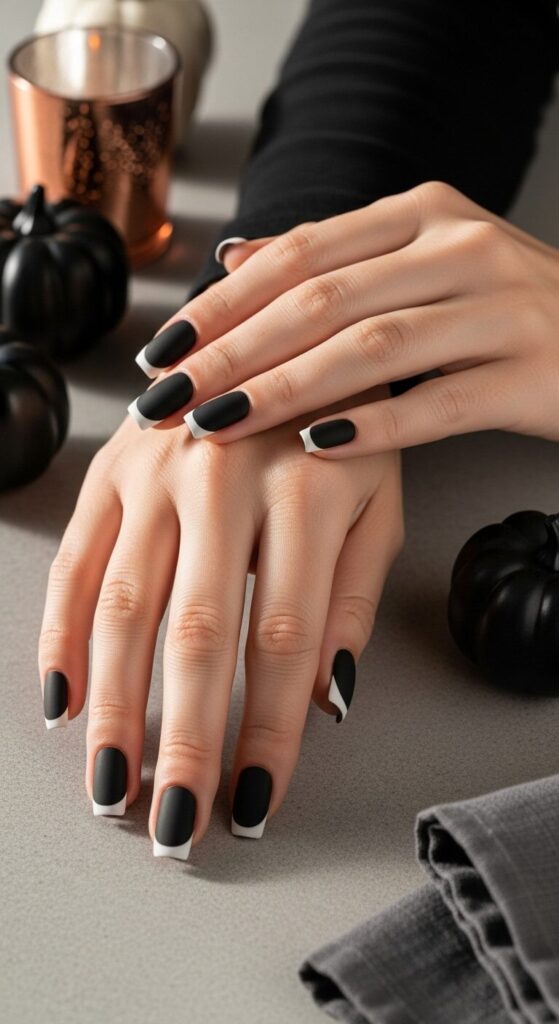
Swap the classic glossy French for a modern, midnight version. Start with a full matte black base on all nails. Using a fine brush, paint crisp, bone-white French tips—slim, no wider than two millimeters—so they read like a clean graphic line. The contrast is sharp and wearable; it’s spooky in spirit but minimal enough for everyday. Seal only the tips with a satin or glossy topcoat to create a “texture French” that catches light without compromising the matte body.
Chrome Blood Drip Accent
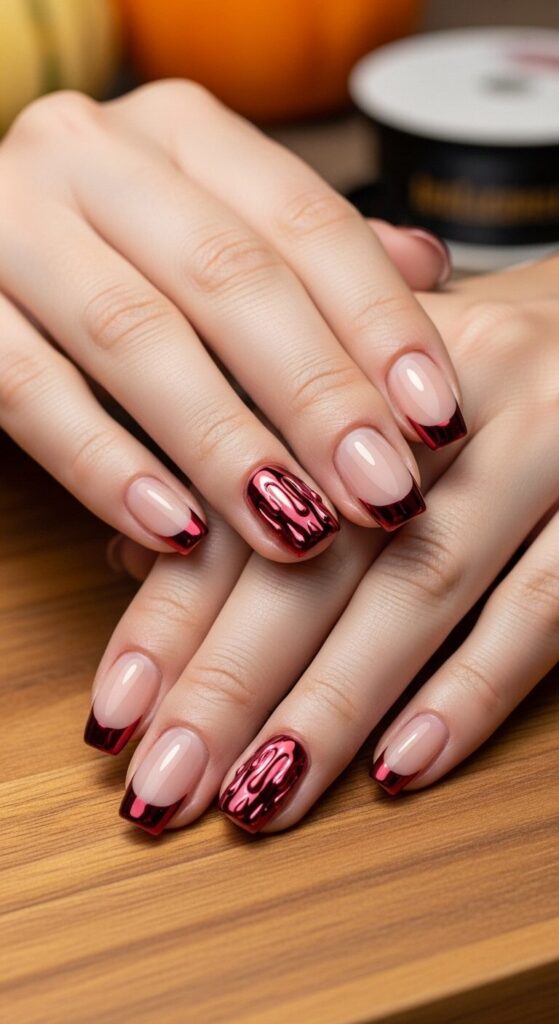
A tiny bit of shine goes a long way. Paint a sheer pink or soft nude base on all nails. Choose one or two accent nails per hand and add a deep oxblood chrome “drip” starting at the cuticle line. To get the chrome effect, layer a metallic red under a rub-on red chrome powder, then top with a high-gloss sealer so the drops look convex and wet. The rest of the nails stay low-key, which keeps the design adult and balanced.
Negative-Space Spiderweb Lines

If you like fine-line art, try spiderwebs that don’t cover the entire nail. Start with a milky sheer base. Using a long liner brush, pull thin bone-white arcs from one corner of the nail and connect them with angled spokes, leaving generous negative space so the design feels airy. Add a micro-dot of jet black only at the hub to anchor the web. Finish with a glossy topcoat to sharpen every line.
Pumpkin Spice Micro-Ombre
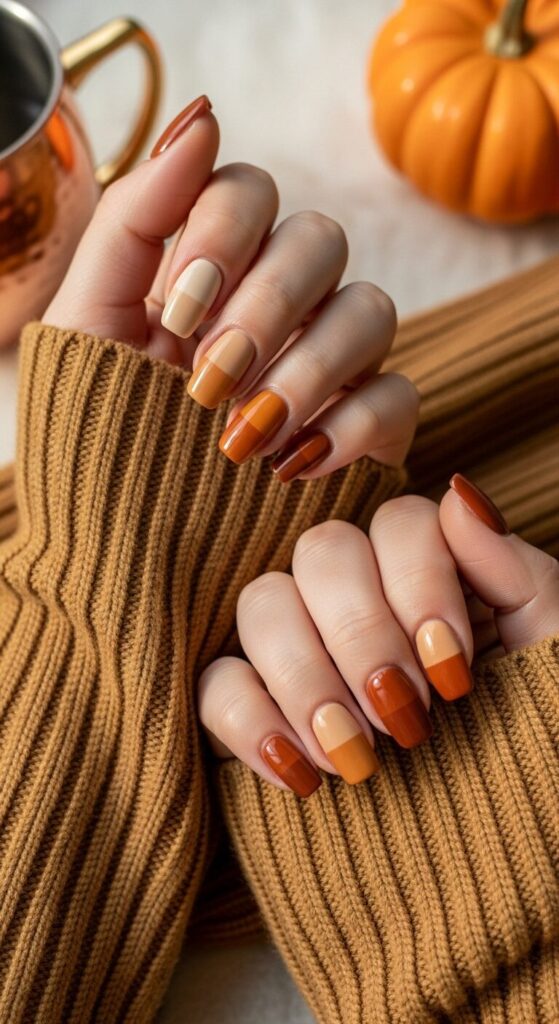
This is an easy, cozy gradient that never looks childish. Choose five pumpkin-adjacent shades ranging from cream to burnt sienna. Paint each nail a single shade, lightest on the thumb to deepest on the pinky, or vice versa. Keep the finish creamy and glossy. If you want a tiny nod to Halloween, add an ultra-thin black contour line at the free edge of only one nail per hand. It’s refined and makes sweaters look intentional.
Gloss-on-Matte Black French Reverse
Flip the French. Paint nails with matte black topcoat for a velvety base. Then, with a striping brush, apply a super-thin glossy black line at the cuticle curve—the reverse French—so the shine edge frames growth in an elegant crescent. Keep lines uniform and tight to the cuticle for a stealthy, luxe effect. This works beautifully on short nails and wears well as your nails grow.
Glow-in-the-Dark Slime Tips
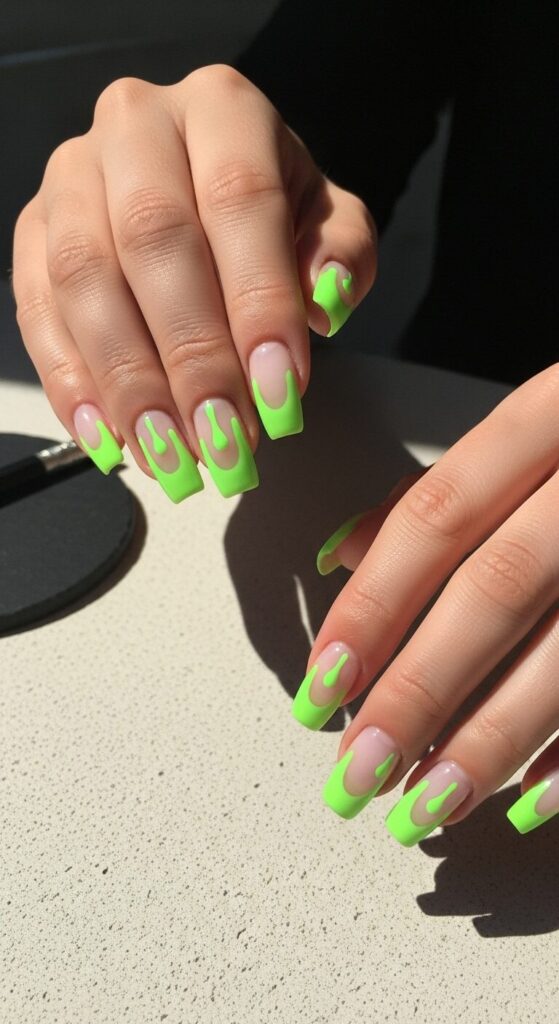
For a playful twist that still reads chic in daylight, try clear or milky bases with neon slime “drips” at the tips in lime-green glow polish. Keep the drip shapes rounded and varied, and cap the free edge well so the luminous pigment doesn’t chip. In normal light, the lime looks edgy; in the dark, the tips glow for a party-ready surprise. Add a thin black micro-line under the slime if you want extra definition.
Porcelain Ghost Decals on Bone White
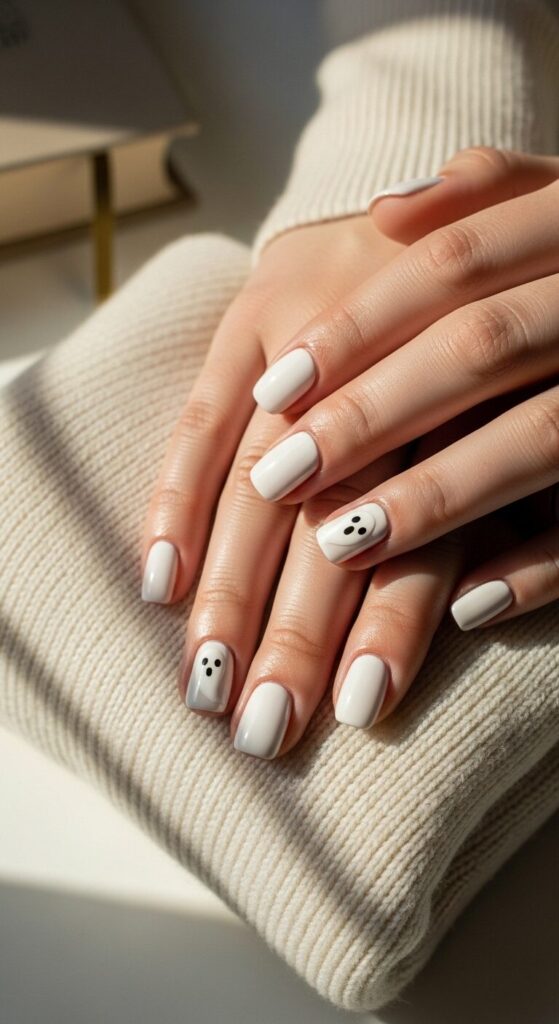
Think quiet, not kitsch. Paint nails in bone white with a porcelain-like shine. On two nails per hand, place minimalist ghost decals: soft oval silhouettes with tiny black oval eyes, nothing more. Keep placement off-center for a designer feel. The rest of the nails stay plain. This reads like a gallery print—crisp, clever, and very photogenic with knitwear.
Candy Corn Ombré
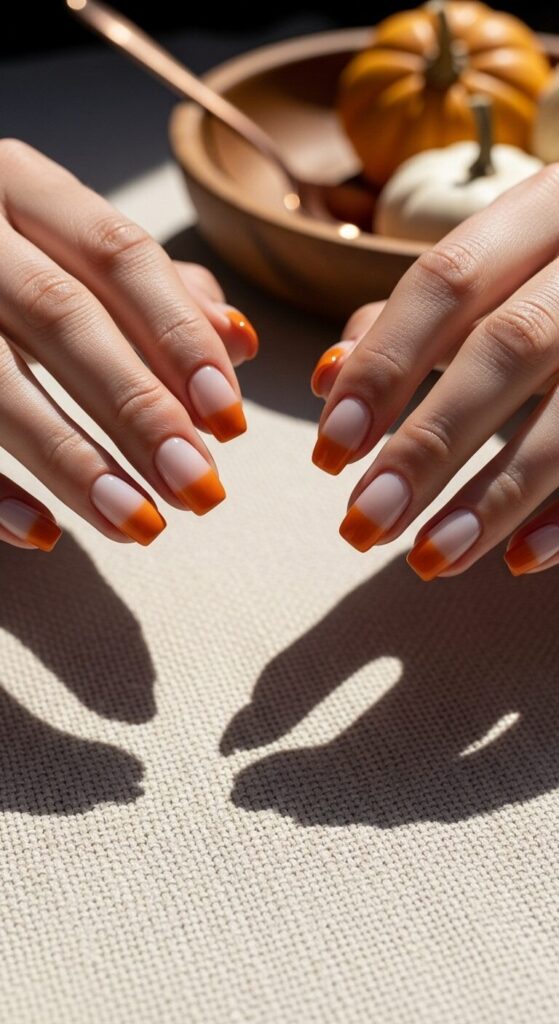
Skip the screaming brights and switch to softened versions: buttercream, muted marigold, and warm pumpkin. Mask off thirds or airbrush the blend so colors bleed seamlessly from cuticle to tip. Keep the white at the cuticle, the yellow center soft, and the orange faded at the tip. Seal with high-gloss. The palette reads nostalgic without going neon, so it works with everyday outfits.
Holographic Bats Over Ink-Black
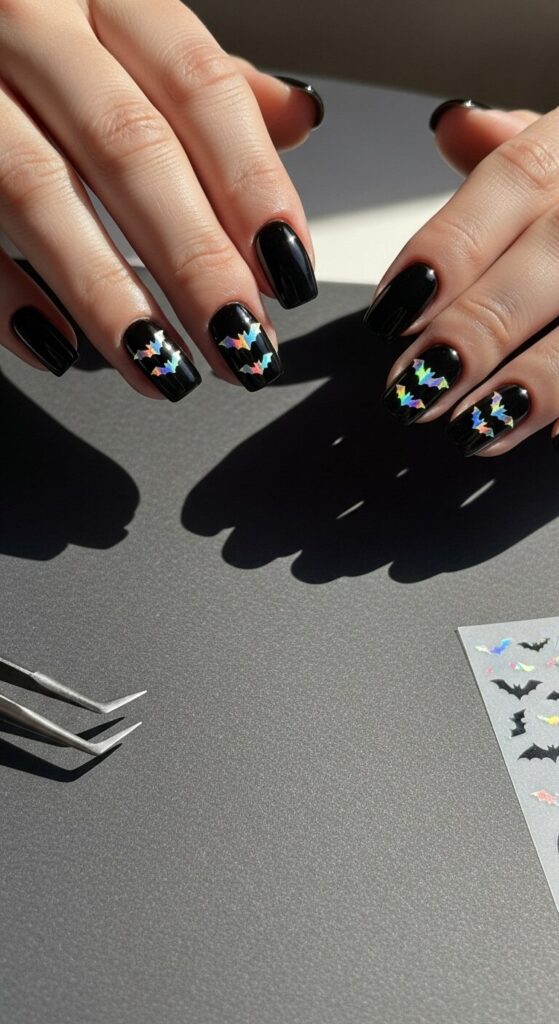
Paint a jet-black base and top with a no-wipe topcoat for slick shine. Apply micro bat silhouettes in holo foil or iridescent decals across two nails per hand—keep them tiny and scattered, as if in flight. The bats flash rainbow in sunlight and look subtle indoors. Finish with another thin layer of glossy topcoat to lock edges. It’s graphic, quick, and surprisingly sophisticated.
Purple Cat-Eye Magnetic Midnight
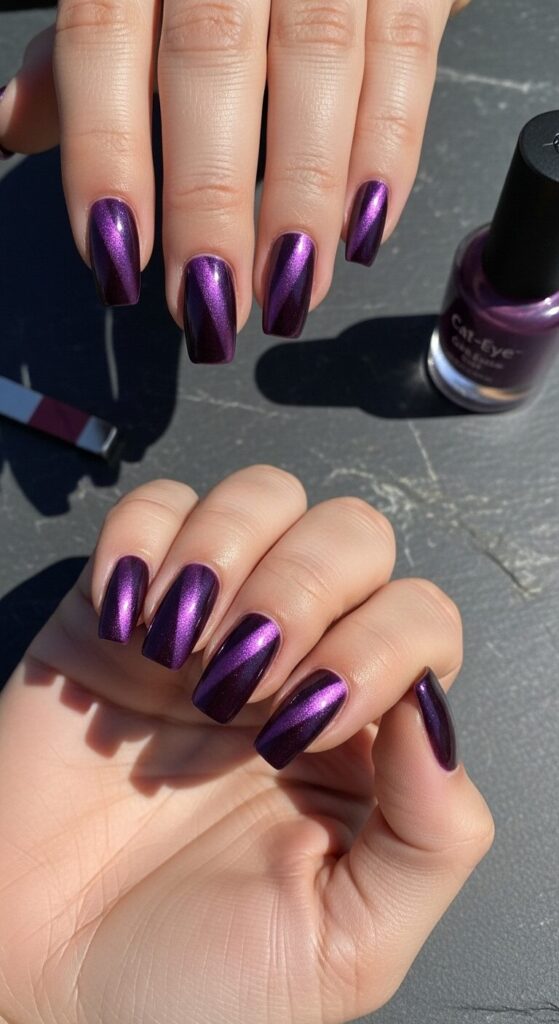
If you like dimensional shimmer, cat-eye gel in deep violet is a showstopper. After two color coats, activate the magnetic pigment with a bar magnet at a diagonal to create a comet-like streak across each nail. The effect changes with the angle of light and feels like falling night sky—mystical but not loud. Keep shapes short and oval for a luxe look, and seal with glossy topcoat.
Velvet Flocking Accents on Matte
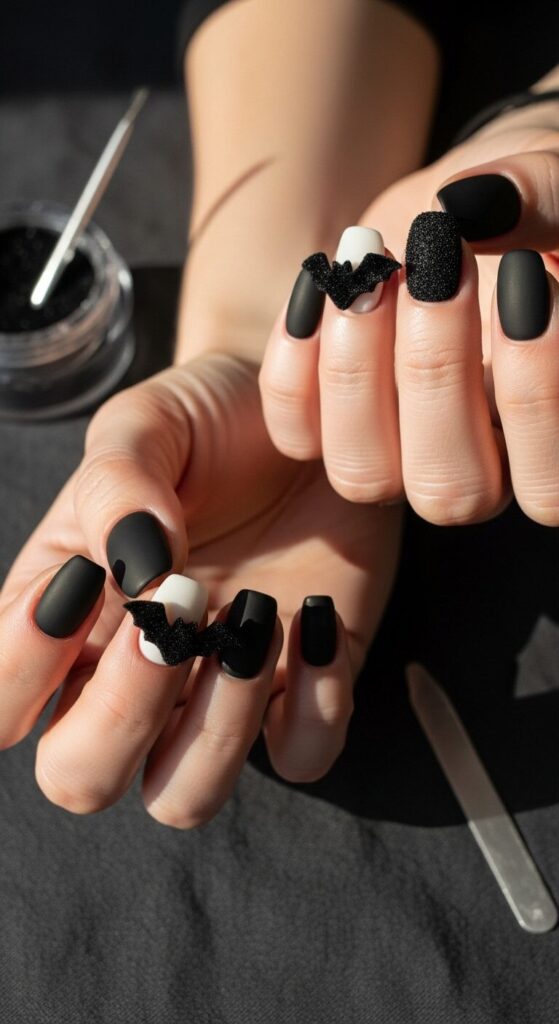
Textural play makes simple colors feel expensive. Start with a full matte black or charcoal base. On one accent nail per hand, paint a thin bat silhouette or a small crescent moon with adhesive, then press on ultra-fine black flocking powder to create a velvet relief. The tone-on-tone effect is subtle in the shade and dramatic when light rakes across it. Balance the set by keeping other nails clean—maybe a single glossy stripe down the middle of one nail for echo.
Micro-Stud Moon Phase Line
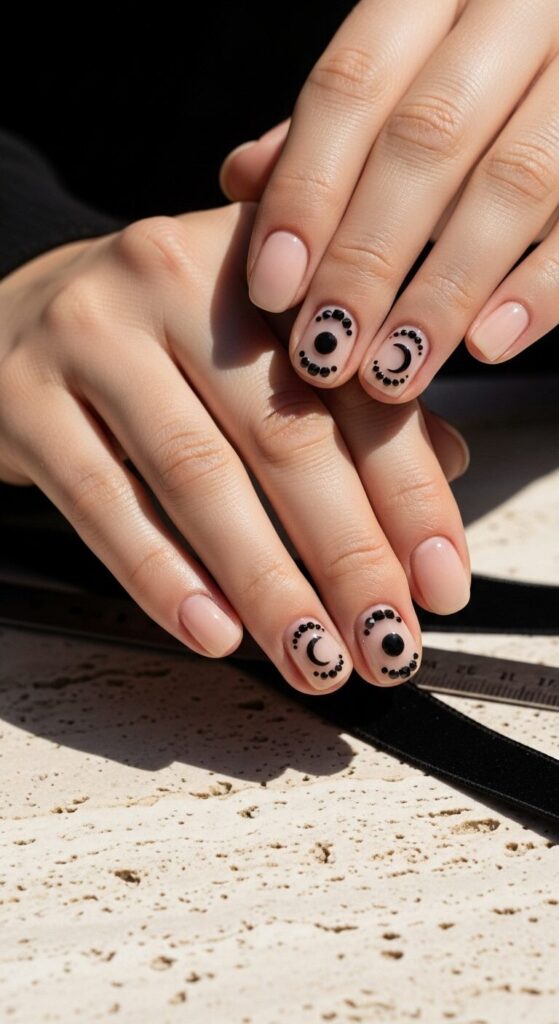
Go jewelry-level minimal. Paint a sheer beige base. Down the center of the middle finger and ring finger on each hand, place a short vertical line of tiny matte-black micro-studs: full moon, half, crescent, tiny dot—arranged as phases. Keep spacing even and the line straight using a striping guide. The rest of the nails stay sheer and glossy. It’s more “couture talisman” than costume.
Mismatched Minimalist Spooks
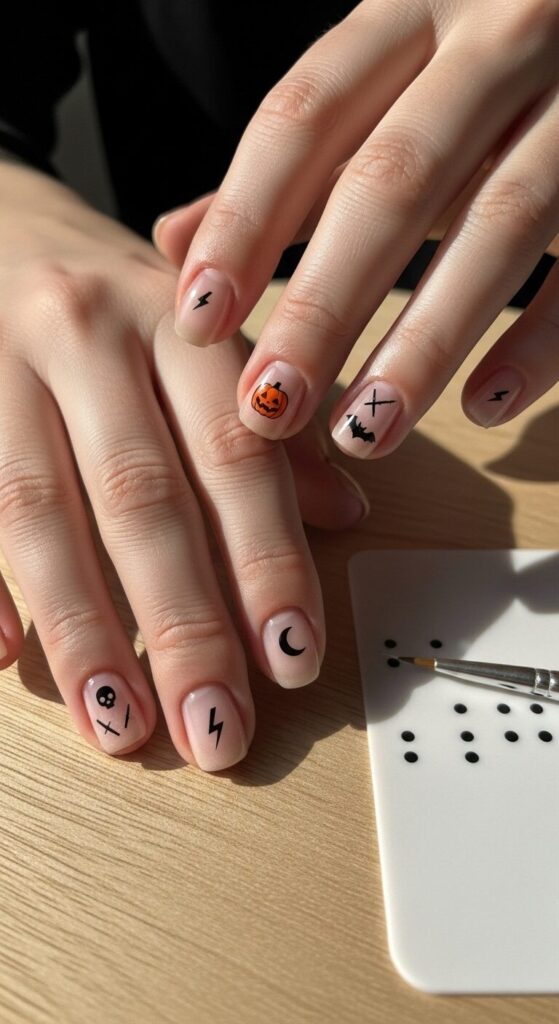
For maximal fun with minimal effort, assign one tiny icon to each nail: a single bone-white skull dot (with micro eyes) on one, a whisper-thin black lightning bolt on another, a petite pumpkin outline on another, and so on—each nail gets one simple mark on a sheer or soft-sand base. Keep the icons small and well spaced. The set reads clever and curated, not busy, and grows out gracefully.
Pro Tips for Wear, Prep, and Removal (useful reference, not a conclusion)
- Prep like a pro – Push back cuticles gently, dehydrate nails with isopropyl alcohol, and use a rubberized base if you have peeling.
- Thin coats win – Two thin color layers beat one thick coat every time for chip resistance.
- Seal the edge – Cap the free edge on every coat, especially with drip art or chrome.
- Match your topcoat to your finish – Matte for velvet looks, glossy for shine; mix both for texture play.
- Protect the art – Add a second topcoat layer over decals, flocking, or studs to lock down edges (avoid matte over flocking).
- Care matters – Wear gloves for dishes, apply cuticle oil nightly, and avoid using nails as tools.
- Removal – For gel or chrome, break the topcoat with a 180-grit file, then soak with acetone and foil; for regular polish, non-acetone remover preserves nails better.