
1. Unlocking the Hidden Potential of Short Square Spring Nails
2. The Timeless Shape That Transcends All Boundaries
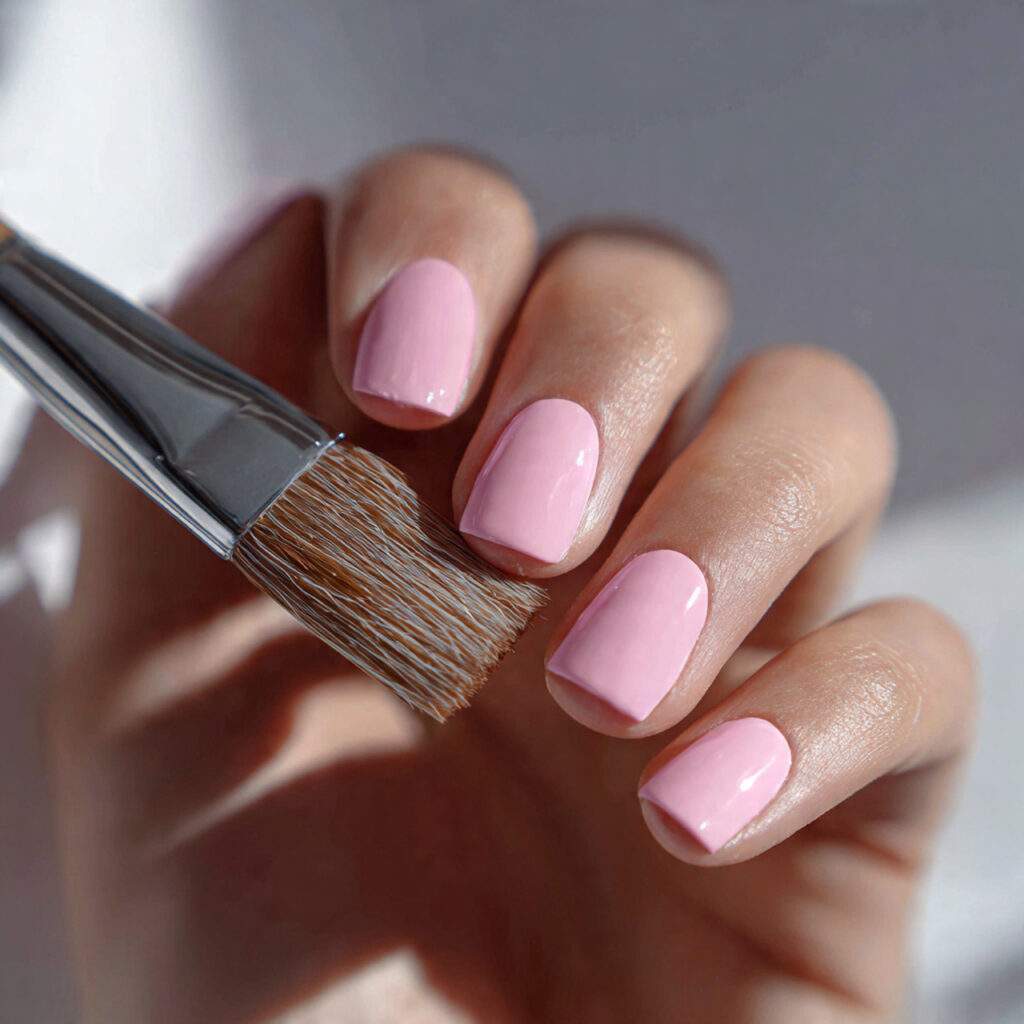
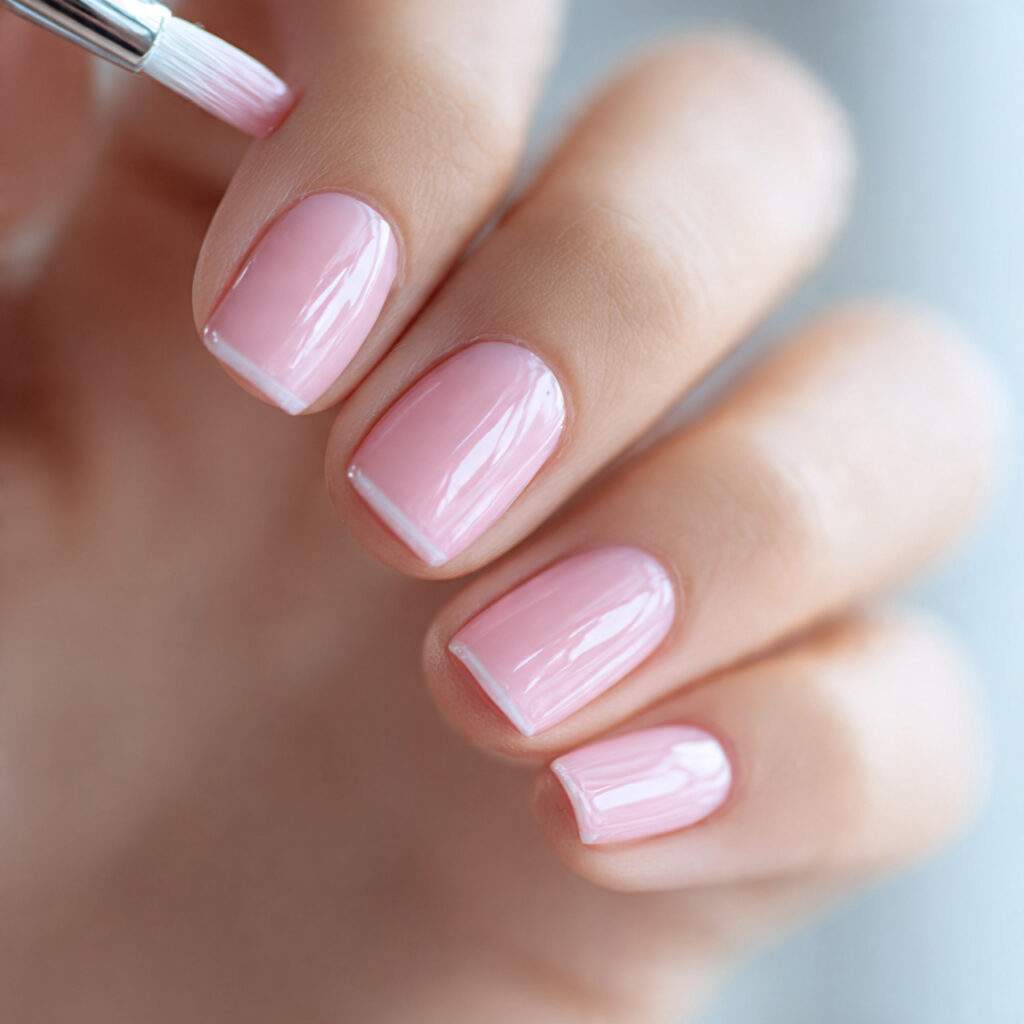
Short square nails boast a clean, structured quality that elevates every color and finish, making them a standout choice for nail enthusiasts. The flat tip creates a precise edge that shines in photographs and adds a touch of sophistication to everyday life. Whether you have wide or narrow nail beds, long or short fingers, this shape flatters your unique features when filed to perfection.
3. Why Spring Is the Ultimate Season for Short Square Nail Enthusiasts
The soft, pastel hues and warm tones of spring colors are perfectly complemented by the structured shape of short square nails. Unlike rounded shapes, which can make light colors appear undefined, the square tip anchors softness and creates a visually stunning effect. This season, discover why short square nails are a match made in heaven for spring’s freshest colors.
4. Exploring the World of Fresh Pastel Colors on Short Square Nails
In this section, we’ll delve into the most stunning color-led looks that define spring nails at their most classic and beautiful.
5. 1. A Lavender Dream Come True
Soft lavender is a color that exudes springtime charm, and when paired with a high-gloss finish on short square nails, it becomes a true showstopper. This gentle, feminine hue works seamlessly from Monday morning to Saturday night, creating a sense of quiet confidence that’s hard to resist.
How to Make It Work
Opt for a lavender shade that’s subtly grey or muted-toned to achieve a sophisticated look. Avoid bright purple-pink hues, which can appear too bold. This look is surprisingly quick, requiring just ten minutes to complete, and will leave you with a stylish finish.
Common Pitfalls
Selecting a lavender that’s overly saturated or too blue can hinder the overall aesthetic. Instead, aim for a soft, slightly dusty purple that reads clearly as lavender without veering into bold territory. For inspiration, check out our curated list of modern spring square nail ideas that are both cute and wearable.
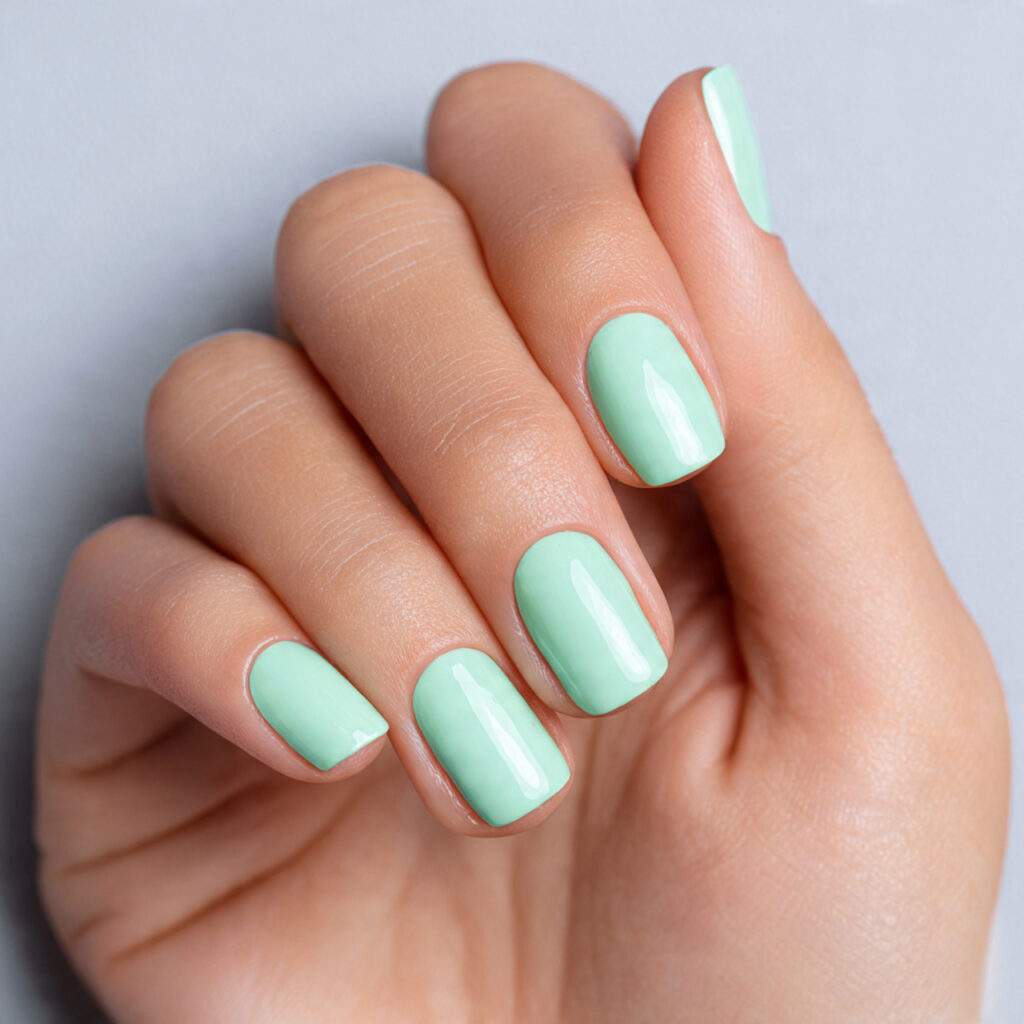
Mint Green Gloss
The Science Behind the Style
Mint on short square nails exudes a crisp, clean quality reminiscent of a freshly pressed white shirt. This look is both current and intentional, with just enough color presence to make a statement. The flat tip of the square shape adds a sharp, defined element to the overall design.
Pulling Off the Look
Apply two coats of a soft, grey-toned mint to achieve a modern finish. The grey undertone is what separates modern mint from its brighter, more elementary-school counterpart. Complete the look with a generous layer of high-gloss top coat. On short nails, this look is effortlessly chic.
Insider Tips
Mint looks particularly stunning in gel formula, which adds depth and glossiness that regular polish sometimes struggles to match. If you have a gel lamp at home, this is worth trying in gel for a truly show-stopping finish.
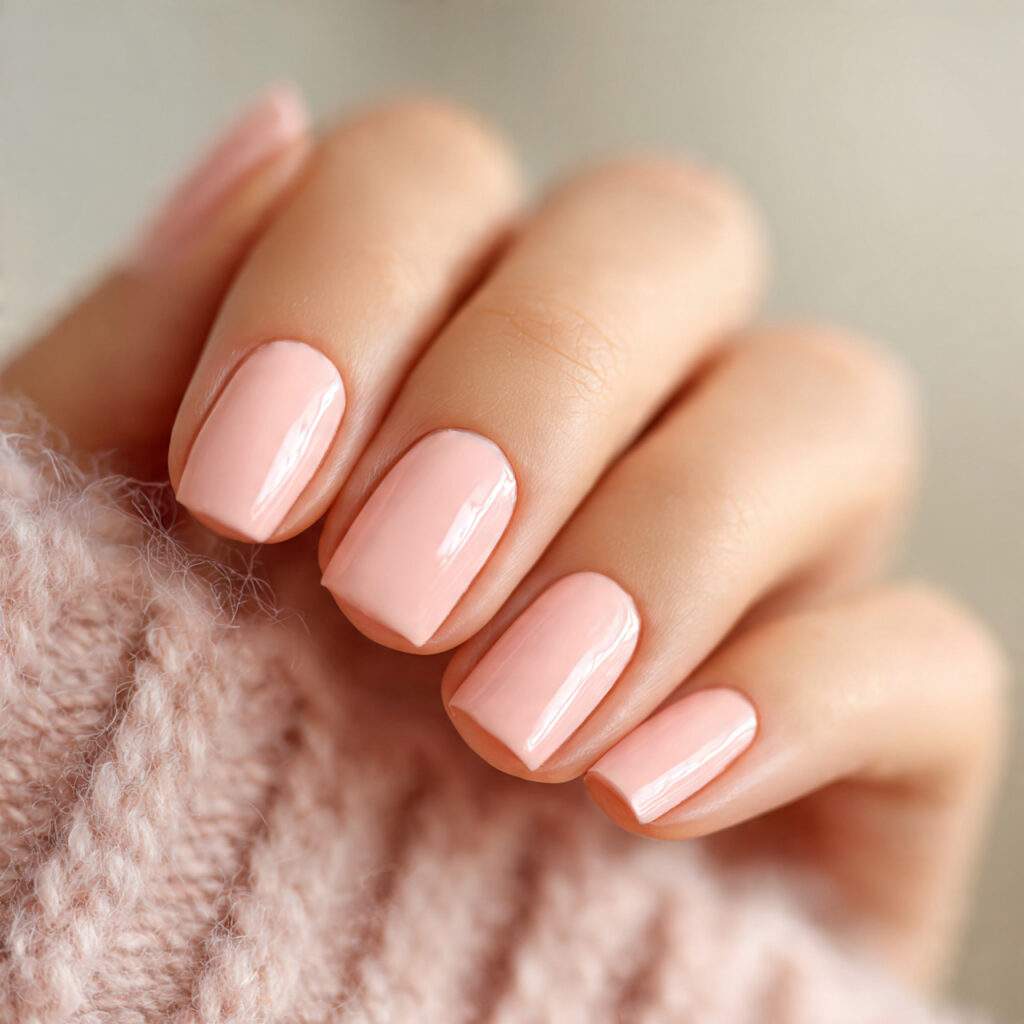
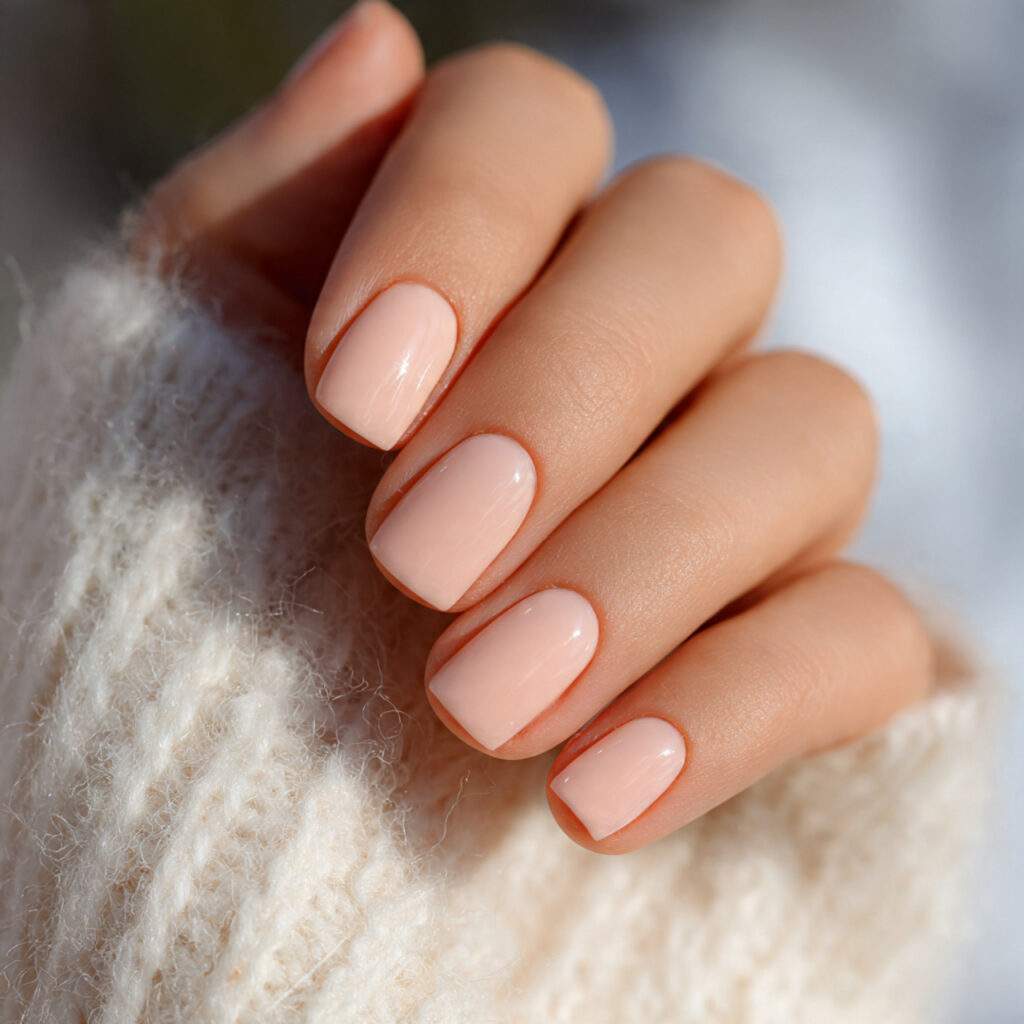
Peach Sorbet Nails
What Makes It Tick
Warm, soft, and quietly joyful, peach on short square nails has an approachability that makes it one of the most universally loved spring shades. This color is not pink, not orange, and not nude – but somehow, it embodies the best qualities of all three. It adds warmth to the hands and looks fresh in every light.
Nailing the Look
Look for a peach that’s soft and slightly creamy rather than bright or coral-adjacent. Both semi-sheer and full coverage formulas work beautifully. On short square nails, peach with a gloss finish looks like something you’d see on a nail account and immediately want to save.
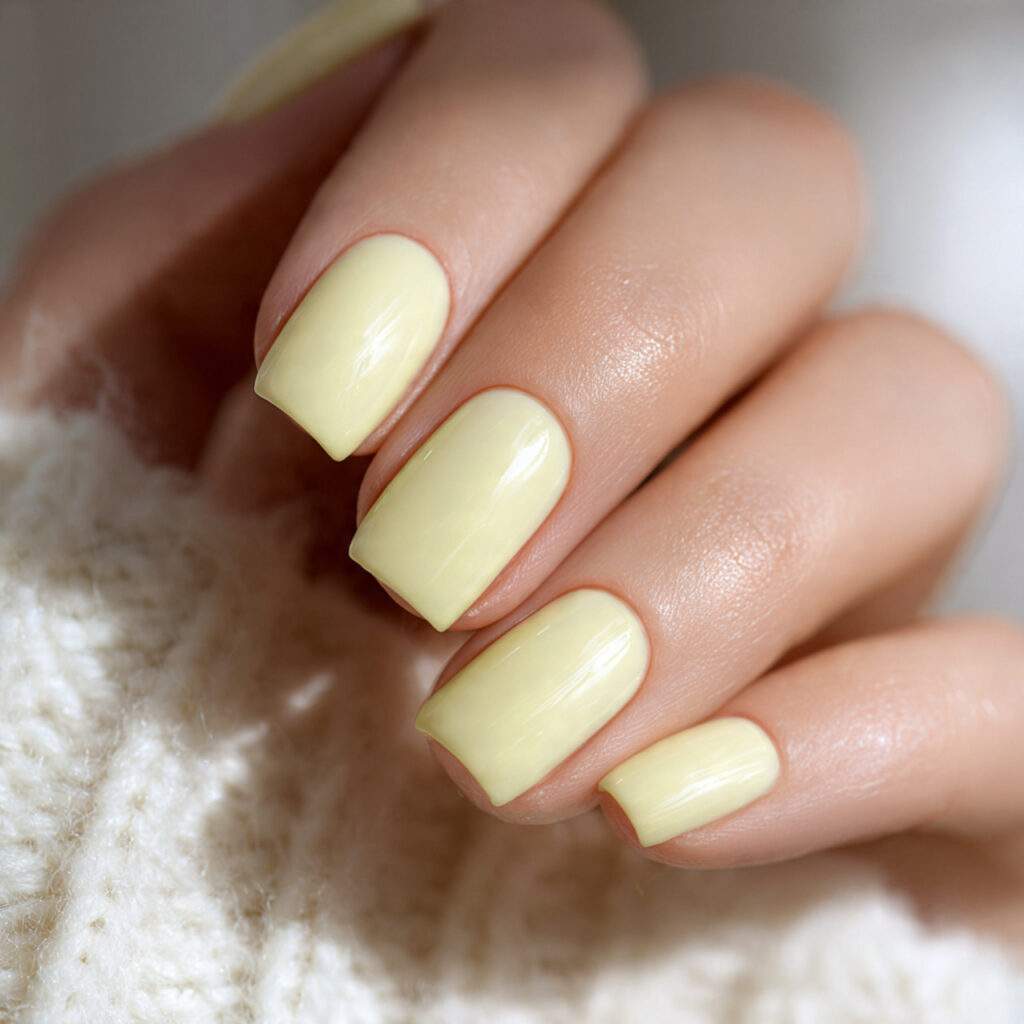
Butter Yellow Nails
The Magic Combination
Pale butter yellow on short square nails is one of those combinations that works better than it sounds. The warmth of yellow paired with the precision of the square shape creates a look that’s simultaneously sunny and sophisticated. It’s a shade that makes people do a double take and then offer a compliment.
Easy as Pie
Butter yellow should be pale enough to feel soft rather than bold, think faint yellow rather than primary yellow. In a slightly sheer formula, it has a luminous quality that looks lovely in spring light. Seal with gloss and you’re done.
Common Mistakes
Over-saturating or over-brightening the yellow can be a major faux pas. If the yellow looks like a highlighter pen on your nail, it’s too saturated. Aim for a warm whisper of yellow, not a statement.
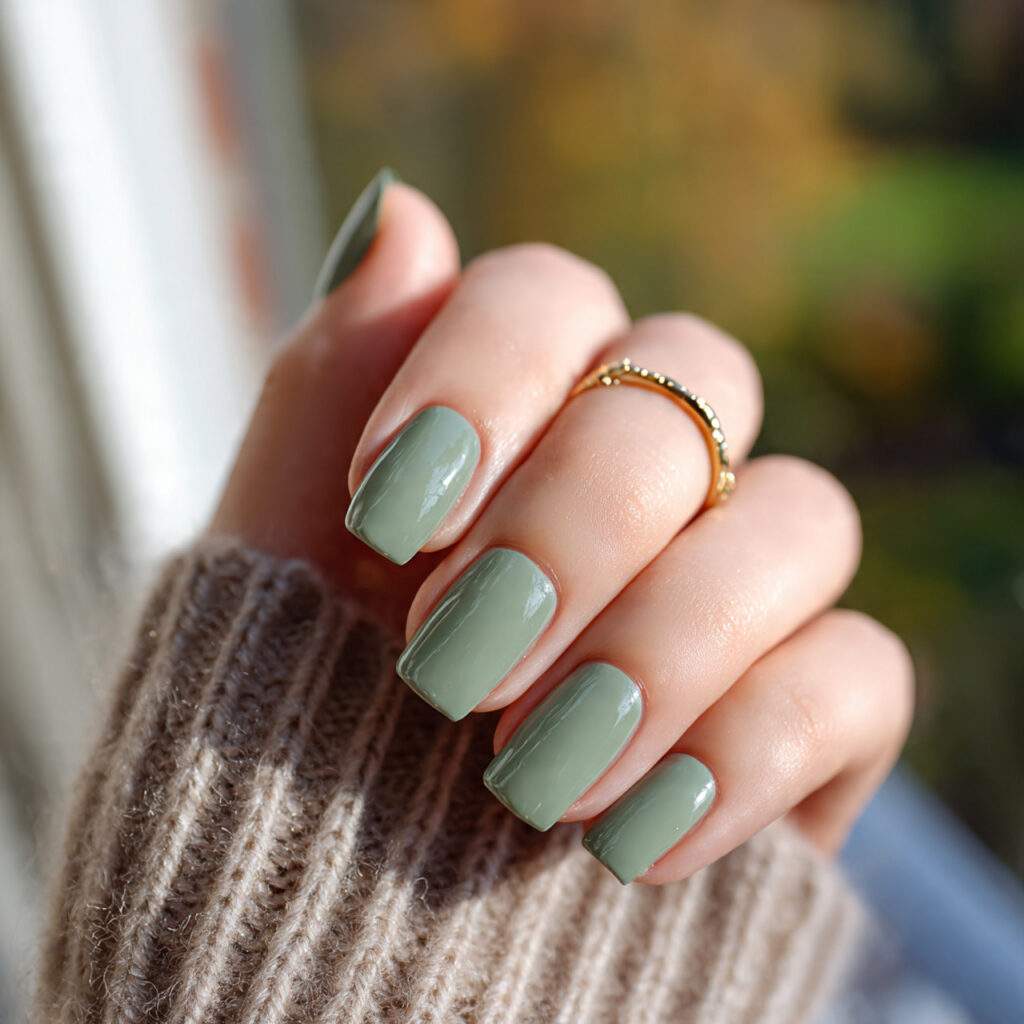
Soft Sage Green
Sage Green: The Ultimate Pastel for Spring
Sage green is a versatile and sophisticated color that effortlessly bridges the gap between green and grey, evoking a natural, earthy, and calming ambiance. This understated yet stylish hue is perfect for those seeking a refined and put-together look. Its widespread adoption by fashion-forward individuals is a testament to its timeless appeal.
Choosing the Right Sage
When selecting a sage shade, opt for one that leans slightly towards grey, rather than bright or yellow-toned. This subtle distinction can make all the difference in creating a polished, high-fashion look. A satin or high-gloss finish can elevate the color, while a matte finish lends an editorial, modern vibe. Ultimately, the choice of finish depends on the desired mood and aesthetic.
Pairing Sage with Gold
Sage green pairs exquisitely with gold jewelry, creating a harmonious contrast between the cool, earthy tone of the sage and the warmth of the gold. This combination not only elevates the gold but also adds a touch of sophistication to the overall look. If you regularly wear rings or bracelets, this color will undoubtedly make them shine.
Spring Nail Art Inspiration
While spring pastels provide a beautiful foundation, it’s the thoughtful details that take short square nails from ordinary to extraordinary. The flat tip and clean lines of short square nails create a blank canvas perfect for nail art experimentation.
The Art of Nail Art
The possibilities for nail art on short square nails are endless, and the ideas that follow are designed to be achievable at home with basic tools. Whether you’re a seasoned nail artist or a beginner, these ideas will inspire you to create show-stopping looks.
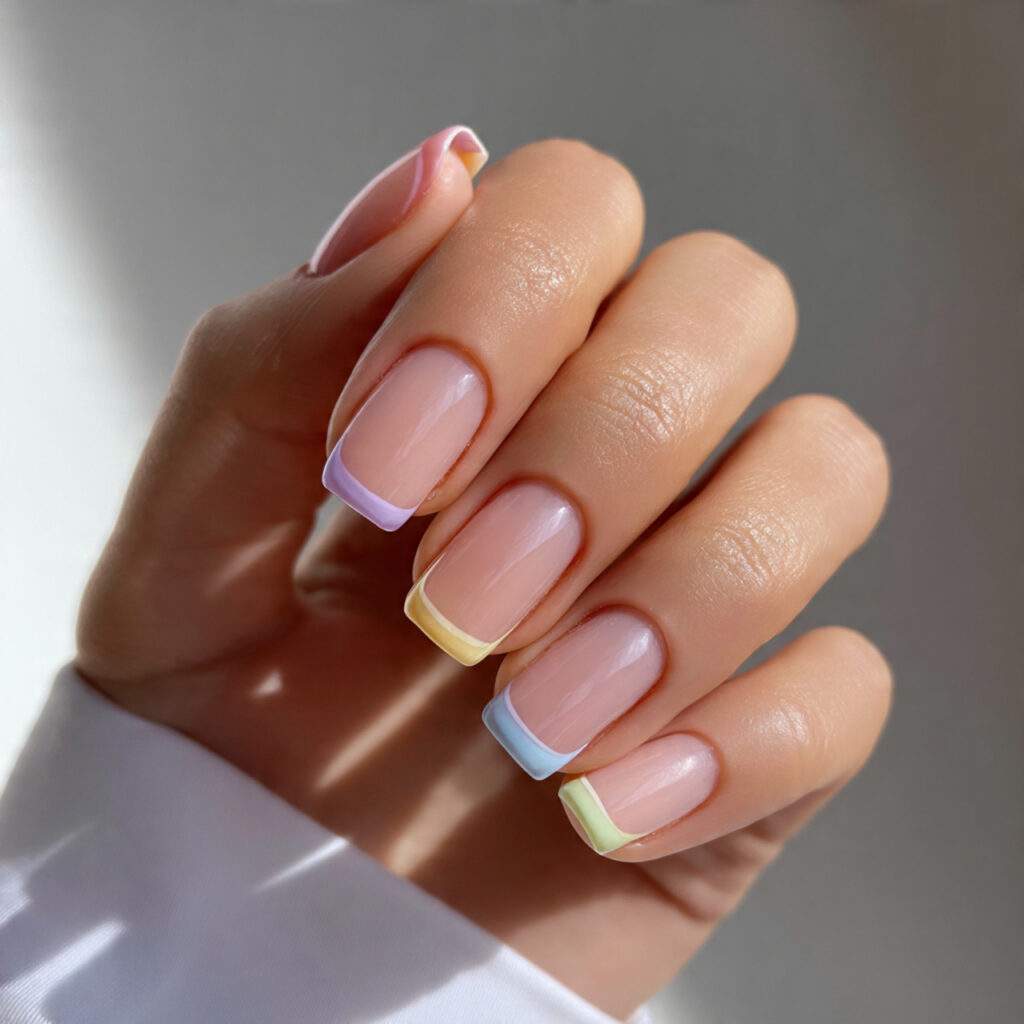
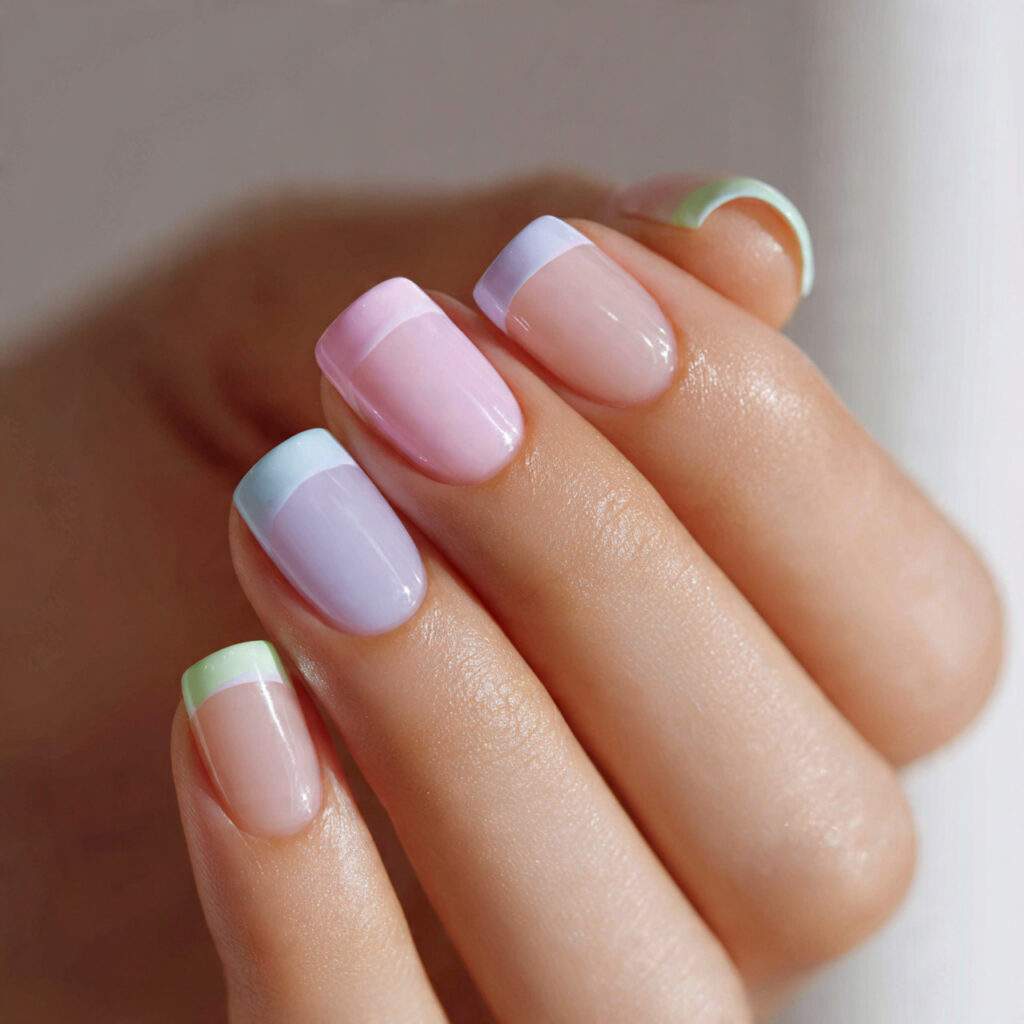
6. Modern Pastel French Tips
The classic French manicure has been reimagined, and the modern version is tailor-made for short square nails. Instead of a thick, curved white tip, the modern French features a delicate, precise line of a pastel shade – lavender, mint, peach, or soft yellow – across the flat tip of a square nail. The result is a clean, fresh, and unmistakably modern look.
7. Applying the Modern French
To achieve this look, apply nail tape horizontally across the tip, just behind the free edge. Then, apply your chosen pastel tip color in one smooth coat over the tape. Remove the tape immediately while the paint is still slightly wet, and let it dry before sealing with a high-gloss top coat. The flat tip of the square shape ensures that the tip line appears perfectly straight with minimal effort.
8. Avoiding Common Mistakes
When creating a modern French manicure, it’s essential to avoid a common pitfall: making the tip line too thick. For this look, the tip should be a thin strip, no more than two to three millimeters. A thick tip can give the impression of an outdated design rather than a trendy, updated look.
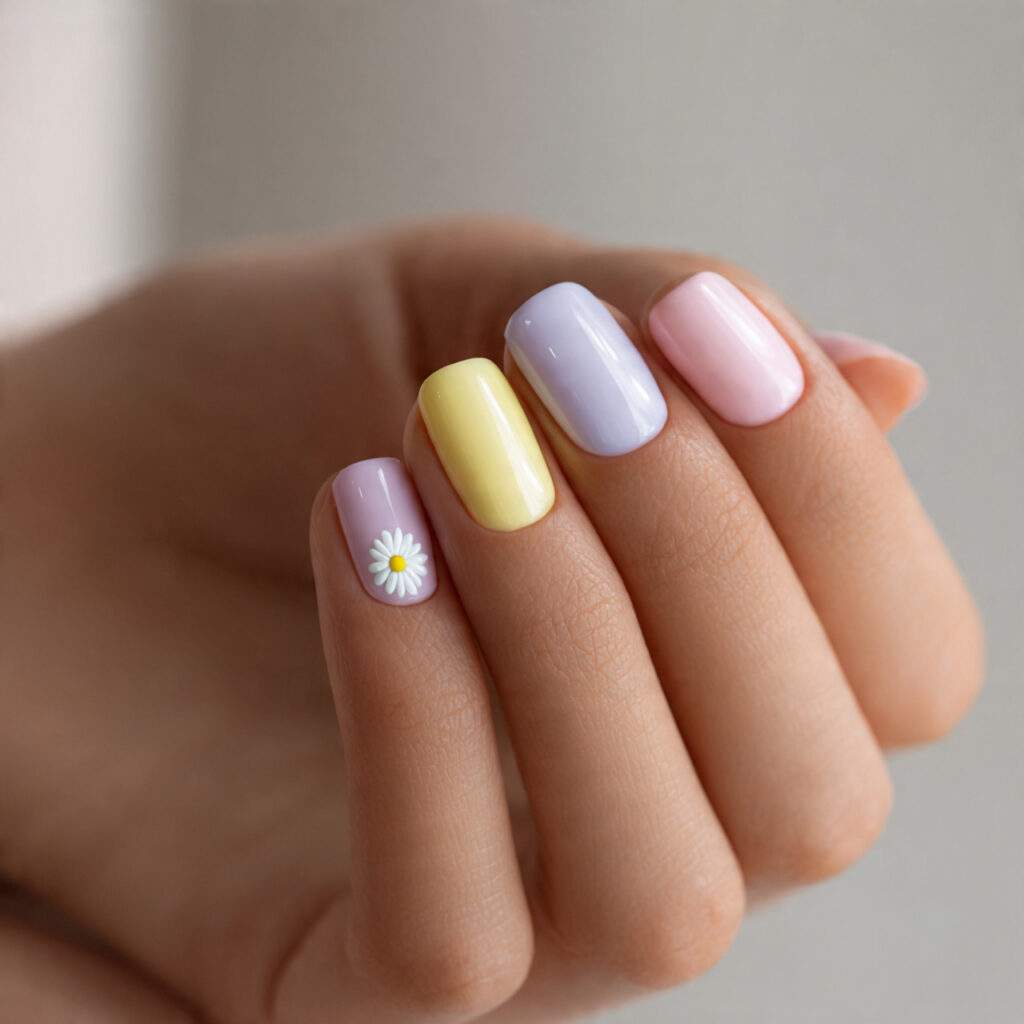
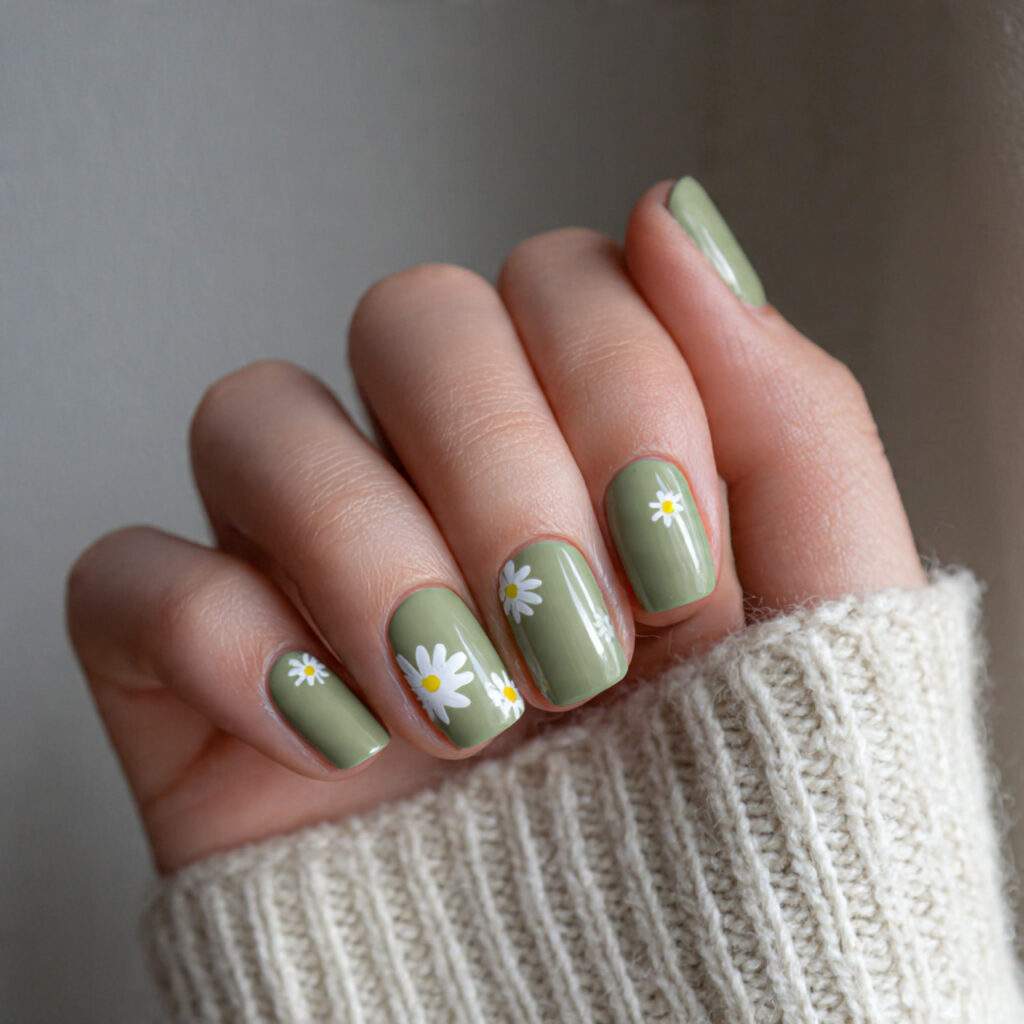
9. Tiny Daisy Accent
A small daisy painted on one nail, with white petals and a yellow center, is a charming spring nail art idea that works exceptionally well on short square nails. The delicate flower sits perfectly in the available space without looking crowded.
10. Painting a Small Daisy
Begin by completing your base color on all ten nails and letting it dry fully. Using a fine nail art brush, paint four to five small white petals radiating from a central point on the ring finger nail. Add a tiny yellow or butter dot in the center, and seal with top coat. The rest of the nails should remain clean and solid.
11. Insider Tip: Daisy Proportions
The key to making a small daisy look its best on short nails is to keep it small. Aim for a flower that takes up about a quarter of the nail surface. A daisy that’s too large can look crowded and overwhelming on short nails.
12. Negative Space Half-Moon
For a striking contrast, try a negative space half-moon design on short square nails. This look creates a beautiful balance between solid and empty space, resulting in a visually appealing and modern aesthetic.
Whimsical Hues
Why It Works
Pairing two distinct pastel colors side by side creates a charming, playful contrast that adds visual interest to short square nails. The compact shape makes even the most unexpected combination look cohesive and stylish.
How to Wear It
Apply nail tape in a straight line across the nail tip, dividing it into two sections. Paint one pastel color on each side, creating a harmonious contrast between the two hues. Remove tape while wet. The slight overlap of the two colors adds a touch of whimsy to the overall look.
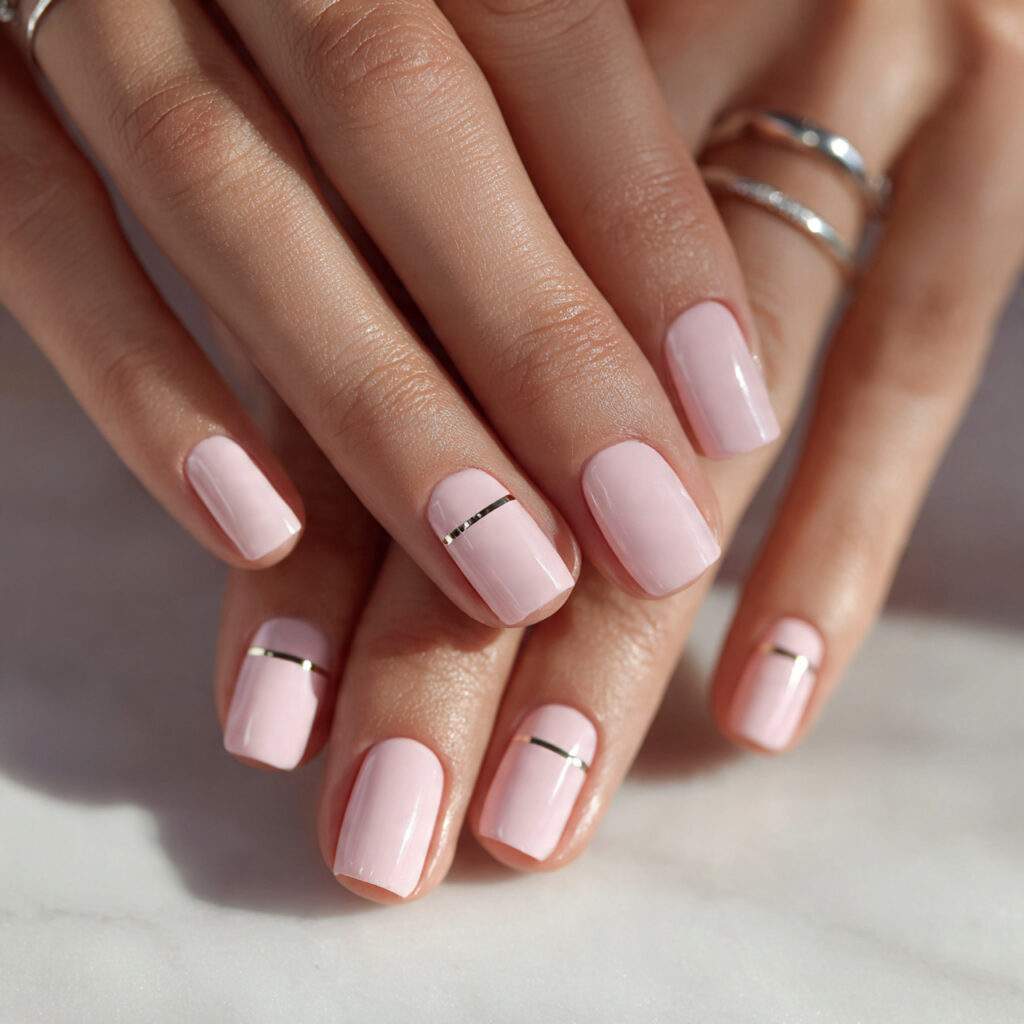
Thin Gold Line Accent
Why It Works
A delicate, horizontal line of metallic gold across the nail creates an understated yet sophisticated effect that elevates a pastel short square nail from demure to dramatic. The gold line adds a hint of glamour, making the look feel special without overpowering the soft color.
How to Wear It
Use nail tape applied horizontally across the nail to achieve a crisp, straight line. Paint over the exposed strip with a gold nail polish or fine nail art paint. Remove tape while wet. The width of the gold line should be around one millimeter, making it look sleek and refined. Seal with gloss for a high-shine finish.
Insider Tip
A gold line on all ten nails creates a cohesive, editorial look that’s perfect for a special occasion. In contrast, adding a single gold line to just two accent nails creates a more casual, playful vibe. Both approaches work beautifully, depending on your personal style.
Pastel Color-Block Tips
Why It Works
Breaking up the traditional French tip with a color-block design adds a modern twist to the classic look. By dividing the nail tip into two sections, each painted in a different pastel, you create a graphic, eye-catching effect that’s uniquely yours.
How to Wear It
Use nail tape placed diagonally across the tip to achieve a clean divide between the two pastel shades. Paint one color on each side, creating a beautiful contrast between the two hues. Remove tape while wet, and let the slight imperfections add to the handmade charm of the look.
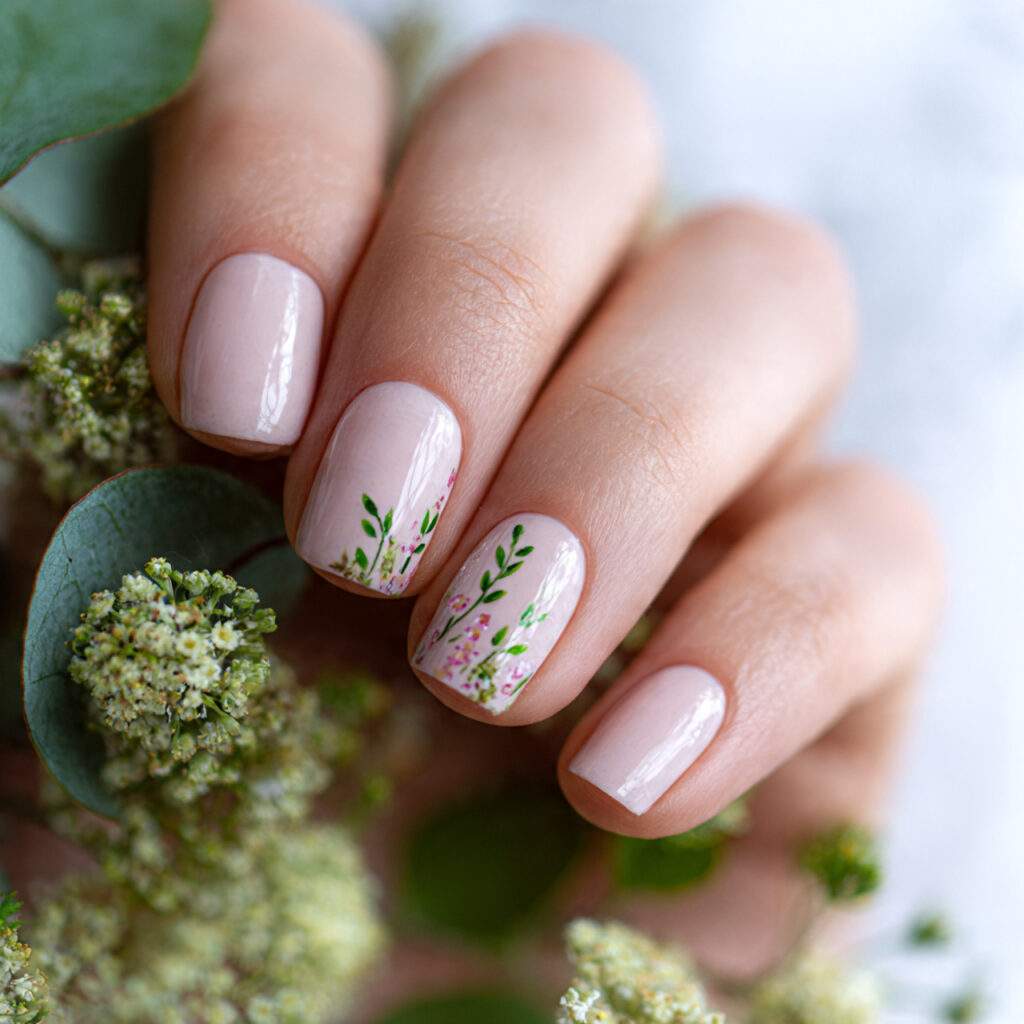
Spring Floral with Leaf Detail
Why It Works
A delicate floral design, complete with a small flower and one or two painted leaves, looks considered and thoughtful on short square nails. The leaf adds a natural, organic element that’s perfectly in tune with spring aesthetics, making the design feel complete and polished.
How to Wear It
Begin by painting your base color. On the accent nail, use a dotting tool to create a small flower and a fine brush to add two or three soft green leaves. Keep the design small and compact, so it reads as a tiny botanical illustration rather than a sprawling scene. The result is a charming, whimsical look that’s sure to turn heads.
Accent Nail Perfection
Why It Works
A strategically placed accent nail can make or break an overall look. By adding a pop of color or texture to just one nail, you create visual interest and draw the eye to the feature. In the case of pastel short square nails, a carefully placed accent nail can add a touch of whimsy and personality to the overall design.
How to Wear It
Identify the nail that will serve as your accent nail, and get creative with the design. Add a bold pastel color, a delicate gold line, or a whimsical floral pattern – the possibilities are endless. Remember, the key to making the accent nail work is to keep it simple and balanced, so the rest of the nails don’t feel overwhelmed.
Spring into Style with These Timeless Nail Sets
Whispers of Spring: The Garden Set
The Look
Soft sage green adorns seven nails, balanced by three accent nails featuring small white daisies on each. A high-gloss finish adds a touch of sophistication.
Why It Works
The serene sage base sets the tone for a modern look, while the daisies inject a charming, handcrafted feel that makes the set feel uniquely personal and seasonal. This cohesive design is a true reflection of spring’s beauty.
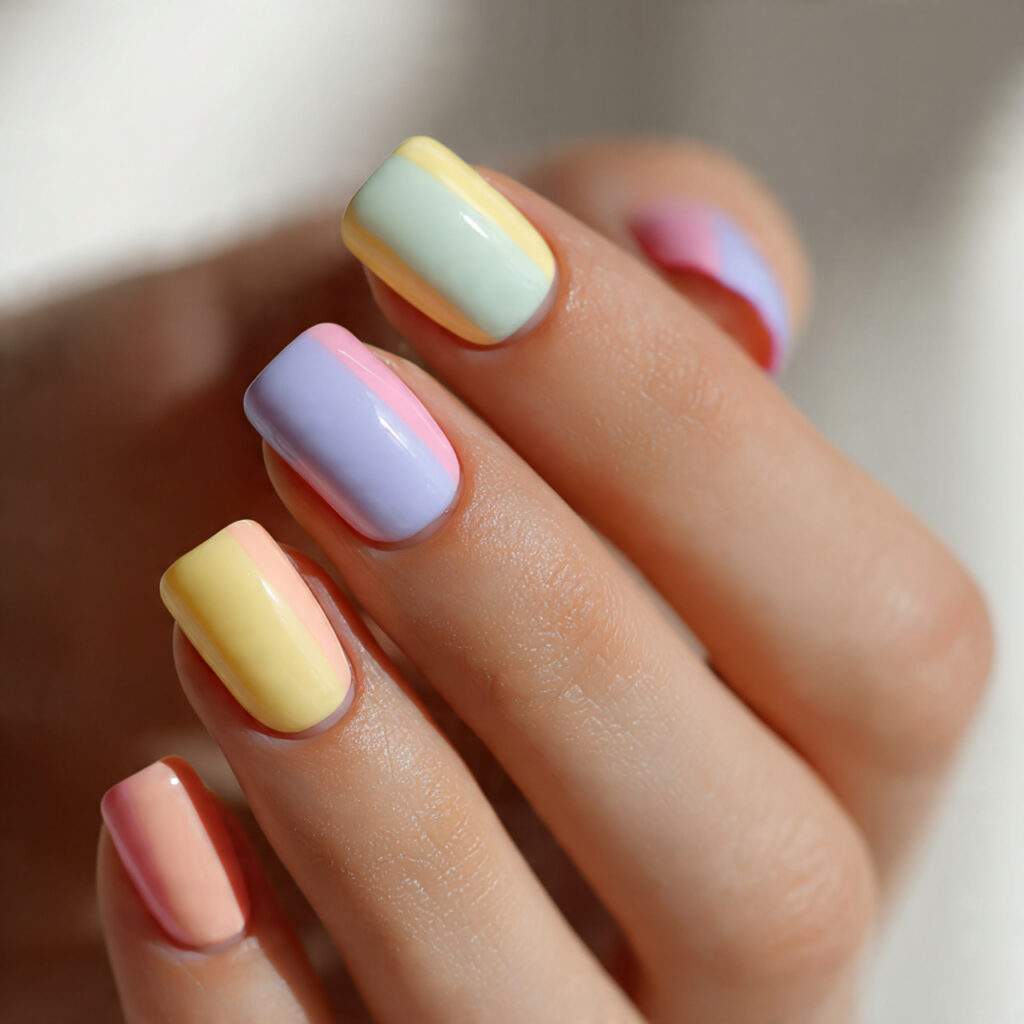
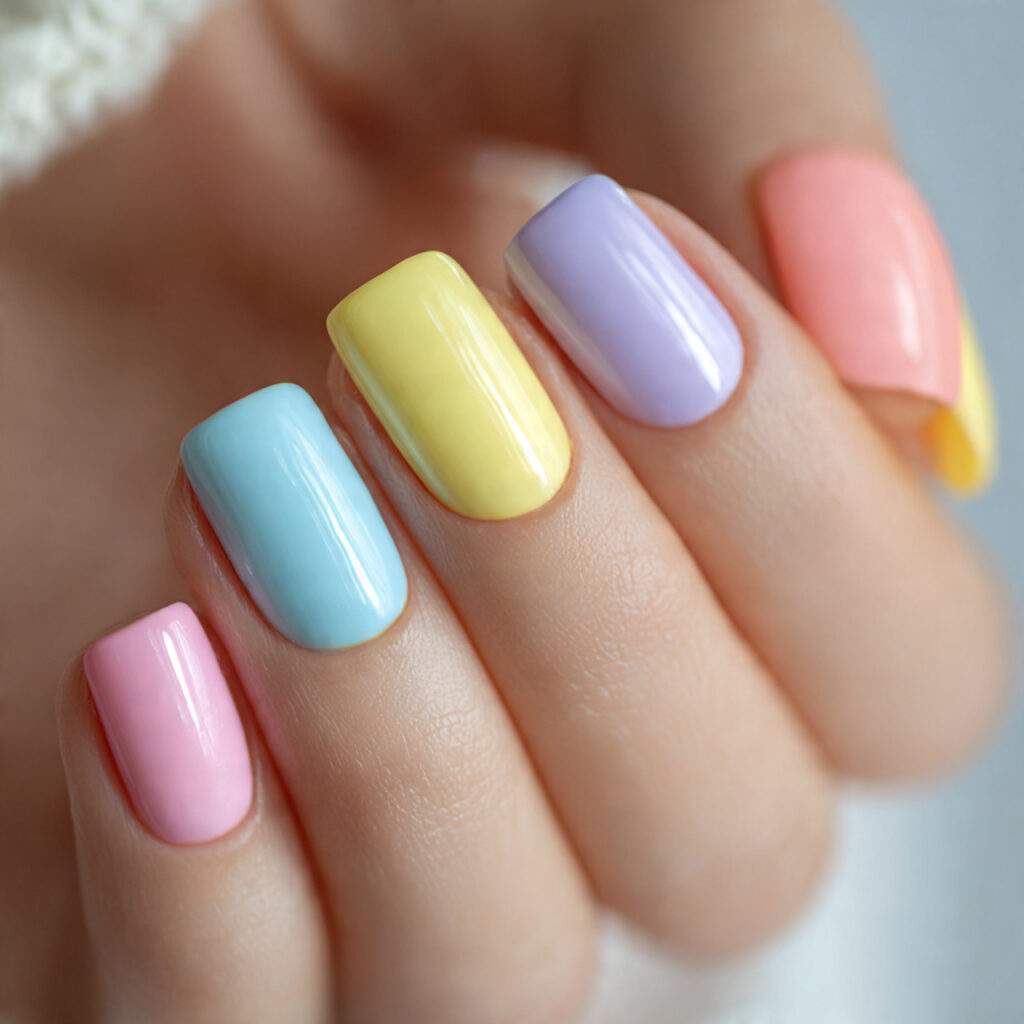
13. Rainbow on the Square
The Look
A rainbow of soft pastels – lavender, mint, blush, butter yellow, and soft blue – are perfectly arranged across all ten nails. The simplicity of this design belies its striking impact.
Why It Works
The graphic arrangement of equal, muted shades on a uniform square shape creates a visually striking effect. When done intentionally, this look exudes joy and becomes a true celebration of spring.
A Pitfall to Avoid
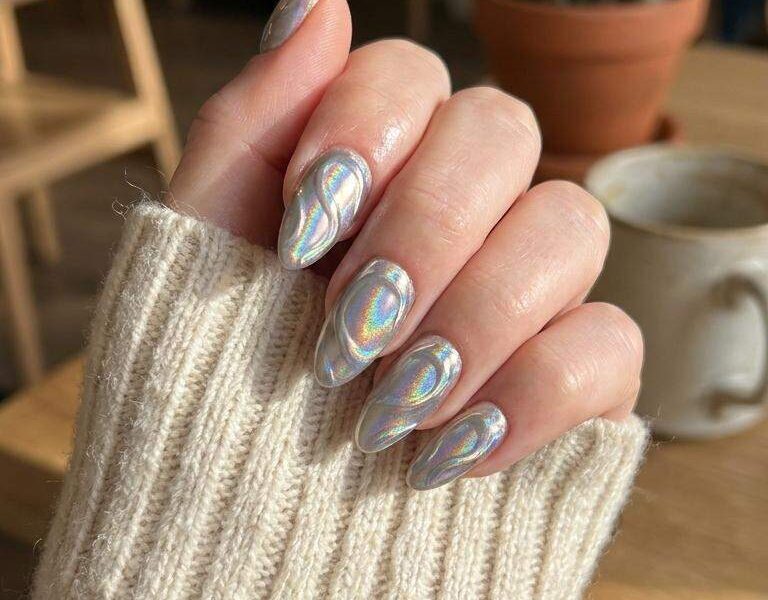
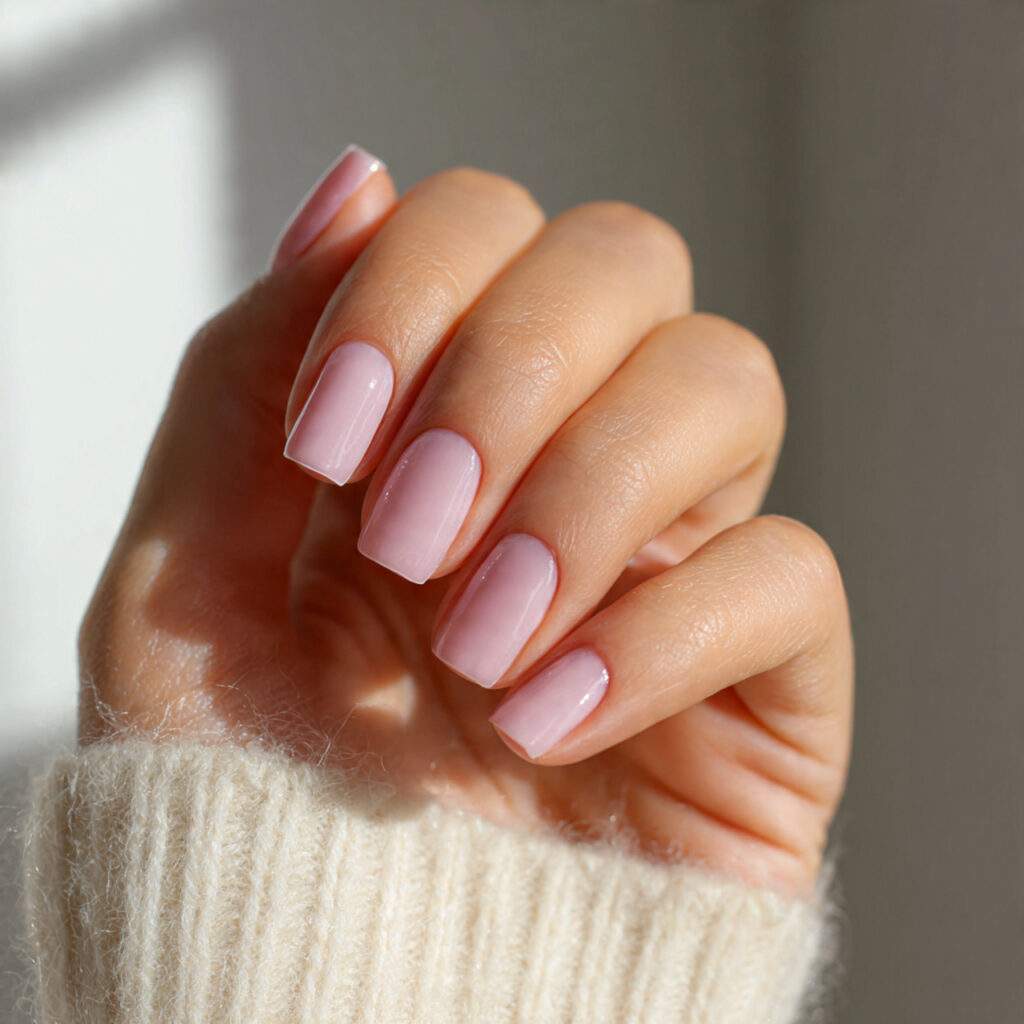
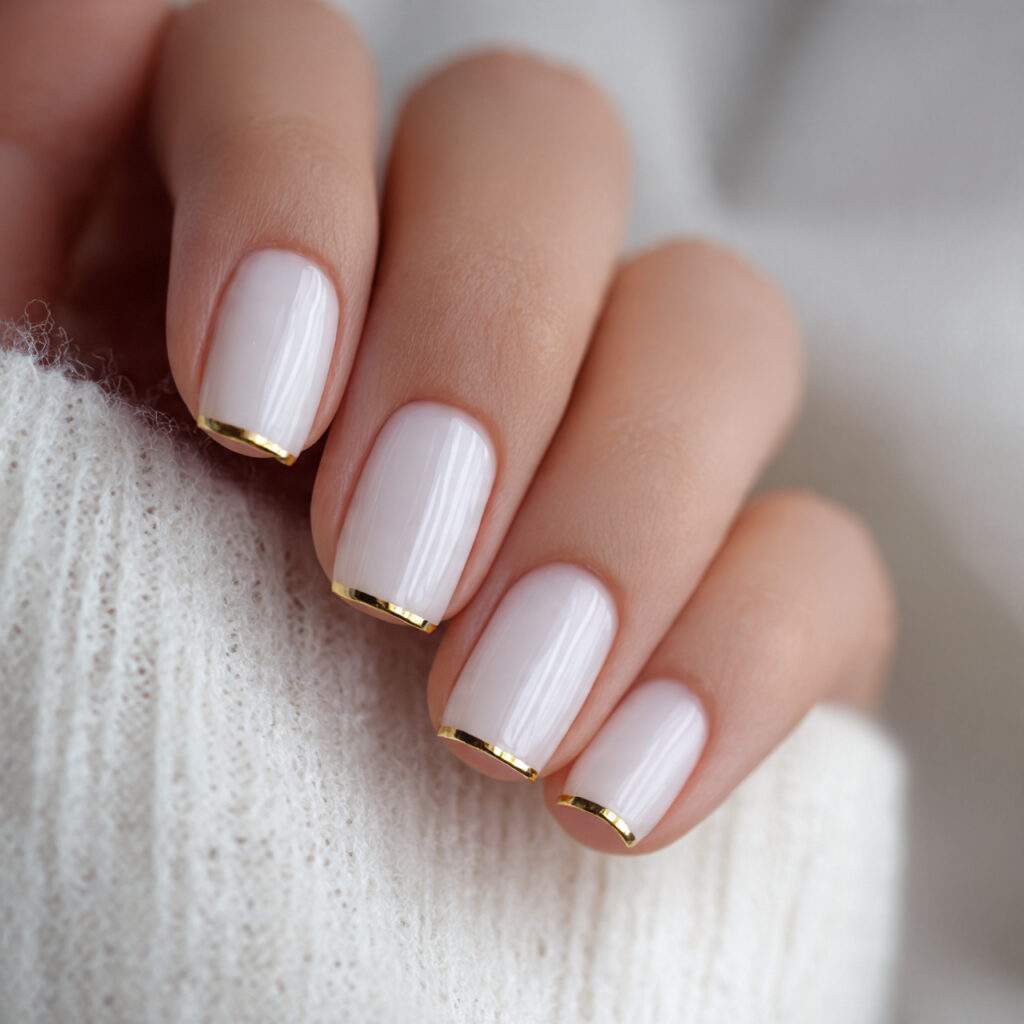
14. Elegance in Simplicity: The Milky White and Gold Set
The Look
Milky white gloss coats all ten nails, while a delicate gold line adorns the base of each, adding a touch of understated luxury.
Why It Works
The combination of milky white and gold is a masterclass in subtlety, conveying a sense of quiet sophistication. On short square nails, the gold line shines like a tiny piece of jewelry, elevating the overall look.
15. French Twist: The Alternating Pastel Set
The Look
Alternating nails feature lavender and mint French tips, creating a visually appealing rhythm that adds depth to the design. A sheer milky base provides a clean canvas for the contrasting tips.
Why It Works
The thoughtful placement of two pastel colors creates a sense of intentionality, making this look more considered than a single uniform color. The result is a design that feels both stylish and effortless.
16. Timeless Elegance: The Peach and White Minimal Set
The Look
Seven nails sport soft peach gloss, while three nails – ring fingers and one index – showcase clean milky white gloss. The contrast between these complementary shades creates a sophisticated look.
Why It Works
The use of two complementary colors in a two-tone set elevates the design, signaling a level of intentionality that single-color sets often lack. This combination of peach and white feels warm, inviting, and effortlessly stylish.
17. Mastering the Short Square Shape: Essential Techniques
Achieving Perfection: Filing the Short Square Shape
The key to executing these stunning nail sets lies in mastering the techniques that make short square nails look polished and professional. Stay tuned for the next installment, where we’ll delve into the essential techniques for achieving this versatile shape.
Establishing a Foundation
The foundation of every short square nail manicure depends on the precision of the filing process. One key characteristic of a well-filed nail is its flat tip, which is achieved by maintaining a consistent filing direction. This means avoiding back-and-forth sawing motions, as they can weaken the nail. Instead, file the tip in one direction while holding the file completely horizontal to create a flat, level edge.
Filing Techniques
To achieve a smooth, even surface, it’s essential to work on the sides of the nail next. Filing straight down, rather than at an inward angle, helps to prevent unevenness. Finally, gently knock off the sharpest point of each corner with one or two light passes of the file. The goal is to create a subtle, almost imperceptible softening of the corners, rather than a deliberate rounding.
Common Pitfalls
One common mistake to avoid is over-softening the corners, which can create a rounded shape. This often happens out of habit or caution, but it’s essential to strike a balance between preventing snagging and maintaining a sharp edge. If the corners appear curved after filing, it’s likely that you’ve gone too far.
The Importance of a Base Coat
The Foundation of a Flawless Finish
Short nails are more prone to revealing imperfections in the natural nail, making it essential to create a smooth, even surface. A ridge-filling base coat serves as a crucial step in achieving this goal, especially when paired with light spring colors. By filling in ridges and discoloration, this base coat creates a flawless canvas for the final color.
The Benefits of a Ridge-Filling Base Coat
Why a Smooth Surface Matters
A ridge-filling base coat is a worthwhile investment in the overall quality of your manicure. By creating a smooth, even surface, it allows the final color to shine and makes every imperfection virtually invisible. This step may seem time-consuming, but the payoff is well worth the extra minute it takes to apply and dry the base coat.
The Science Behind Thin Coats
Why Thin Coats Outperform Thick Ones
Spring colors, particularly pastels, are notorious for streaking when applied in thick coats. This is because the pigment can’t penetrate the nail evenly, resulting in an uneven finish. In contrast, applying two thin coats with patience and precision allows the color to build up evenly and dry without streaks or bubbles.
The Two Thin Coats Method
A Step-by-Step Guide
To achieve a flawless finish, apply the first coat as thinly as possible, using three gentle brush strokes to cover the nail. Allow it to dry to a semi-matte finish, typically two to three minutes, before applying the second coat. Use the same technique to apply the second coat, and the color will build up evenly, resulting in a stunning finish.
Insider Secrets for Sheer Colors
When to Apply a Third Coat
For very sheer or milky pastels, three thin coats may be necessary to achieve the desired level of coverage. This additional coat can help to even out the color and prevent streaks, making it a worthwhile investment for a professional-looking finish.
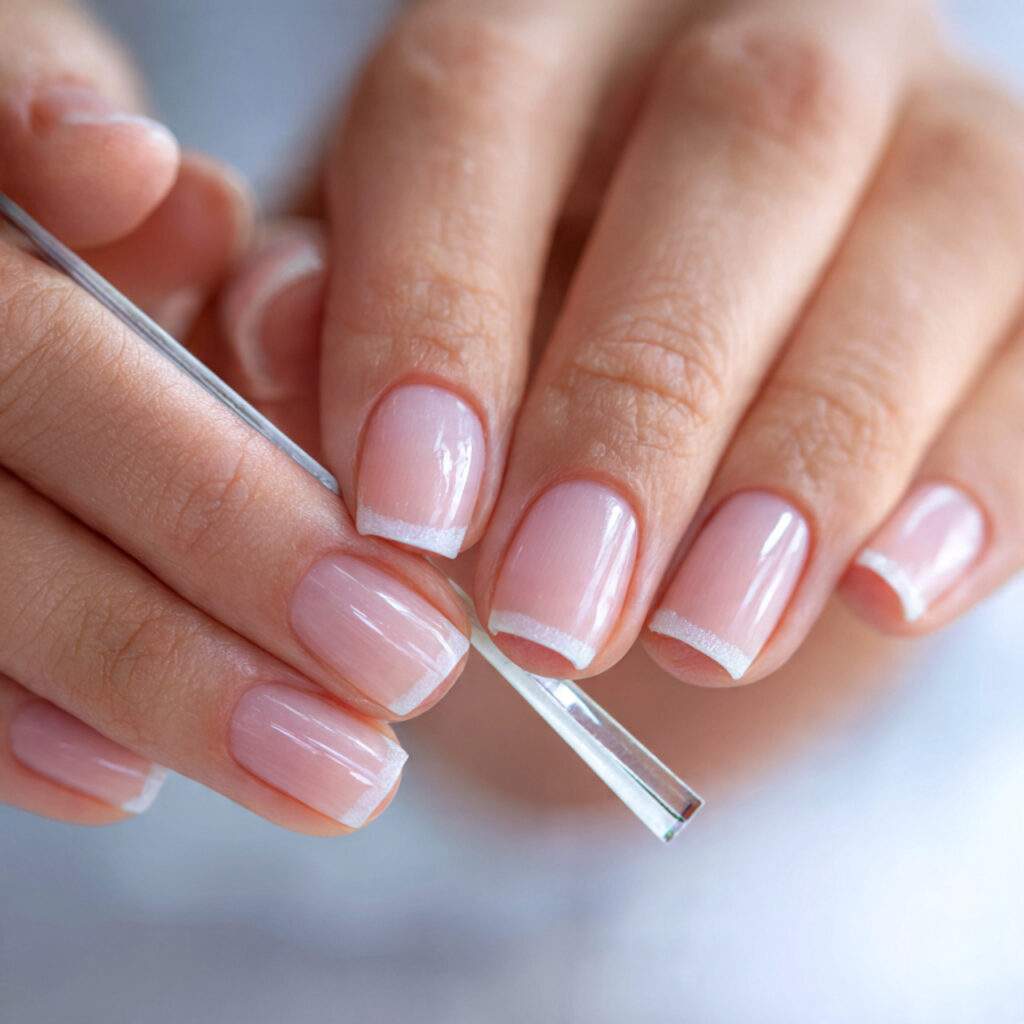
The Importance of Clean Edges
Why Clean Edges Matter
Clean edges are essential for creating a polished, professional-looking manicure. Any stray polish on the skin around the nail can break the clean aesthetic, instantly making the manicure look amateurish. The acetone cleanup method is a crucial step in achieving clean edges and elevating the overall quality of your manicure.
The Acetone Cleanup Method
A Step-by-Step Guide
The acetone cleanup method is a simple yet effective technique for removing stray polish from the skin around the nail. By gently wiping the area with a cotton swab soaked in acetone, you can create a clean, polished finish that makes every imperfection virtually invisible.
Why the Acetone Cleanup Method Matters
The Single Step That Separates the Pros from the Amateurs
The acetone cleanup method is the single step that most separates a professional-looking home manicure from a home-looking one. By taking the time to remove stray polish and create clean edges, you can elevate your manicure to the next level and achieve a finish that looks like it was done in a salon.
The Final Touches
The Importance of Finishing Touches
While the acetone cleanup method is essential for creating clean edges, it’s also important to take the final touches into account. By paying attention to the details and taking the time to finish every nail perfectly, you can create a manicure that looks polished and professional, even at home.
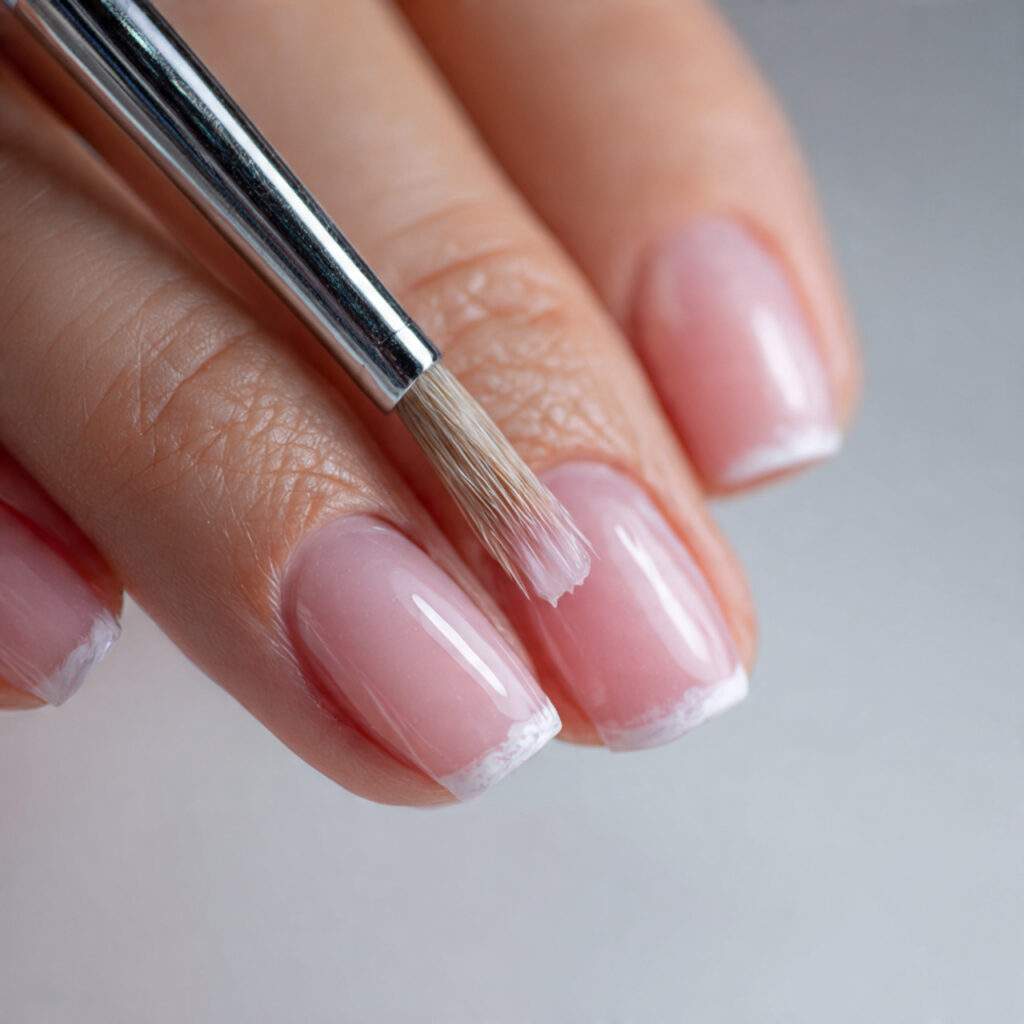
Achieving a Salon-Ready Finish
After your final top coat has dried for five to ten minutes, carefully dip a fine-tipped brush into acetone to create a precise edge. Use this delicate tool to meticulously define every boundary, from the cuticle line to the side walls and base of the nail. This labor of love yields a remarkably crisp, high-gloss finish in just three minutes, boasting an undeniable visual impact.
21. Double Glossing for a Show-Stopping Shine
Unlocking the Secret to Double Glossing
Two coats of top coat, applied sequentially with a brief drying period between coats, unlock a depth of gloss that rivals even the most advanced gel manicures. This intelligent application technique not only fills in any residual brush texture from the color coats but also creates a resplendent, glass-like surface that leaves onlookers in awe.
How to Achieve Double Glossing Perfection
To unlock this show-stopping finish, apply your first top coat generously, sealing the tip with a smooth, even coat. Allow the first layer to dry for four to five minutes before applying a second coat just as liberally. The resulting combined thickness yields a high-end finish that not only looks stunning but also extends wear significantly, allowing short square nails to last up to a week without chipping when applied correctly.
22. Nurturing the Cuticle Zone Between Manicures
The Importance of Cuticle Care
Why Cuticle Care Matters
Short nails showcase the cuticle area prominently, making it essential to maintain a clean, soft, and neatly pushed-back appearance. The difference between polished and unfinished nails lies in the attention given to this often-overlooked area.
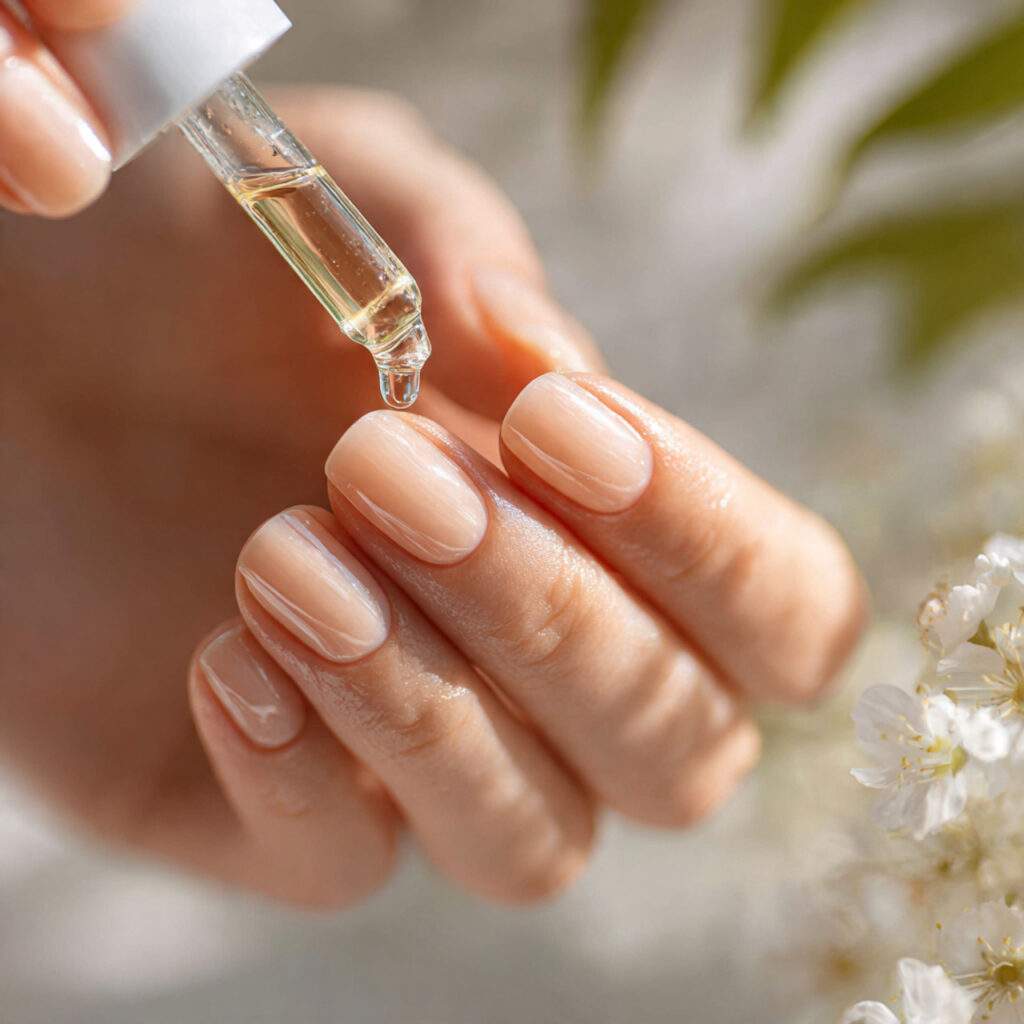
How to Tend to Your Cuticles
To keep your cuticles looking their best, massage a single drop of cuticle oil into each nail daily, taking just a moment to work it in. After showering, when your cuticles are at their softest, use a rubber-tipped pusher to gently coax them back into place. Remember, never cut live cuticles – this can cause irritation – and only use a proper cuticle remover when absolutely necessary. This simple, five-minute habit can transform the appearance of your nails more dramatically than any polish choice.
Insider Tip: Prioritizing Cuticle Care
To maximize the benefits of your cuticle care routine, apply cuticle oil directly before bed, allowing it to absorb overnight and do its magic while you sleep. Keep a small bottle on your nightstand to ensure this habit becomes second nature.
23. Safeguarding Your Manicure in Daily Life
The Importance of Daily Protection
Why Daily Protection Matters
While short nails chip less frequently than long ones, their corners are still vulnerable, especially in the initial hours after a manicure when the polish is still malleable. That’s why it’s crucial to take preventive measures to extend the life of your manicure.
How to Protect Your Manicure
To safeguard your manicure, wear rubber gloves for tasks like washing dishes and cleaning in the first 24 hours after a manicure. Apply a fresh coat of top coat every two to three days to maintain shine and add a protective layer. When faced with situations that may damage your nails, such as opening cans or packages, opt for a different object instead. By incorporating these small habits into your daily routine, you can extend the life of a short square manicure from a few days to well over a week.
24. Reviving a Chipped Corner Without Reapplying
The Secret to Repairing a Chipped Corner
Why Corner Chips Happen
Why Corner Chips Occur
Short square nails are prone to chipping, particularly at the corners, due to their unique shape and the stresses placed on them during daily activities. Knowing how to repair a corner chip without redoing the entire nail is essential for extending the life of your manicure and saving valuable time.
The Art of Repairing a Corner Chip
To revive a chipped corner, use a fine-tipped brush and acetone to carefully redefine the edge, creating a seamless finish that blends with the surrounding nail. This technique requires patience and precision but yields remarkable results, allowing you to enjoy a chip-free manicure for longer than ever before.
Repairing the Chip
To conceal a minor chip, delicately apply a small amount of the original polish color using a very fine brush. Allow it to dry completely before blending the edges with a fine brush that’s been dampened with a tiny drop of acetone to soften the repair line. Finish by applying a high-quality top coat across the entire nail to seal and unify the finish. When executed with care, a repaired corner chip becomes almost imperceptible.
25. Building Your Short Square Spring Nail Kit Essentials
What Makes It Work
The right tools can significantly ease the process, making it faster, more enjoyable, and less daunting. A well-stocked short nail kit eliminates friction points between the vision and the final result, streamlining the entire experience.
The Must-Haves
A crystal nail file for creating smooth, splinter-free edges is essential. Next, include a ridge-filling base coat, three to five spring polish colors in your chosen palette, a fine nail art brush for detailed work, nail tape for crisp lines, a high-quality glossy top coat, a thin angled brush for acetone cleanup, and cuticle oil. These are the fundamental components of a spring nail kit, providing everything you need for stunning short square spring nails in a single compact pouch.
Unlocking Your Potential
To cultivate a lasting nail habit, keep your spring nail kit in a visible and easily accessible location, such as a bathroom shelf or a decorative basket on your dresser. When your tools are readily available, you’re more likely to maintain your manicure and make small adjustments between full sessions. This approach is the secret to making nail care a sustainable part of your daily routine.
Embracing the Beauty of Short Square Spring Nails
The truth about short square spring nails is that they’re for anyone, regardless of their natural nail length, social status, or available time. They’re not just for those with extensive polish collections or regular salon visits. Short square spring nails are for you, with the nails you have today, in the colors that resonate with you this season, done with as much or as little time as you prefer. Short nails have never been a limitation; they’ve always been a deliberate choice. When made with intention, care, and attention to detail, the result is a beautiful, understated look that brings you joy every day. Spring is a season of small, refreshing starts, and your nails are the perfect place to begin. Pick the idea that sparks your enthusiasm, try it this week, and let it be a source of enjoyment and self-expression. Remember, the most stunning nails aren’t the most complicated ones; they’re the ones you take the time to care for.