
What Sets Tropical Nails Apart?
The Unifying Essence of Tropical Aesthetics
When envisioning tropical nails, imagine being enveloped in the tranquil atmosphere of a serene oceanfront. The air is filled with the sweet scent of salt and the gentle rustle of palm fronds. The vibrant hues of tropical flowers and lush foliage add depth and allure to this idyllic scene. Tropical nails capture the essence of this enchanting world, transporting you to a place of tranquility and beauty, no matter where you are.
The Beauty of Simplicity in Tropical Nail Designs
Simplicity is not synonymous with blandness. Tropical nail designs can be both effortless and striking, requiring minimal expertise to achieve. These designs are perfect for those who want to infuse their daily lives with a touch of tropical magic without the need for extensive training or elaborate techniques. With a little creativity and basic nail art tools, you can create stunning tropical looks that exude warmth and personality.
The Foundation of Tropical Color Palettes
Tropical color palettes are built around a core of vivid, sun-kissed shades that evoke the feeling of a tropical paradise. These colors, often inspired by the ocean, flowers, and foliage, work in harmony to create a cohesive and visually appealing aesthetic. By using these colors as the foundation of your nail design, you can achieve a look that’s both effortless and impressive.
1. Seaside Breeze Gloss
The Power of a Single Shade
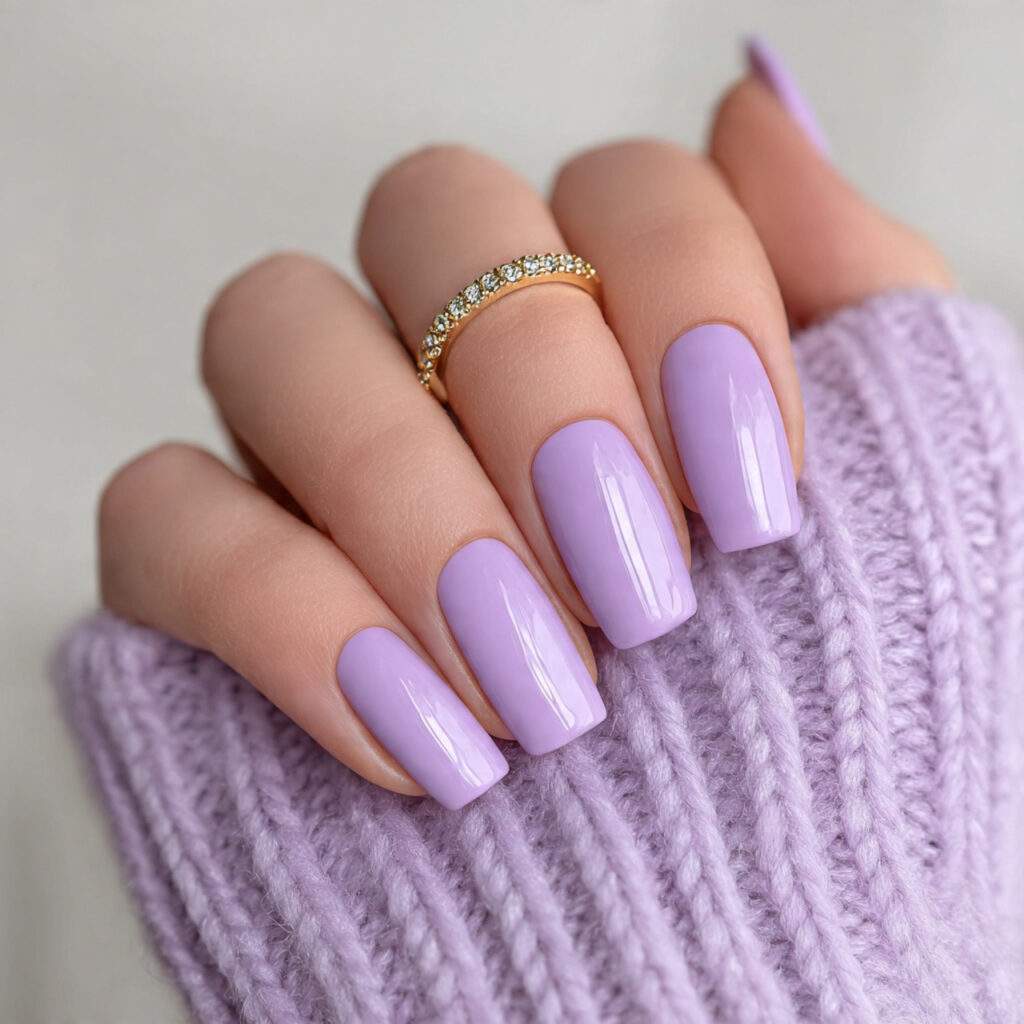
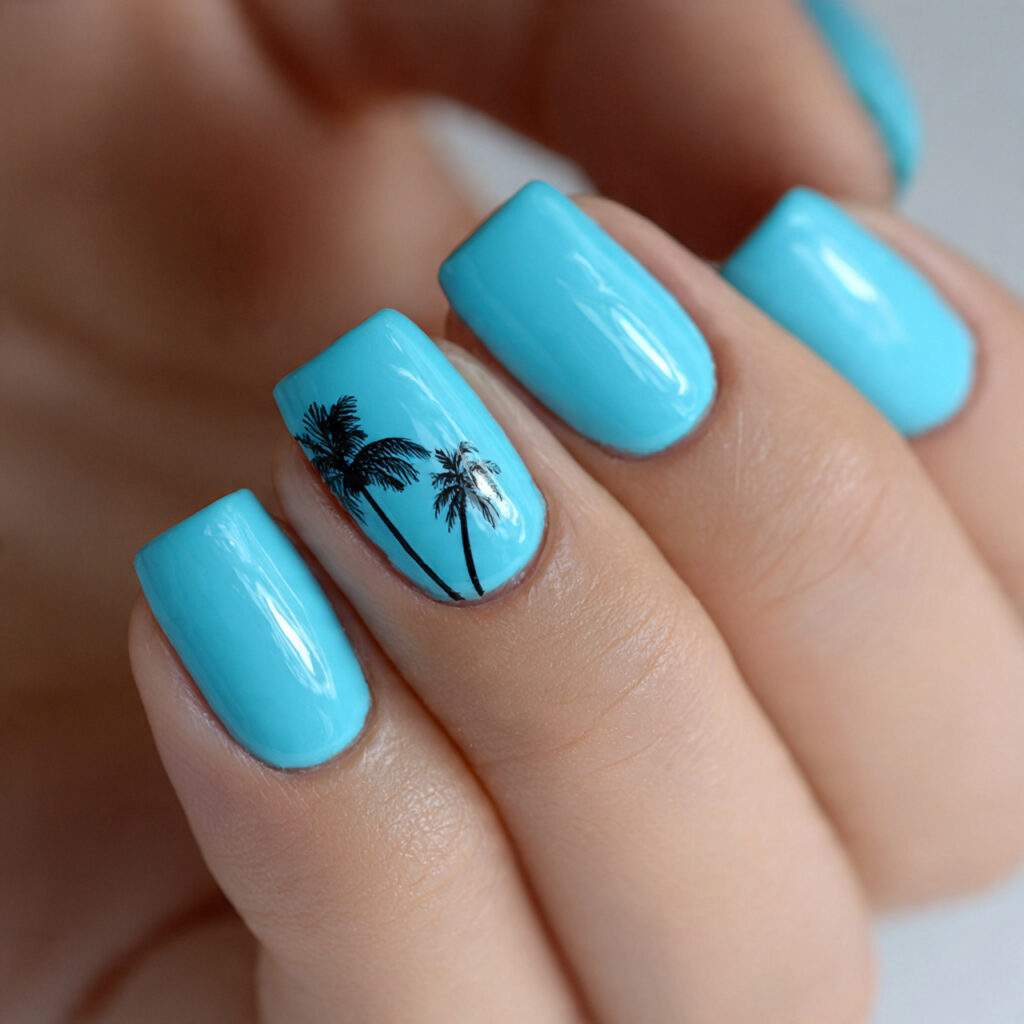
A single, well-chosen shade can be the catalyst for a stunning tropical nail design. The subtle nuances of color can evoke the feeling of a tropical paradise, transporting you to a world of serenity and beauty. In this case, a soft, ocean-inspired blue-green hue, known as Seaside Breeze, is the perfect starting point for a tropical nail look that’s both effortless and eye-catching.
Ocean Breeze
Choosing the Perfect Hue
When it comes to turquoise nail polish, opt for a shade that leans towards teal rather than a bright blue. This subtle shift in tone imbues the color with an authentic oceanic depth. Two coats of a semi-opaque formula, finished with a thick high-gloss top coat, create a stunning finish on every nail length and shape.
2. Skin Tone Secrets
Flattering Skin Tones
Turquoise nail polish is surprisingly versatile, looking brilliant against a range of skin tones. On tan skin, the color creates a stunning contrast, while on lighter skin tones, it adds a fresh and dramatic touch. Don’t let concerns about your skin tone hold you back from trying this vibrant shade.
Tropical Oasis
Why It Works
The warm, vivid orange of ripe mango is an unapologetically happy nail color that radiates heat and warmth. It’s like stepping into a tropical fruit market, surrounded by sunshine and vibrant market stalls. On nails, this bold yet wearable shade creates a striking contrast without being too aggressive.
Mango Magic
Wearing the Color
To make the most of this shade, look for a mango orange with warm, slightly coral undertones rather than a flat primary orange. A glossy finish adds a fresh and modern touch, while a satin finish creates a more subdued, everyday look. Apply two coats and seal with a glossy top coat for maximum vibrancy.
Orange You Glad?
Common Mistakes
Avoid choosing an orange that’s too brown-toned or too red-toned, as this can detract from the overall effect. True mango orange sits in a warm, fruit-bright middle ground, reminiscent of the inside of a ripe mango. If it looks like terracotta, it’s too brown; if it looks like coral, it might be too pink.
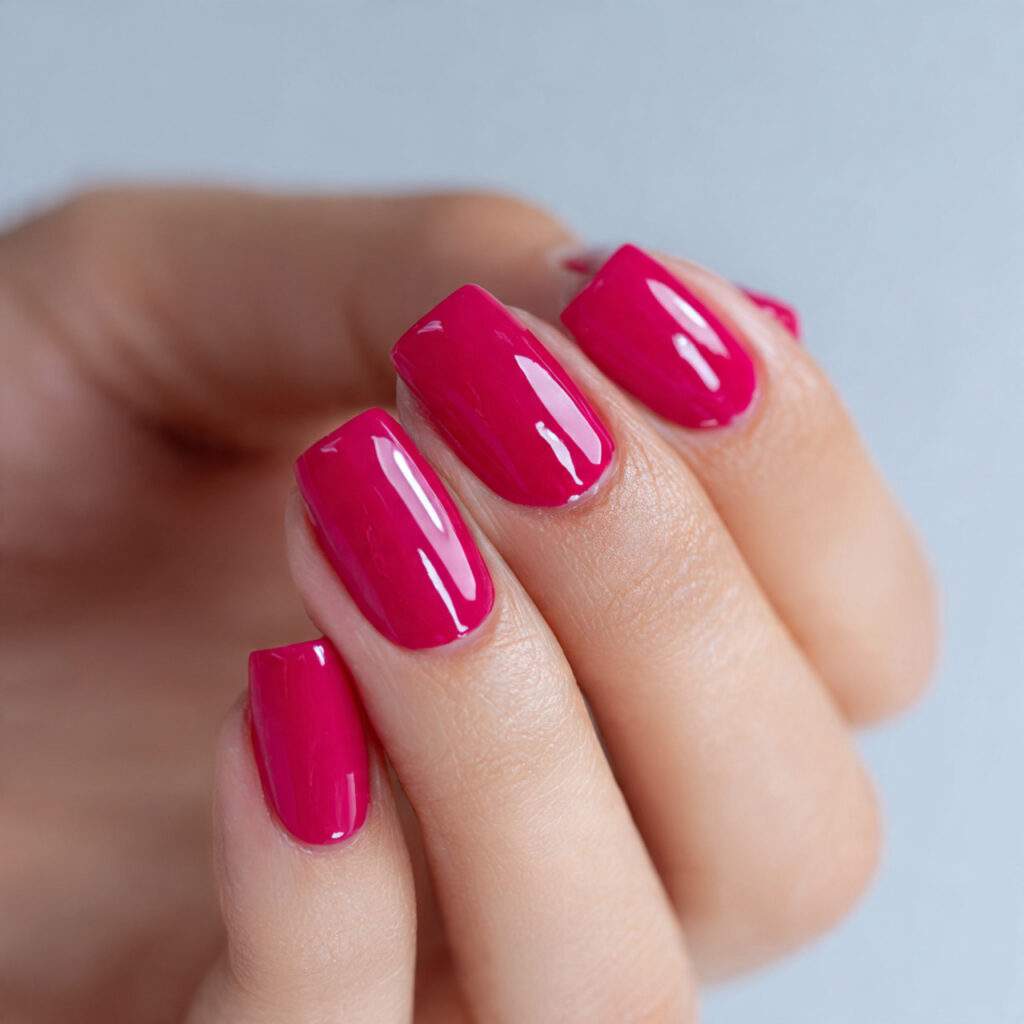
3. Hibiscus Bloom
Why It Works
Hibiscus pink is that saturated, vivid pink-red that thrives in tropical gardens, looking almost too beautiful to be real. On nails, this confident and feminine shade is a statement piece, not a soft pastel pink but a full-bloom pink that means business. It photographs spectacularly and looks great in every light.
Pink Perfection
Wearing the Color
For maximum impact, try a full-coverage formula in a glossy finish. Two coats and a high-gloss top coat will create a stunning effect. Alternatively, choose a formula that’s a touch more sheer to achieve a luminous, rather than solid, look.
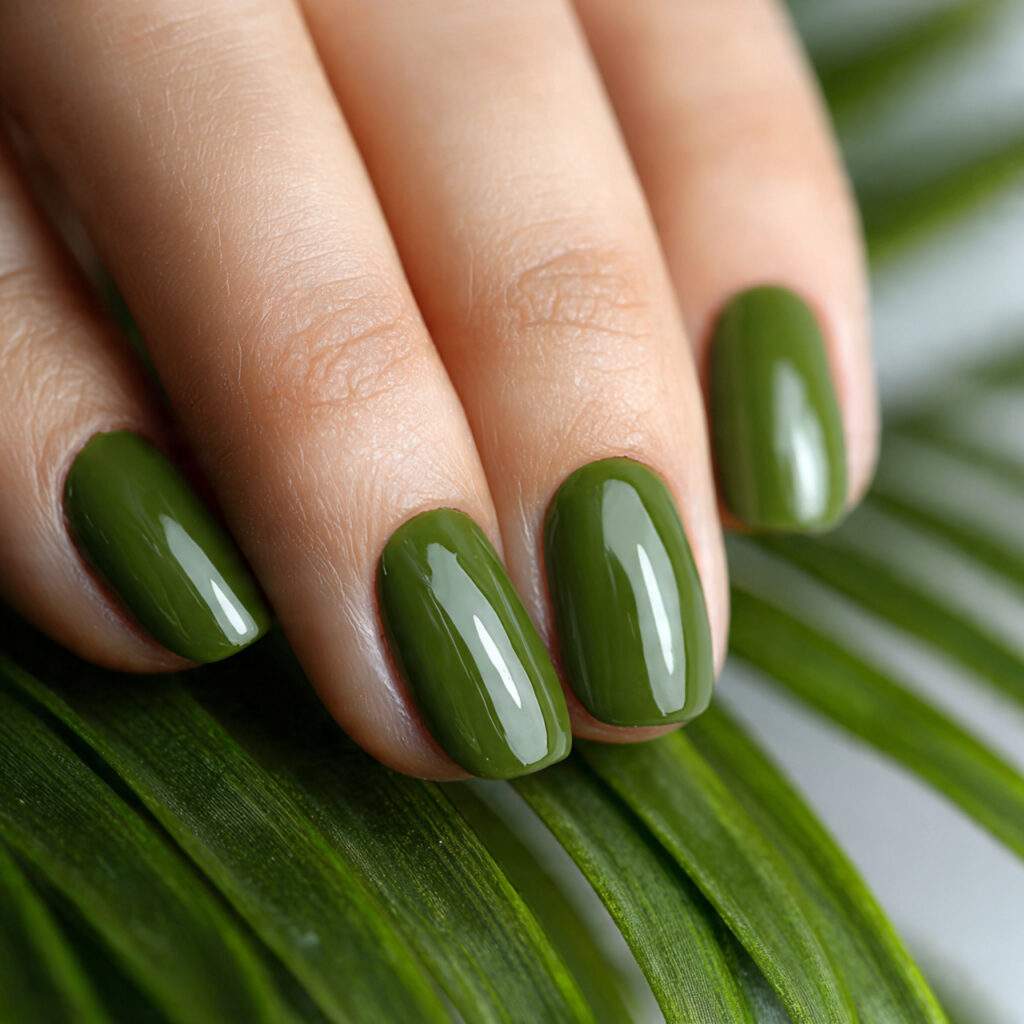
4. Jungle Green
Why It Works
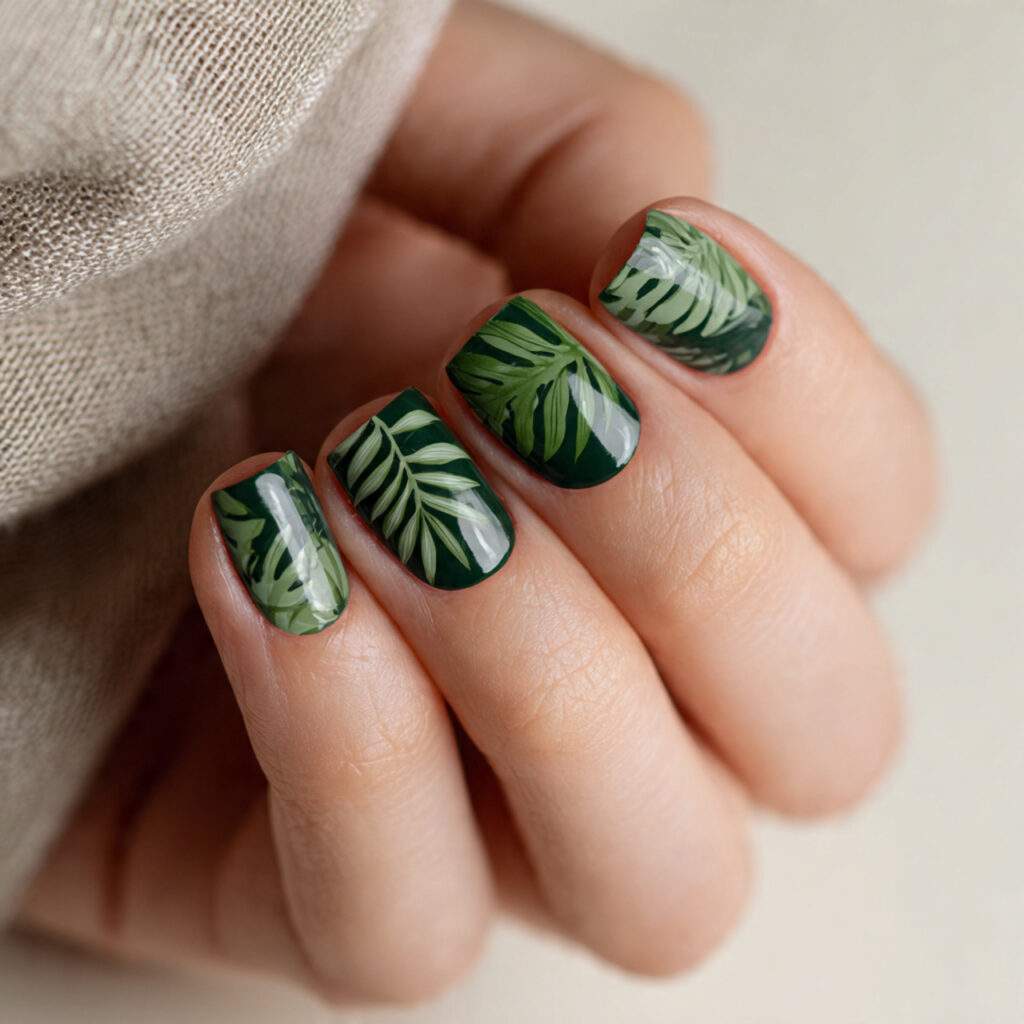
Deep, rich green inspired by tropical foliage is one of the most unexpected and rewarding nail colors you can try. It reads as both bold and natural, like wearing something living on your fingertips. Not mint, not sage, but a genuinely lush, saturated tropical green.
Green Scene
Wearing the Color
A slightly glossy, semi-deep green in the family of jungle or palm leaf is perfect for making a statement. Pair it with gold jewelry for a luxurious combination that looks genuinely high-end. On short nails, this shade creates a modern and graphic look, while on longer nails, it’s dramatic and botanical.
Green Goddess
Insider Tip
Palm leaf green with a satin rather than glossy finish looks incredibly sophisticated, like polished malachite. This elevated take on the color will surprise even those who thought they didn’t like green nails.
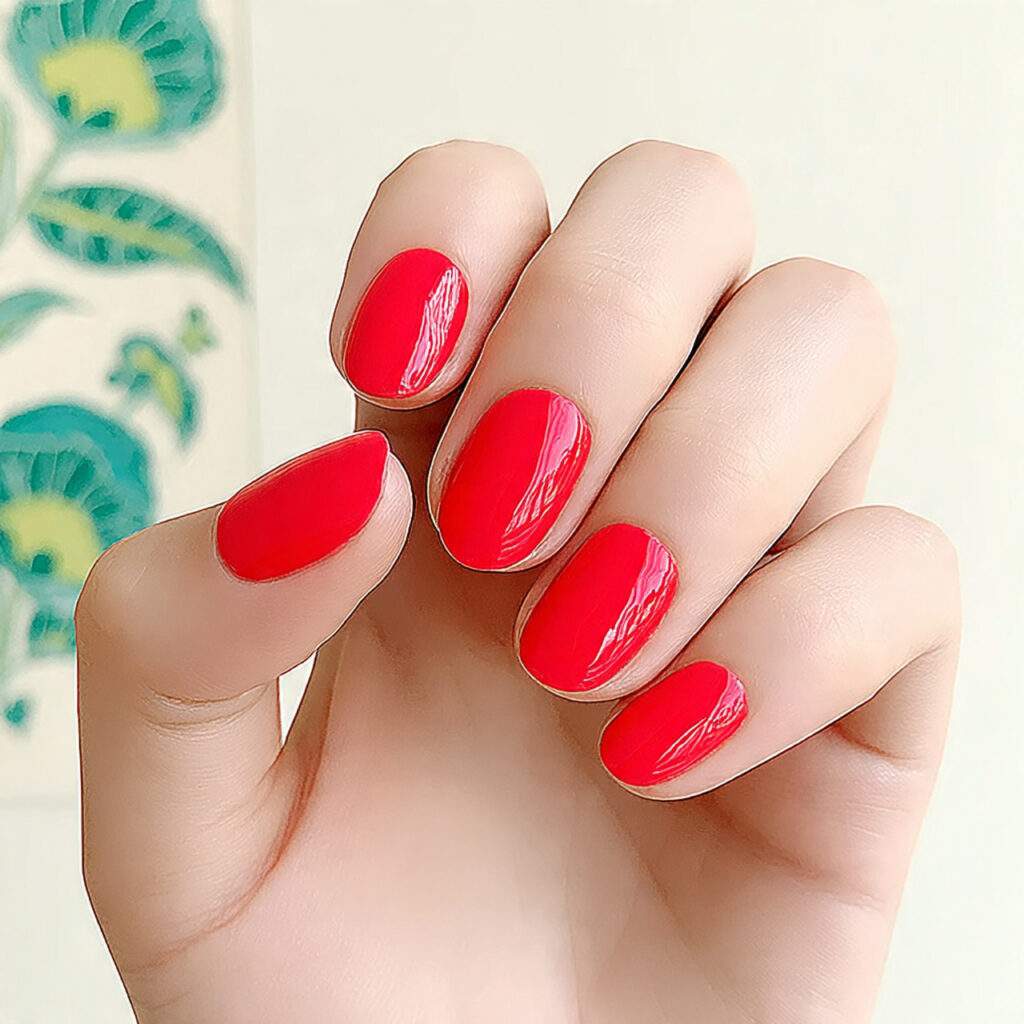
5. Coral Cove
The Allure of Coral
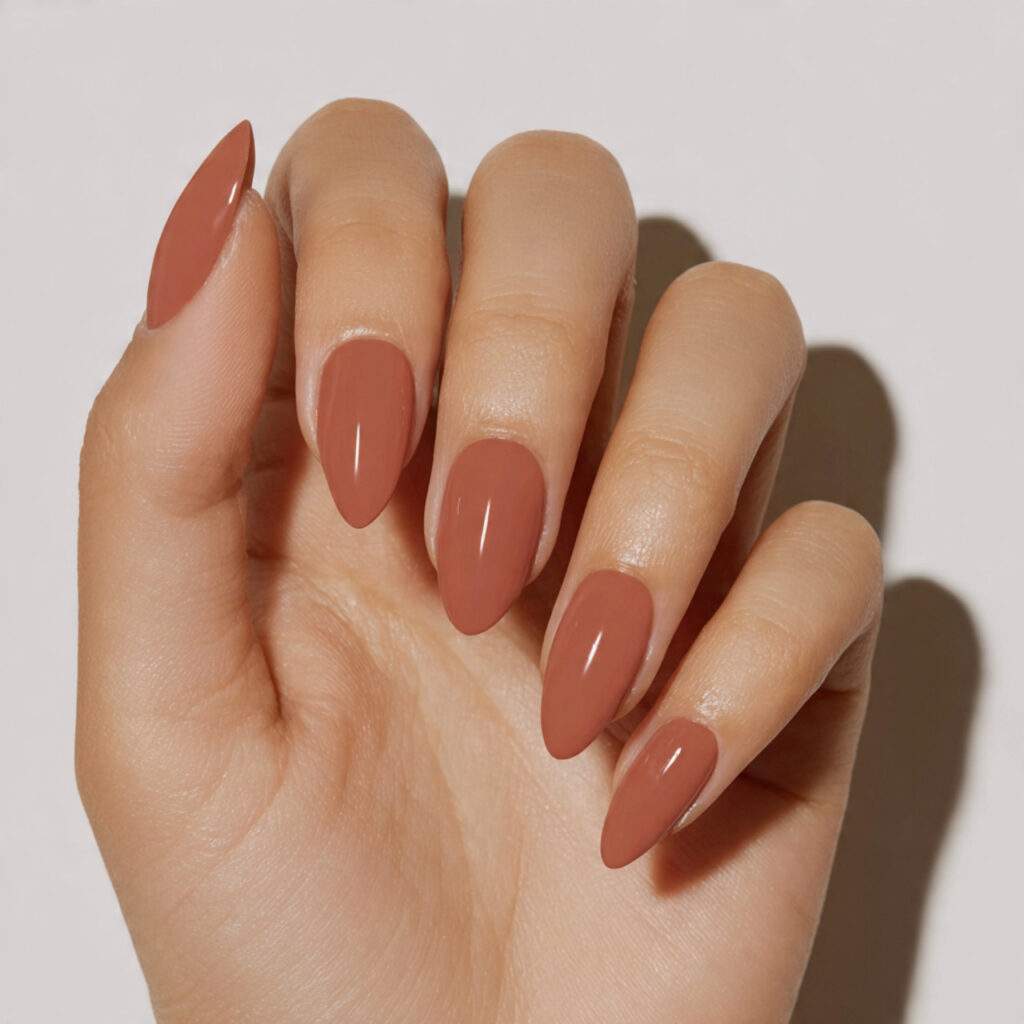
Coral’s unique blend of warmth, femininity, and vibrancy has made it a timeless favorite across various skin tones and nail aesthetics. Its ability to evoke a sense of summery bliss and tropical charm is unparalleled, rendering it an essential shade in any nail enthusiast’s palette.
Mastering Coral Nail Art
When it comes to pulling off coral nails, it’s crucial to select a shade with a balanced warm undertone, rather than one that leans heavily towards pink or orange. By applying a glossy finish over two smooth coats, coral nails can exude a fresh, flattering, and instantly vacation-ready appearance.
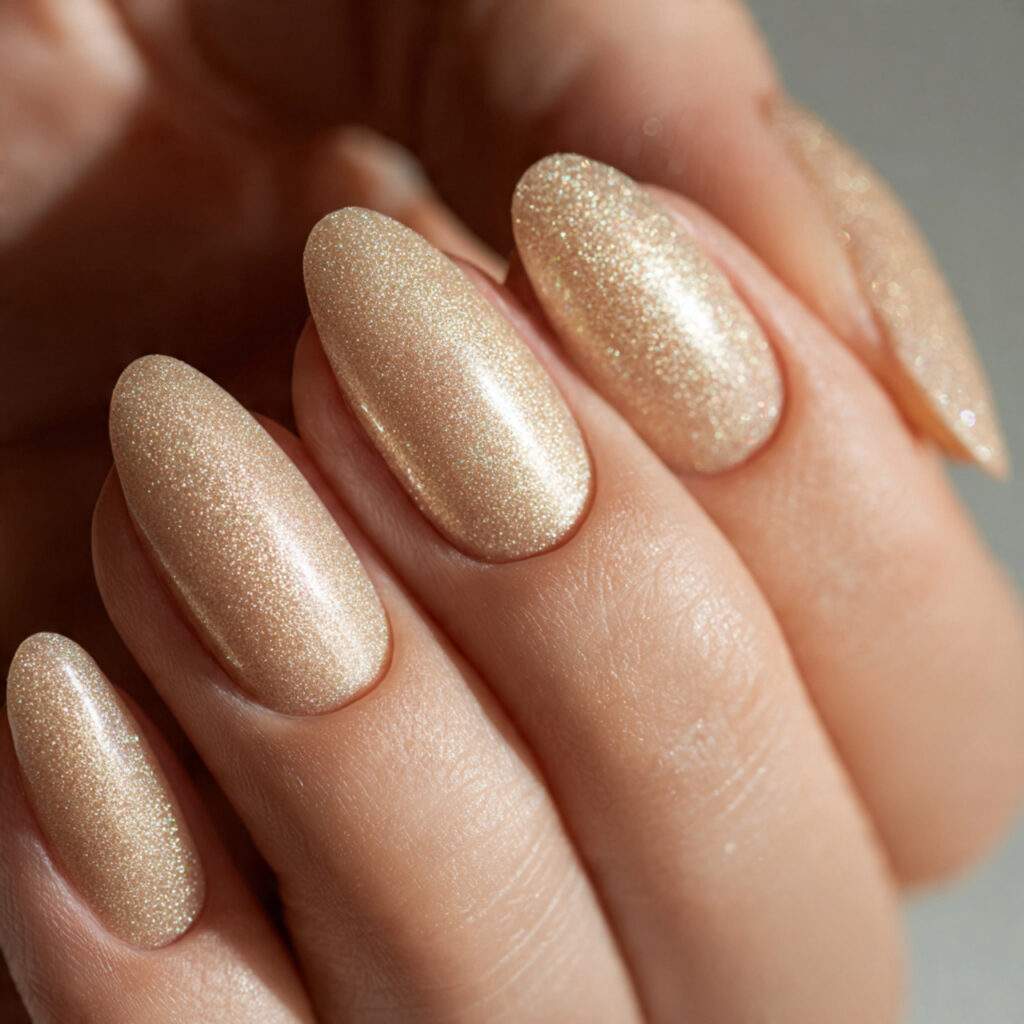
6. Golden Sand
The Timeless Appeal of Golden Sand
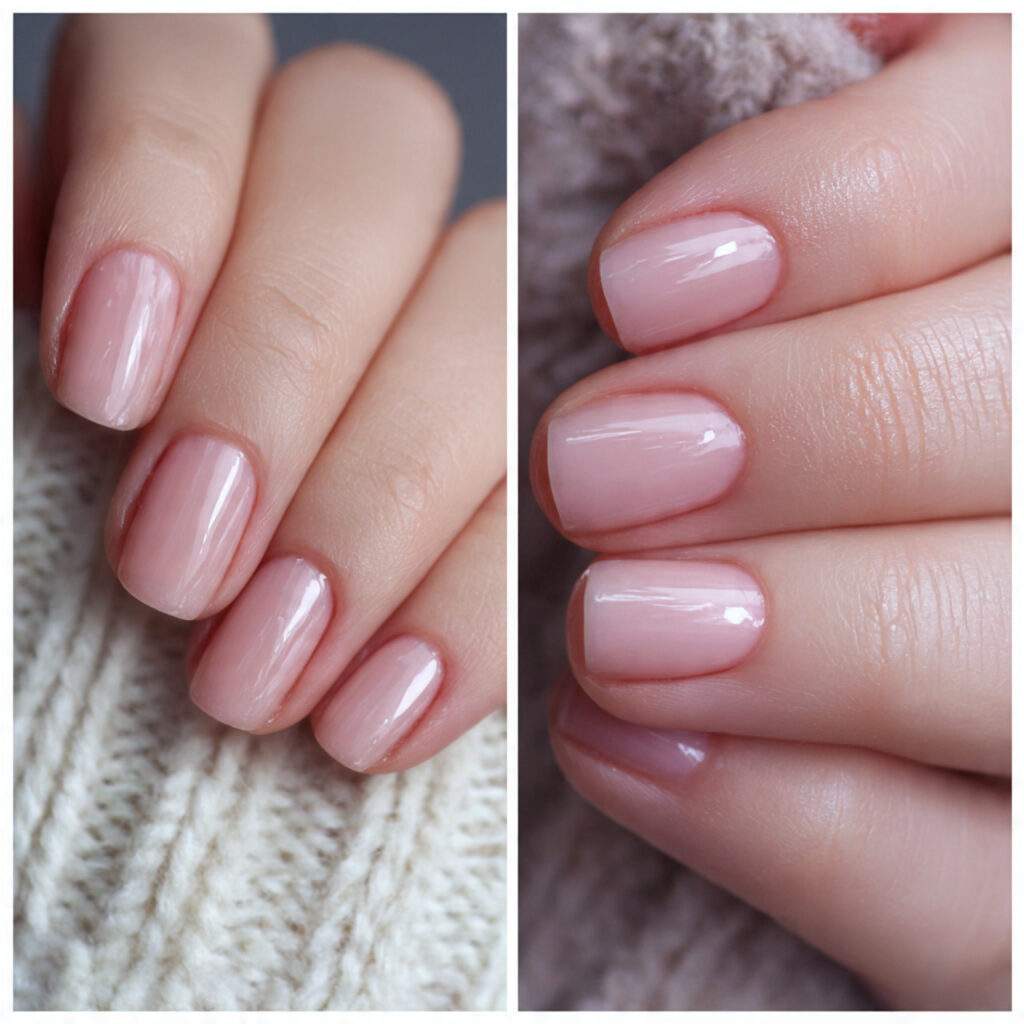
Golden sand, a warm and luminous nude with a hint of gold shimmer, has an uncanny ability to capture the warmth of sunlight on pale sand. Its subtlety and versatility make it an excellent choice for professional settings where brighter shades might be deemed too bold.
Elevating Golden Sand Nail Art
To achieve a stunning look with golden sand, pair it with a base that’s slightly warmer than your natural skin tone, featuring a fine gold shimmer or metallic quality. Applying a high-gloss finish will amplify its luxurious appearance, and it pairs beautifully with brighter tropical shades when worn on alternating nails for a cohesive, warm set.
Avoiding Common Pitfalls
When opting for a nude shade, it’s easy to fall into the trap of choosing one that’s too close to your skin tone, rendering the golden quality imperceptible. To create a truly tropical look, ensure the sand reference has a noticeable warmth and shimmer.
6. Building a Tropical Foundation
These six color looks serve as the foundation for the nail art ideas that follow, seamlessly integrating to create a cohesive and visually stunning tropical aesthetic.
7. Easy Tropical Nail Art for Beginners
These accessible designs can be achieved at home with basic tools and are well worth the effort, making them perfect for nail art enthusiasts of all skill levels.
8. 7. Palm Tree Silhouette Accent
Creating a Tropical Statement with Palm Trees
A simplified palm tree silhouette, comprising a trunk and a few fronds, painted on one accent nail against a vibrant tropical base, instantly conveys a tropical essence. This detail elevates the entire set, transforming it from a mere colorful arrangement to a carefully crafted, themed design.
9. Mastering the Palm Tree Silhouette
To achieve this look, complete your base color on all ten nails and then use a fine nail art brush to paint a simplified palm tree on the ring finger nails. Employ black, white, or dark green polish for the design, using two vertical strokes for the trunk and four to six short strokes at the top for the fronds. Keep the design small and simple for an authentic look.
10. Insider Tips for Palm Tree Nail Art
For maximum impact, pair the palm tree silhouette with a solid bright base rather than a patterned one, allowing the design to stand out clearly. A turquoise or ocean blue base with a white or black palm tree is particularly striking.
11. 8. Tropical Leaf Print
Infusing Tropical Charm with Leaf Prints
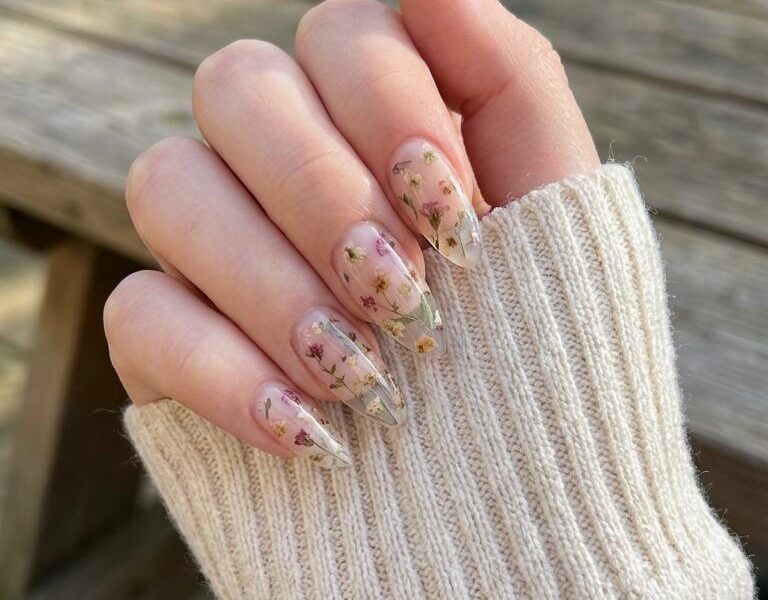
Abstract leaf shapes, monstera-inspired splits, banana leaf curves, or simple elongated pointed leaves can add a botanical, resort-like quality to nails that’s unmistakably tropical. This look seamlessly blends artistry with nature, creating a visually stunning and captivating tropical aesthetic.
12. Elevating Tropical Leaf Print Nail Art
To create this look, experiment with various leaf shapes and patterns, ensuring a balanced and harmonious design that complements your chosen base color. The result will be a unique and captivating nail art design that exudes tropical charm.
Tropical Leaf Nail Art
Tropical leaves can add a touch of exotic elegance to any nail art design. For a stunning look, use a fine brush in a rich, dark green or white to paint loose, abstract leaf shapes across the nail surface. Aim for an organic, stylized look rather than precise, photographic accuracy. Two or three leaf shapes per nail are more than enough to create a beautiful design. Don’t be afraid to get creative and experiment with different leaf shapes and sizes.
Avoiding Perfection
One common mistake in tropical nail art is striving for perfection. Real tropical leaves are often slightly asymmetrical and organic, so a slightly imperfect leaf can look intentionally stylized. On the other hand, a perfectly symmetrical leaf can come across as stiff and unnatural. To achieve a more authentic look, focus on capturing the essence of the leaf rather than its precise shape.
Tropical Nails 101
Why It Works
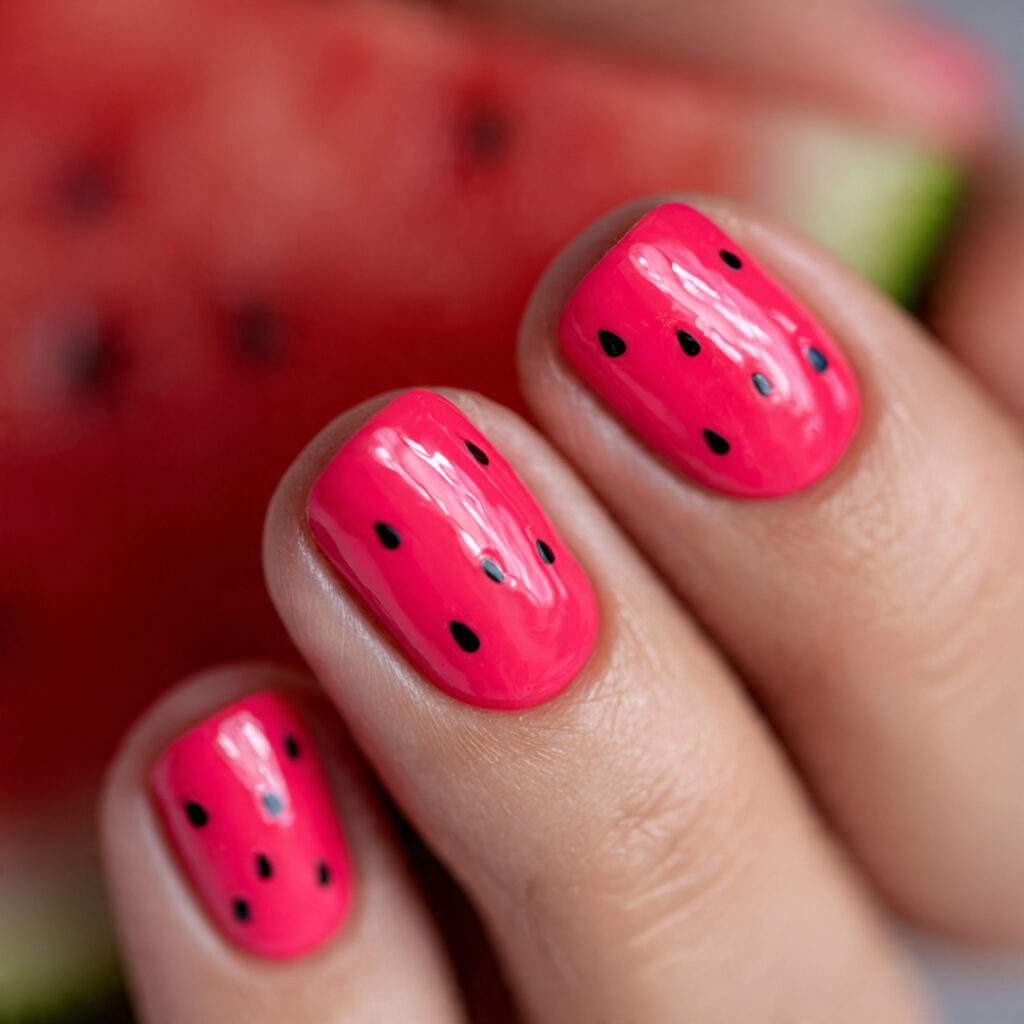
Watermelon nails are a timeless, universally loved simple tropical nail art idea that never fails to put a smile on people’s faces. A bright pink or coral base with small black seeds painted near the tip, or a green and pink split nail, cleverly captures the fruit’s look in a way that’s both cheerful and instantly recognizable.
How to Wear It
To create a watermelon nail design, apply a vivid pink or coral base to all your nails. Using a dotting tool or the end of a bobby pin, add three to five small black dots near the tip of each nail for watermelon seeds. For a more detailed look, apply a thin strip of green along the very tip before the pink, like the rind. This simple yet sweet design is perfect for those who want a tropical look without the fuss.
Tropical Nails 102
Pineapple Accent Nail
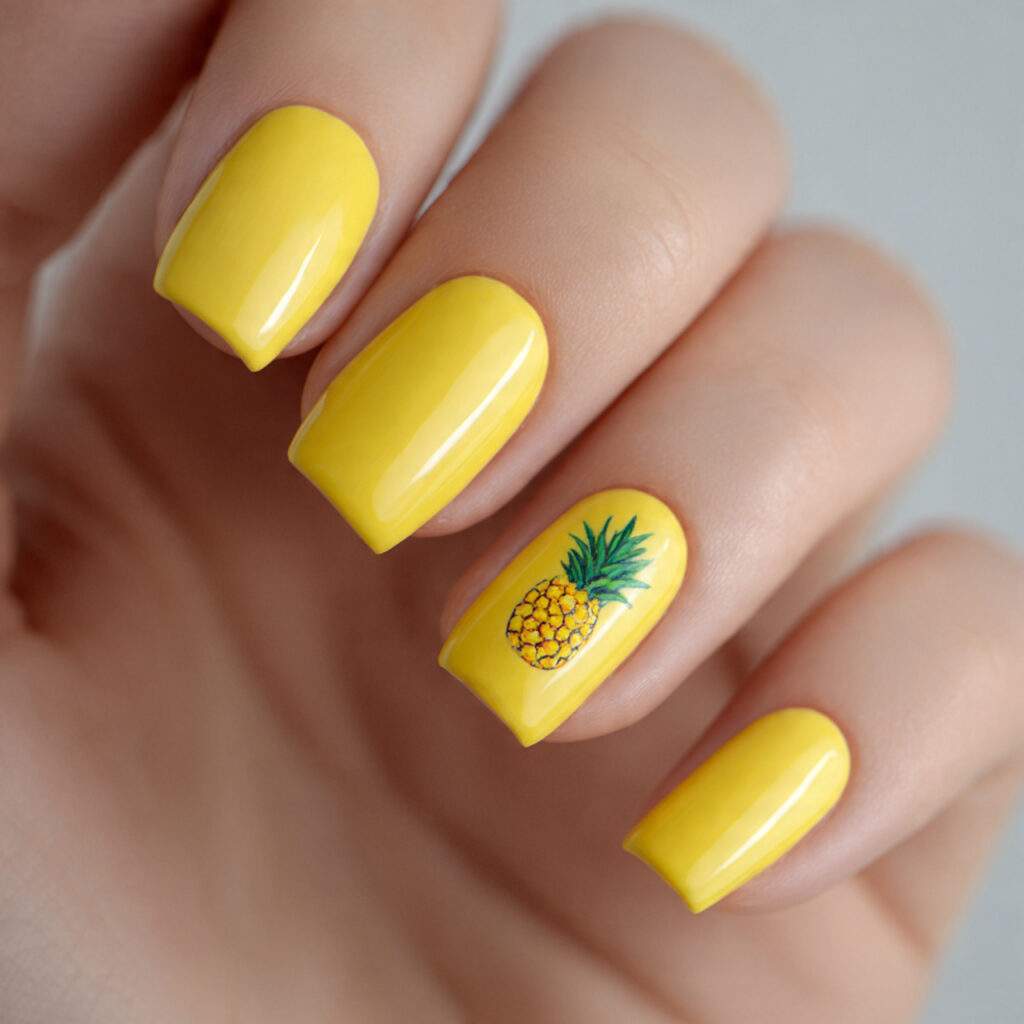
A small pineapple drawing on one accent nail against a bright yellow, turquoise, or coral base is a delightful detail that’s both playful and polished. Pineapples are a universal symbol of tropical hospitality, and the design translates beautifully to nail art.
How to Wear It
To paint a pineapple design, start by creating a simple oval or diamond shape in yellow or gold on the accent nail. Add a few crosshatch lines to suggest the pineapple’s texture. Top with three to five short green strokes at the crown. Outline the design in a slightly darker shade if desired for definition. The whole design fits comfortably on one nail and takes about three minutes once you’ve practiced it.
Insider Tip
Before applying any nail art design, practice it on paper or on a piece of plastic wrap. Even one practice run makes the actual application dramatically cleaner and more confident. This simple tip can make a huge difference in the overall quality of your nail art.
Tropical Nails 103
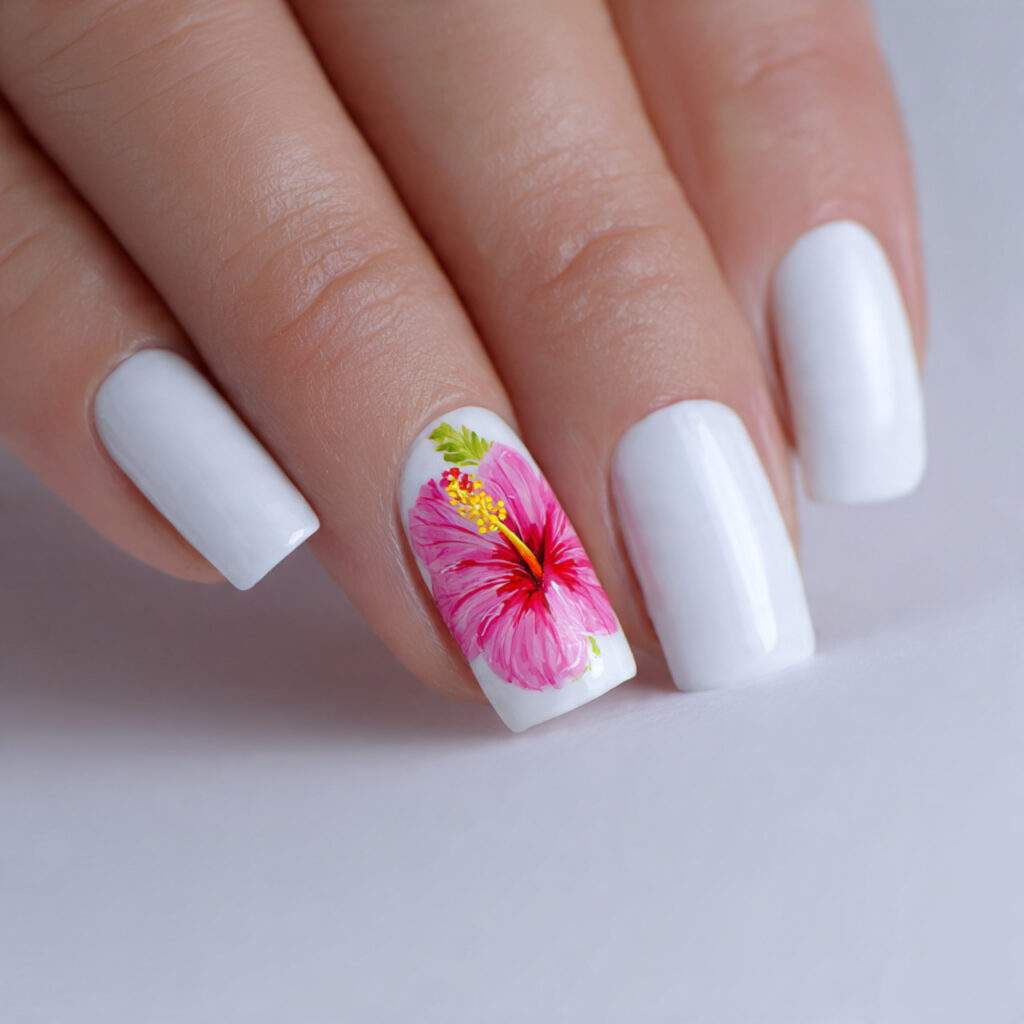
Hibiscus Flower Accent
A single hibiscus flower painted on one nail, five rounded petals in pink, orange, or coral with a small yellow center, is the quintessential tropical nail art element. On a clean white or turquoise base, it looks like something from a resort menu card in the most beautiful way.
How to Wear It
To create a hibiscus flower design, use a medium nail art brush to paint five rounded petal shapes radiating from a center point. Don’t worry too much about uniformity – slightly varied petal sizes look more natural. Add a small dot cluster in yellow or white at the center. If your freehand feels uncertain, hibiscus nail stickers and decals are widely available and look genuinely beautiful as an alternative.
Sunset Ombre on One Nail
Tropical Sunset on One Nail
A vibrant sunset ombre on one nail can add a pop of color and whimsy to any nail art design. By layering shades of orange, pink, and purple, you can create a stunning, gradient-like effect that’s reminiscent of a tropical sunset.
13. Tips for a Successful Ombre
To achieve a beautiful ombre effect, start by applying a base coat to your nail. Then, layer on shades of orange, pink, and purple, allowing each layer to dry before adding the next. Use a light hand when applying the colors, as it’s easier to build up the color than it is to remove excess. With a little practice, you can create a stunning, tropical-inspired ombre on one nail.
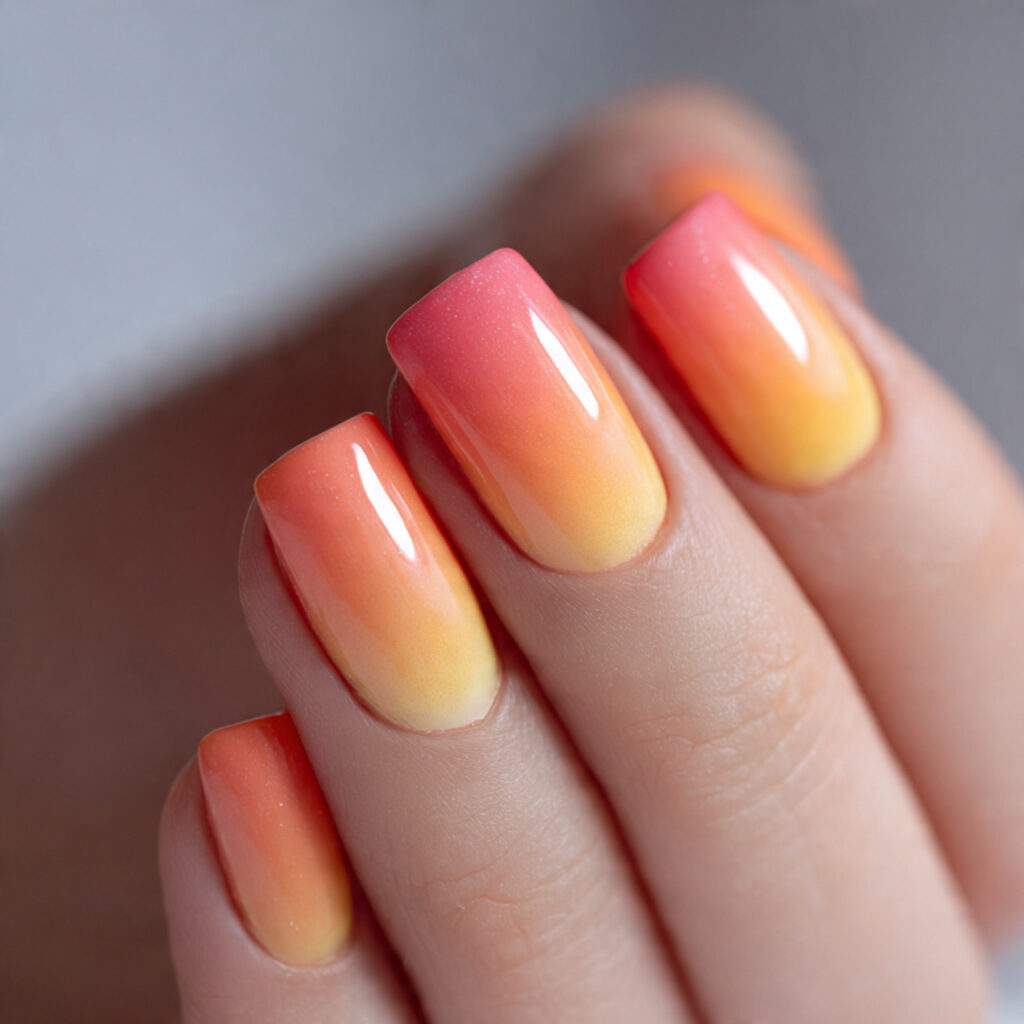
Harmonious Gradient
A gradient that transitions seamlessly from deep coral at the base to pale yellow at the tip effectively recreates the breathtaking palette of a tropical sunset on a single nail. When paired with a solid base nail in another tropical shade, it becomes a stunning accent that elevates the entire set.
Mastering the Gradient Technique
To achieve this look, apply coral polish at the base and pale yellow polish at the tip, blending them with a small makeup sponge where they meet. Build up three to four sponge layers for a smooth, even gradient. Seal with high-gloss top coat to add a touch of sophistication. Apply this design to both ring finger nails, while keeping the rest of the set in a solid shade from the same warm color palette.
Unconventional Accent Wave
The Art of Simplicity
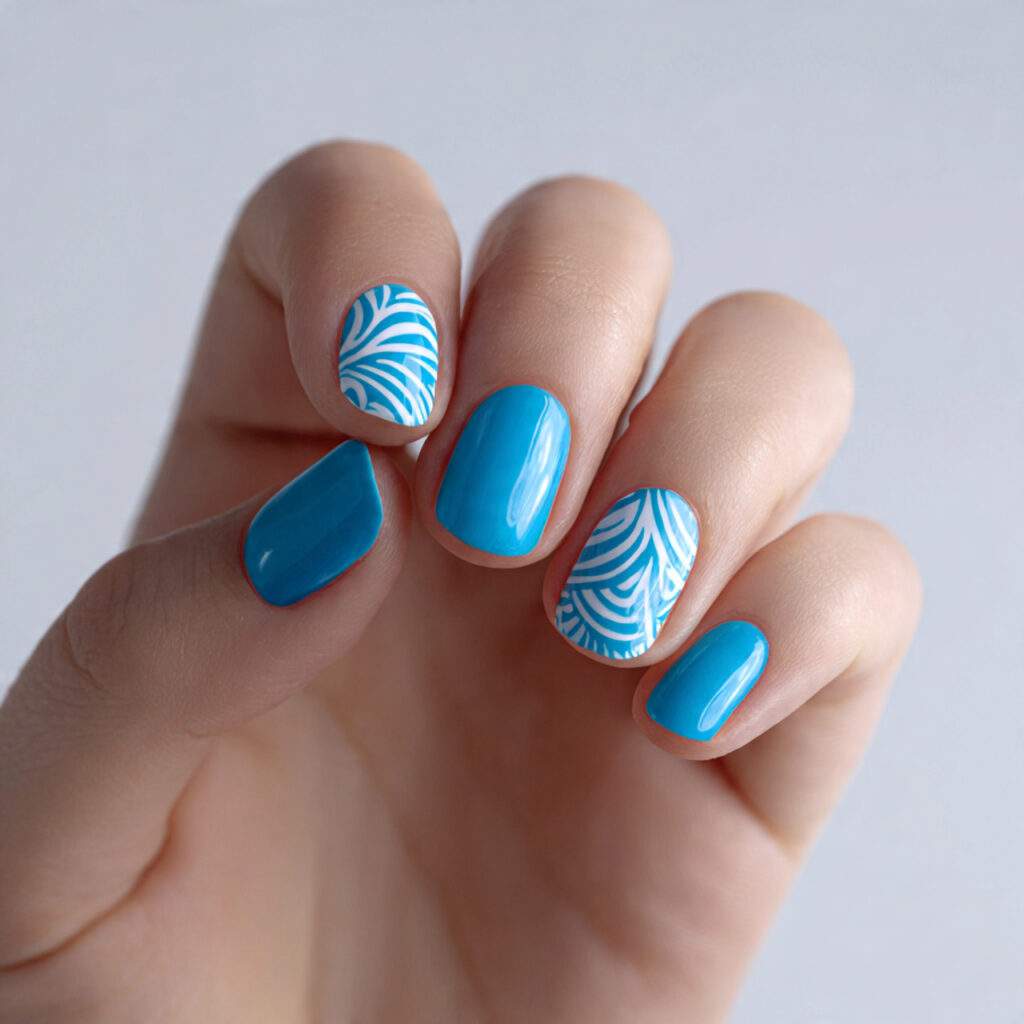
A simple yet effective design, curved lines painted in white over a blue or turquoise base creates an abstract wave pattern reminiscent of tropical ocean water. This design is one of those secrets that looks more complex than it is and garners disproportionately larger compliments than the effort it requires.
Painting the Perfect Wave
Using a fine nail art brush and white polish, paint three to four loose, slightly curved horizontal lines across the nail, varying in their curve and spacing for a natural wave quality. Don’t be afraid to introduce gentle imperfections, as they will add to the design’s authenticity. Seal with gloss to bring out the vibrant colors.
Tropical Nail Sets That Make a Statement
These full set ideas combine colors and details into cohesive, vacation-ready looks that exude a sense of genuine design.
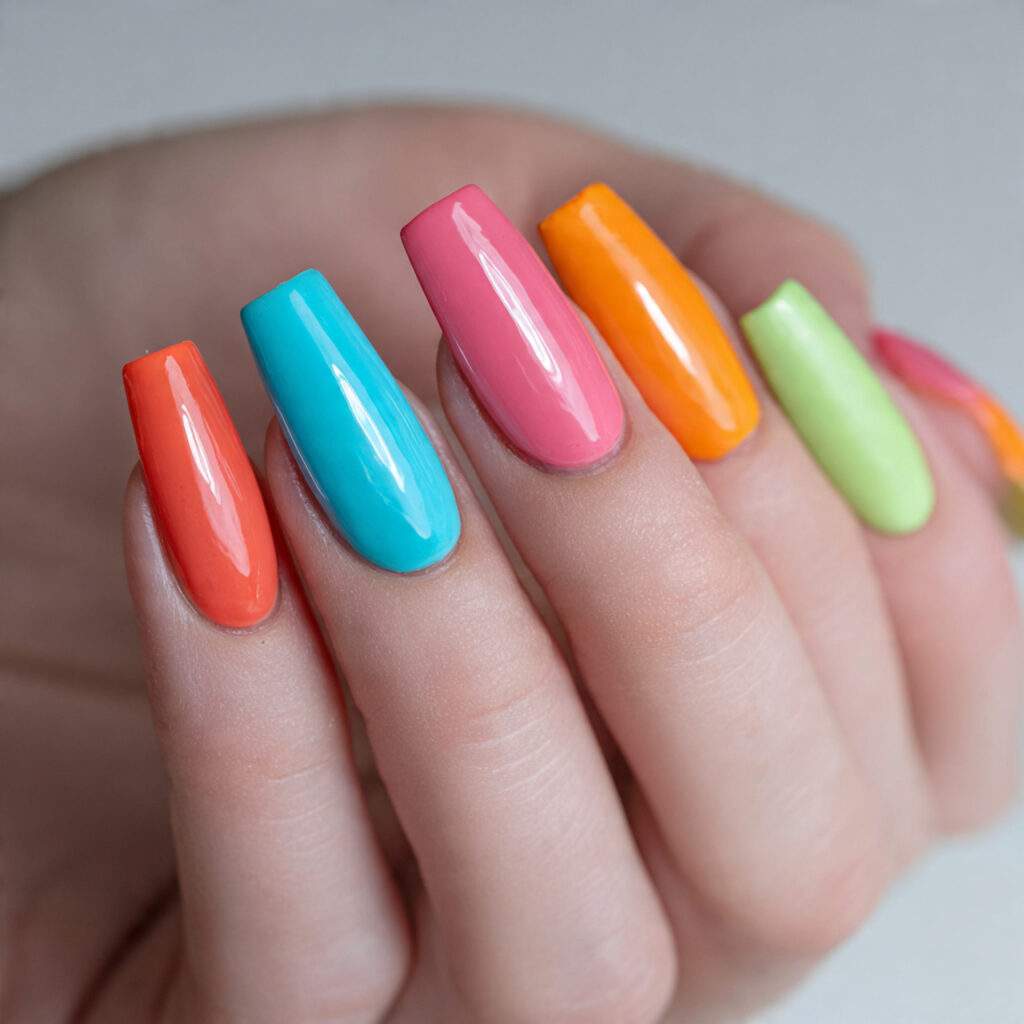
The Vibrant Island Brights Set
A Colorful Masterpiece
Each nail in this set showcases a different vivid tropical shade, alternating across both hands. The palette features turquoise, coral, mango orange, hibiscus pink, and palm green, all on a clean, consistent shape with no additional art or details.
The Secret to Success
The uniformity of shape and the vibrancy of color together create a set that radiates joy and intention. When every shade is equally vivid and the nails are all the same shape and length, the variety reads as a deliberate color story rather than indecision.
Common Mistake to Avoid
Mixing vastly different saturation levels can break the visual cohesion of the set. To achieve a harmonious result, keep all shades in the same range of brightness, avoiding neon and pale pastel combinations that can disrupt the balance.
Elegant Neutral Base With Tropical Accents
Accenting with Tropical Charm
Eight nails in this set feature a warm golden sand or milky nude base, while two accent nails, both ring fingers, boast a small hibiscus flower or palm tree painted on each. High-gloss top coat adds a touch of sophistication throughout the set.
The Versatility of Neutral Bases
The neutral base makes the tropical accents stand out dramatically and keeps the overall set wearable in professional settings or occasions where full tropical color might feel bold. This set is the most versatile tropical look in this guide.
14. The Timeless White and Tropical Set
Tropical Nail Inspiration
Elevate your nail game with the perfect blend of white and tropical hues. Five crisp white gloss nails paired with five vibrant turquoise or coral nails create a stunning, resort-inspired look. Alternate the shades for a cohesive finish that exudes effortless elegance.
The Tropical Twist
White and tropical colors together evoke the clean, carefree essence of a white linen shirt paired with a bright sarong. The contrast between white and tropical hues makes each color appear even more vivid, while the tropical color adds a pop of personality to the white nails.
17. The Fruit Bowl Set
The Vibrant Look
Unleash the fun of a fruit market on your nails with a colorful set featuring watermelon pink, mango orange, lime green, pineapple yellow, and coconut cream. No intricate nail art required – just clean lines and high gloss finishes.
Why It Works
Fruit-inspired color combinations are inherently tropical and joyful, making them perfect for a fun, carefree look. This palette creates a cohesive, vibrant set that’s as easy to achieve as it is to admire, requiring no technical nail art skills.
18. The Ocean Gradient Set
The Oceanic Look
Dive into the depths of the ocean with an alluring gradient of ocean blue and green. From palest aqua to richest deep teal-green, each nail is a solid shade, creating a stunning, monochromatic effect. No blending needed – just a smooth, high-gloss finish.
Why It Works
A monochromatic ocean gradient combines the soothing, serene quality of the ocean with its tropical energy, resulting in a sophisticated look that’s both calming and eye-catching. Like the ocean itself, this palette contains dozens of colors within a single cohesive vista.
The Technique Guide: Enhancing Tropical Nails
To truly make tropical nails shine, it’s essential to master a few key techniques. From working with vivid colors to preventing staining, these tips will elevate your nail game and make your tropical creations look their absolute best.
19. Mastering Vivid Colors: The White Base Trick
Why It Works
Vivid tropical polishes, especially yellows, oranges, and pinks, can appear surprisingly sheer and patchy when applied directly to the nail. A white base coat solves this issue, making the color appear more vibrant and saturated in fewer coats.
How to Do It
Apply one coat of opaque white polish over your base coat, allowing it to dry fully before adding your tropical color. This simple trick will make even moderately pigmented polishes look like a million bucks.
20. Preventing Staining from Bold Colors
Why It Works
Deep, rich tropical colors can stain natural nails over time, leaving behind a visible discoloration after polish removal. A proper base coat creates a barrier between the pigment and the nail, preventing this issue entirely.
How to Do It
Never skip the base coat when working with tropical colors. Apply one thin coat, allowing it to dry fully before adding any color. This simple habit takes just thirty seconds and saves you weeks of discolored nails.
AVOIDING THE MOST COMMON NAIL ART MISTAKES
One crucial aspect of achieving stunning nail art is avoiding common pitfalls. Using a regular clear polish as a base coat can lead to disaster, as it’s not designed to prevent staining. Instead, opt for a product specifically labeled as a nail base coat for proper protection and a long-lasting finish.
MASTERING SMALL-SCALE NAIL ART
When it comes to simple tropical nail art, keeping details small and lines clean is key. This style looks best when executed with precision, and most common nail art mistakes arise from working too large or with an overabundance of polish on the brush.
THE SECRET TO DELICATE NAIL ART
For achieving delicate, intricate nail art, it’s essential to handle your fine nail art brush with care. When loading the brush, wipe off most of the polish before applying it to the nail, leaving a subtle coating rather than a heavy, loaded one. This will give you the control you need to create precise strokes and avoid bleeding edges.
THE IMPORTANCE OF A CLEAN BRUSH
During the nail art process, it’s crucial to maintain a clean brush for each stroke. Keep a piece of paper towel or palette nearby and wipe your brush between each application. This simple habit can make all the difference between a polished, graphic design and something that appears rushed or messy.
EXTENDING THE LIFE OF YOUR TROPICAL NAILS
Tropical nails are often worn during warmer seasons, making them vulnerable to the harsh effects of sun, sunscreen, saltwater, and chlorine. By adopting a few simple habits, you can dramatically extend the wear time of your polish.
SEALING THE FREE EDGE
To prevent peeling and chipping, seal the free edge of your nail with every coat of polish, including base coat, color coats, and top coat. Run the brush along the very tip of the nail to cap the edge, ensuring a smooth finish that resists damage.
MAINTAINING SHINE AND PROTECTION
In addition to sealing the free edge, apply a fresh coat of top coat every two to three days to restore shine and protection. When engaging in water activities, wear gloves when possible, or reapply top coat after prolonged exposure to water to keep your nails looking their best.
CHOOSING THE RIGHT SHAPE FOR TROPICAL NAIL ART
The shape of your nail plays a significant role in how art looks on your nails. Certain shapes are better suited for tropical nail art than others, and understanding these differences can help you create stunning designs.
OVAL AND ALMOND SHAPES
For tropical nail art, oval and almond shapes are ideal. These shapes provide a natural, organic frame that complements the flowing quality of leaves, flowers, and wave patterns, making them perfect for creating a sense of movement and fluidity.
SQUARE AND SQUOVAL SHAPES
On the other hand, square and squoval shapes offer a clean, graphic frame that makes bold tropical colors and geometric designs look particularly sharp. These shapes are ideal for creating a striking contrast between the nail art and the surrounding skin.
WORKING WITH SHORT NAILS
Short nails are incredibly versatile and can work beautifully for all tropical color looks and small, detailed accent art. They’re perfect for creating a bold, graphic statement or adding a touch of whimsy to your manicure.
TAKING ADVANTAGE OF LONGER NAILS
Longer nails, on the other hand, provide more room for multi-element designs like full botanical illustrations. They’re perfect for creating intricate, detailed designs that showcase your artistic skills.
EMBRACING NAIL STICKERS AND DECALS
Not everyone is comfortable freehanding nail art, and that’s perfectly okay. High-quality tropical nail stickers and water transfer decals can be a valuable tool in your nail art arsenal, offering a convenient and beautiful alternative to traditional techniques.
Mastering the Art of Tropical Nail Design
To create a tropical nail look that’s truly unforgettable, start by applying stickers or decals over a dry base color. Ensure a smooth application by pressing firmly from the center outward to eliminate any air bubbles. For a polished finish, trim any excess decals carefully using a fine scissors or nail file. Sealing your decals immediately with two coats of top coat is crucial, as unsealed stickers can lift and peel quickly. When properly sealed, decals can last just as long as a standard manicure.
Avoiding Common Pitfalls
A common mistake made when designing tropical nail art is applying decals before the base color is completely dry. Even a slightly tacky polish can cause decals to wrinkle, resulting in an unprofessional finish. To avoid this issue, ensure the base color is bone dry before applying any stickers or decals. Waiting at least ten minutes or using a quick-dry spray can help you achieve a smooth, bubble-free application.
Crafting Your Unique Tropical Style
Creating your signature tropical look involves more than just copying popular trends. The most timeless and authentic tropical nail designs are those that resonate with your personal style and aesthetic. By understanding what draws you to the tropical look, you can build a unique approach that you’ll return to again and again.
Unpacking the Magic of Tropical Aesthetics
The tropical nail look can be deceivingly simple, but it’s the subtle nuances and personal touches that make it truly special. Think about which element of tropical beauty resonates most with you. Are you drawn to the ocean’s blues and greens, or perhaps the vibrant colors and patterns of tropical produce? By identifying your unique connection to the tropical world, you can create a nail look that feels authentic and true to your personal style.
Bringing Your Tropical Vision to Life
Once you’ve identified your tropical inspiration, it’s time to bring your vision to life. Choose a few key elements that speak to you, and build your design around them. Whether it’s a bold, colorful gradient or a delicate, botanical print, remember that the most memorable nail looks come from a clear, personal point of view. Don’t try to include everything at once – instead, focus on creating a cohesive, eye-catching design that showcases your unique style.
Elevating Your Tropical Game with a Personalized Palette
Creating a small collection of three to five tropical polish shades that work together and feel like yours is a game-changer for any nail enthusiast. By curating a personalized palette, you can create a beautiful tropical set any time the mood strikes without having to make new decisions from scratch. Your tropical signature becomes something you can re-wear, refine, and enjoy across every warm season, making it a timeless and unforgettable part of your nail art repertoire.
Unleashing a State of Mind with Tropical Nails
There’s an undeniable connection between our self-expression and our mood. Tropical nail ideas tap into this dynamic, imbuing our daily lives with a sense of emotion that many other nail trends often lack. Every time you glance down at your hands adorned with ocean-inspired hues, vibrant floral shades, or delicate palm tree silhouettes, your mood undergoes a subtle yet palpable shift.
A gentle, authentic happiness settles in, reminding you that warmth, beauty, and the essence of a tropical getaway can be distilled into the smallest details, even those as seemingly insignificant as nail polish. This realization shouldn’t be underestimated, as the choices we make about our appearance accumulate to shape the texture of our daily lives. When paired with tropical nails, life takes on a more desirable quality – as if you’re somewhere you’d willingly choose to be.
You’re not required to wait for a trip or a special occasion to experience this sense of tropical bliss. The nail design that resonates with you can be found; gather the matching polish, and dedicate an hour to giving yourself a taste of paradise. Sometimes, the most rejuvenating vacation you can afford lies within the palm of your hand.