21 Spellbinding Hocus Pocus Nails to Cast a Magical Halloween Glam
1. Witch's Sunset: Orange and Purple Ombré Nails
Inspired by the warm tones of a Halloween sunset, this design seamlessly blends vibrant orange and rich purple to create a captivating look. The smooth ombré gradient imbues each nail with a sense of warmth and enchantment, while a flying witch silhouette adds a touch of spooky whimsy. This harmonious color combination is both bold and elegant, making it perfect for those who crave a statement manicure. For a more polished finish, consider using a stencil or sticker to create the silhouette, or opt for freehand painting for a more rustic charm.
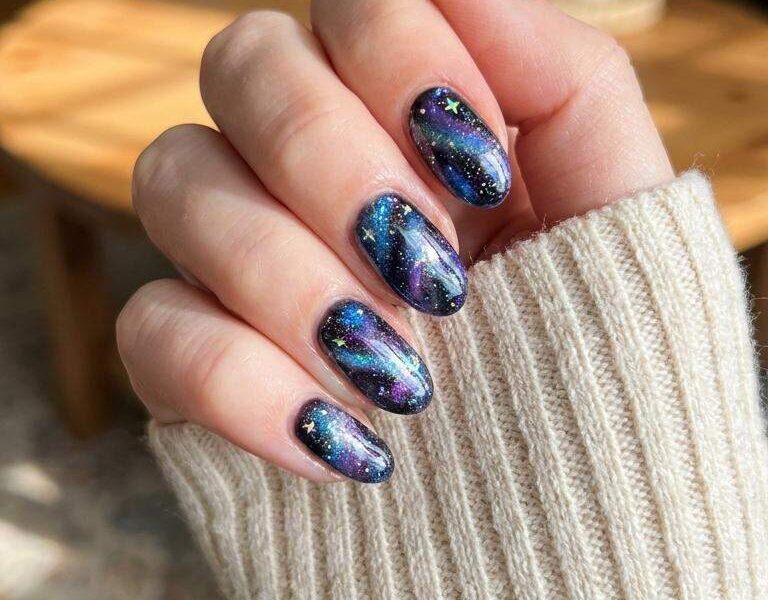
2. Celestial Magic: Silver Galaxy Hocus Pocus Nails
These dazzling nails feature a silver galaxy base that shines with an otherworldly light. The sparkly finish creates a mesmerizing effect that catches the eye with every movement. For an added touch of whimsy, incorporate a crescent moon design on one or two nails, bringing the magical theme to life. Fans of celestial art will adore the galaxy effect, which can be achieved using a sponge for a softer fade. A delicate brush is ideal for painting the moon, resulting in a design that’s both simple and eye-catching.
3. Spooky Chic: Hocus Pocus Nail Art for the Modern Witch

Whether you’re a fan of bold and bright colors or soft, ethereal themes, this collection of Hocus Pocus nail art ideas has something to offer. With clear instructions and inspiration from the beloved Sanderson sisters, you’ll be well on your way to creating a spellbinding Halloween look that’s all your own. From bright and moody color combinations to spooky art and celestial themes, every design is carefully crafted to capture the essence of the season. So why not get creative and cast a spell with your nails this Halloween?
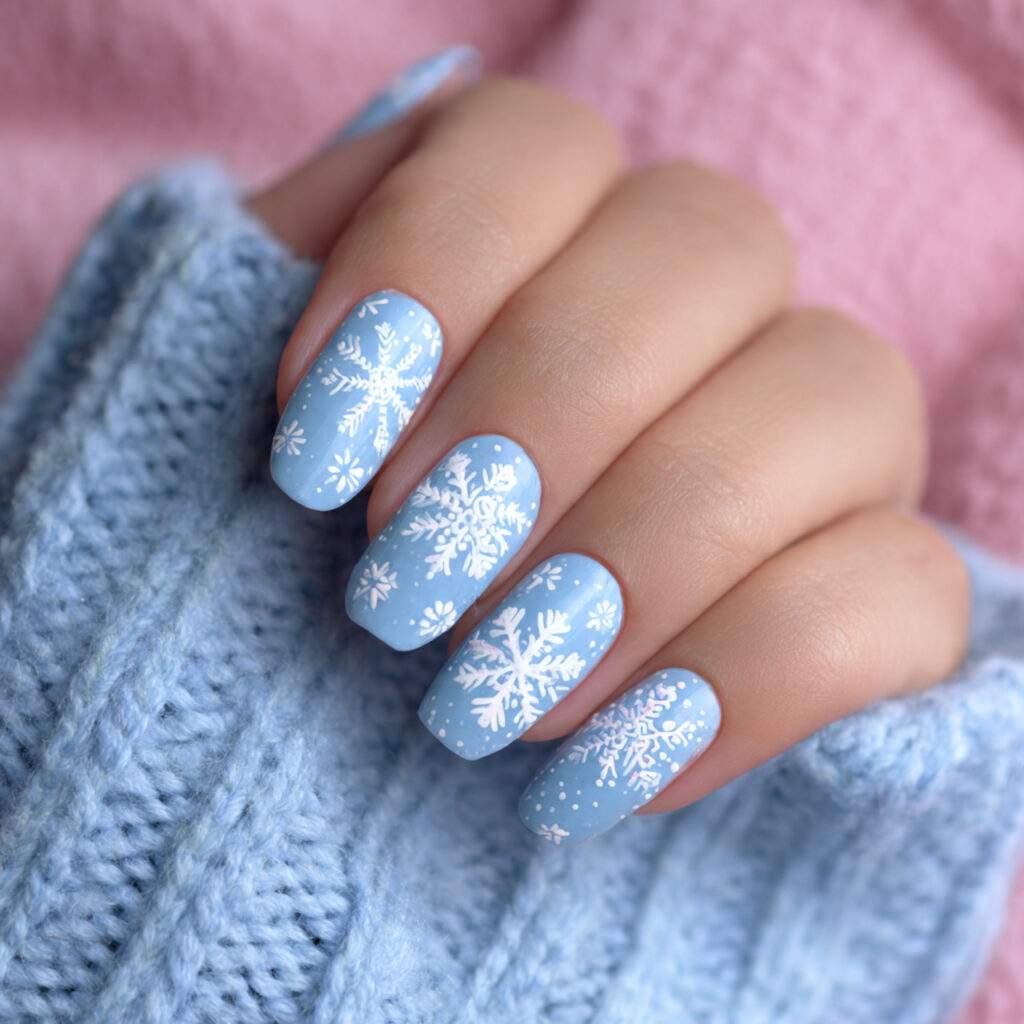
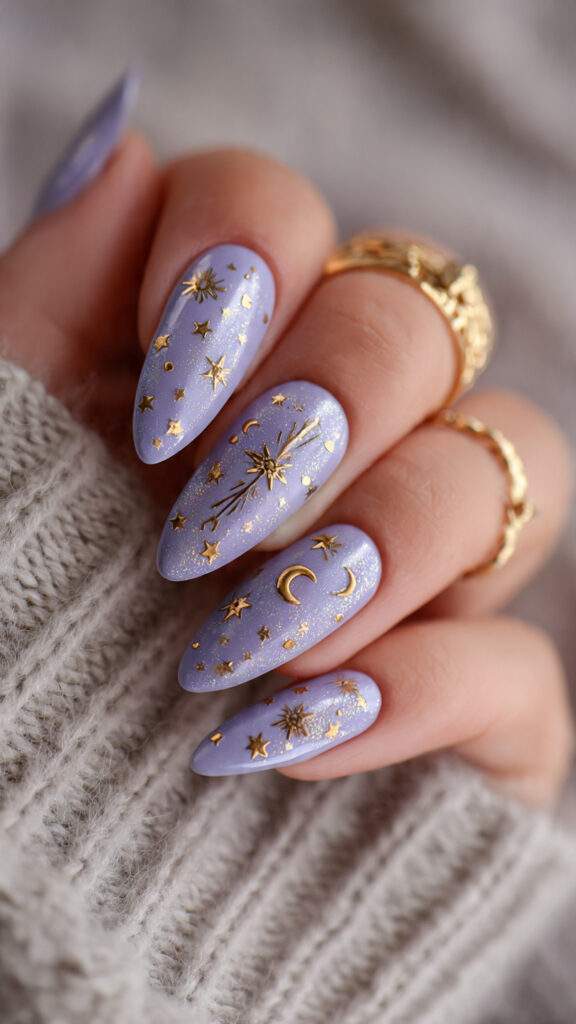
Lavender Shimmer Nails Embellished With Gold Celestial Accents
Lavender shimmer polish imbues these nails with an enchanting quality, as if kissed by moonlight. The judicious placement of gold celestial accents adds a touch of warmth without overpowering the delicate atmosphere. Celestial motifs such as stars, tiny moons, and subtle lines harmonize beautifully with this soothing hue. This design elegantly captures the essence of the Hocus Pocus theme without succumbing to darkness or drama. The shimmer polish expertly captures the light, creating a mesmerizing effect that’s sure to turn heads. If you’re seeking a feminine and gentle nail design, this is an excellent choice.
4. Vibrant Sanderson Sisters Cartoon Character Nail Art
This design proudly showcases the three Sanderson sisters in bold, cartoon-inspired artistry. Each sister’s unique features ensures instant recognition, making these nails instantly iconic. The vibrant color palette is carefully chosen to evoke the spirit of the movie, lending an air of playfulness to the overall look. These nails are perfect for fans who crave a fun and expressive design. Cartoon art looks its best on longer nails, providing ample space for intricate details. You can also opt for a single sister for a more streamlined appearance.
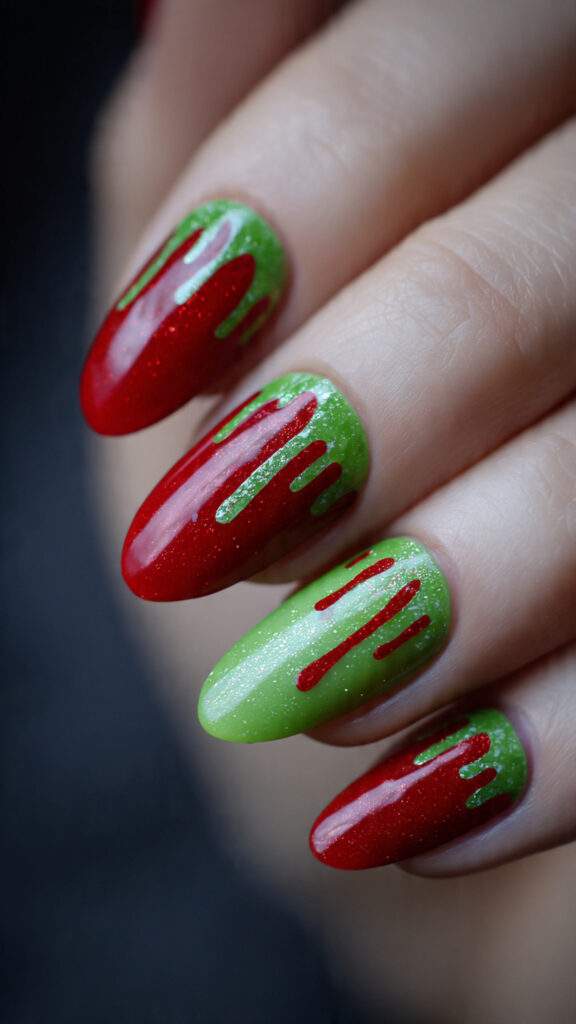
5. Red and Green Dripping Potion Nail Art
The juxtaposition of red and green polish creates a mesmerizing effect, imbuing these nails with a potion-like quality. The dripping effect adds a touch of spine-tingling drama, perfectly capturing the essence of the movie. To amplify the impact, consider keeping the background dark to allow the drips to take center stage. This design may appear complex, but decals can simplify the process. Adding glitter outlines can help the characters pop, making these nails a standout choice that’s sure to garner compliments.
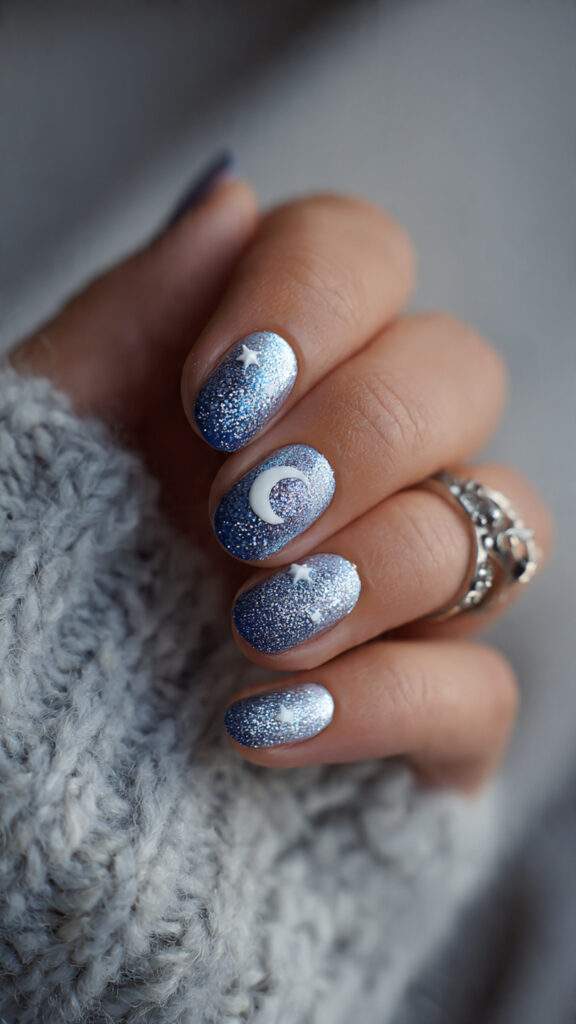
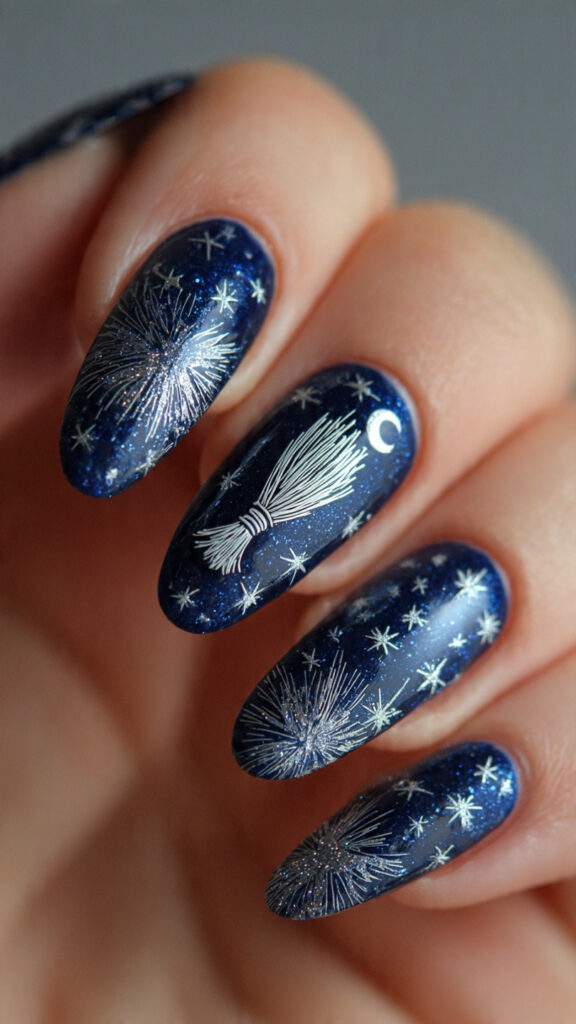
6. Captivating Midnight Blue Broom Nail Art Under Starry Skies
Midnight blue serves as an enchanting backdrop for this design, evoking a sense of mystery and wonder. The broom art adds a dynamic touch, infusing the nails with energy and movement. Sparkling stars create a mesmerizing glow, elevating the overall aesthetic. This style exudes a soft, dark, and mystical quality, perfect for fans of celestial themes. The rich, blue polish looks particularly stunning against a glossy finish.
The star effect can be achieved using silver glitter, while a thin brush is ideal for drawing the broom with crisp lines. To complete the scene, consider adding a tiny moon on one nail. This design is adaptable to any nail length and pairs beautifully with winter or fall outfits, thanks to the deep, cozy colors.
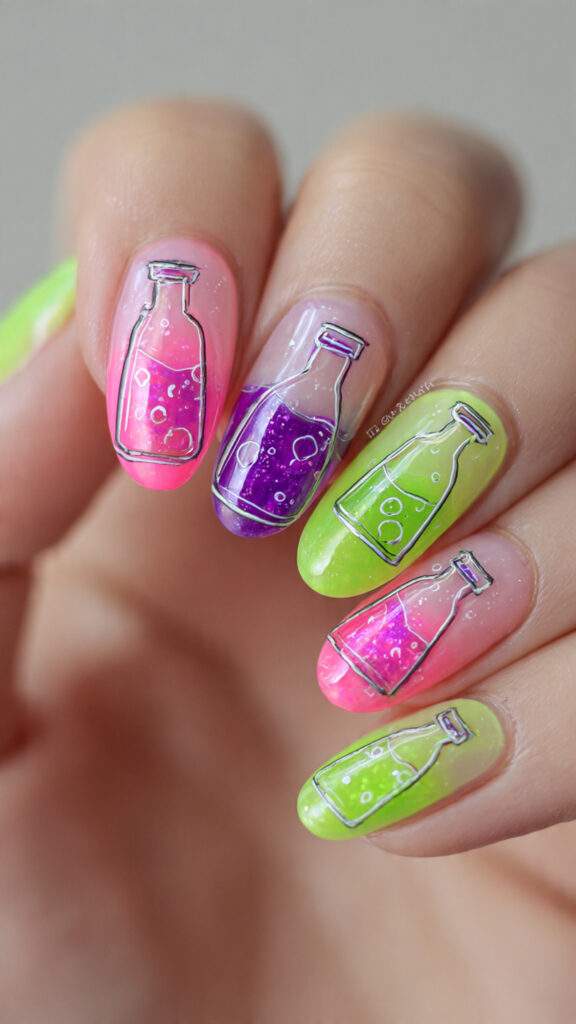
7. Vibrant Neon Potion Bottles Against a Clear Jelly Base
This eye-catching design features neon potion bottle art against a clear jelly base, expertly showcasing the colors. The transparent background amplifies the neon hues, creating a truly striking effect. Neon green, purple, and pink are the most effective colors for this style, which can range from simple to highly detailed, depending on your skill level. A jelly base adds a soft, shiny quality, giving the nails a modern look.
These nails exude a bright, playful, and personality-filled vibe, perfect for Halloween enthusiasts who prefer fun designs without dark colors. Adding tiny bubbles inside each bottle can enhance the charm, while a sprinkle of glitter within the bottles creates a magical glow. This style also works well for short nails, making it an excellent choice for those with limited nail length.
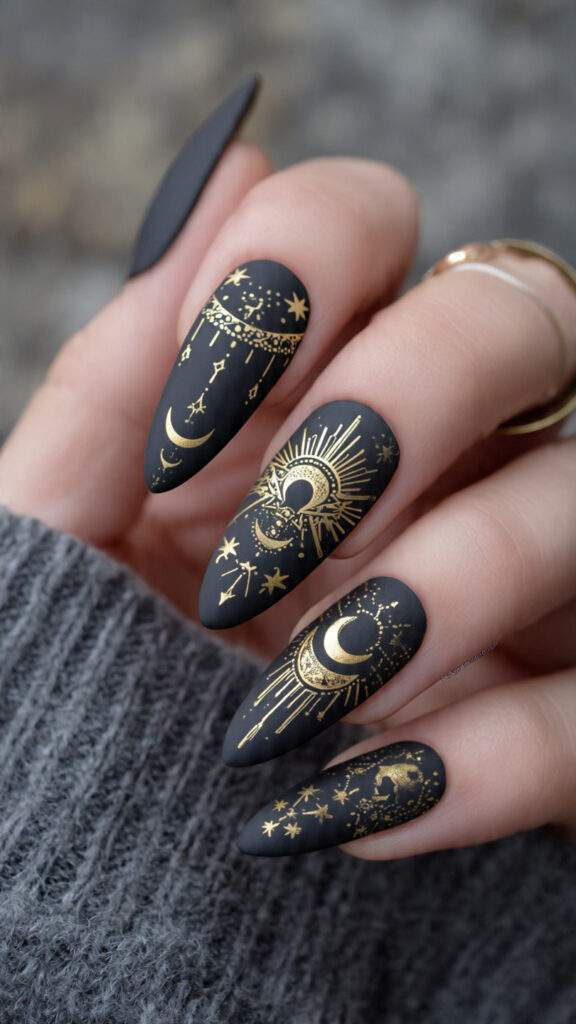
8. Timeless Elegance: Matte Black Nails With Gold Celestial Symbols
Matte black provides a sleek and bold base, while gold celestial symbols add an air of sophistication and elegance. Stars, moons, and lines appear sharp against the dark background, creating a striking contrast. This design combines a classy, refined look with a touch of witchiness, making it perfect for the Hocus Pocus theme without being overpowering. The matte finish expertly highlights the gold, adding depth to the overall aesthetic.
These nails look stunning on coffin or almond shapes, and can be customized to feature one symbol per nail or a full accent nail. To soften the look, use smaller symbols. A matte top coat keeps the overall appearance clean and smooth. The versatility of this design allows it to match almost any outfit, ensuring a stylish look at all times.
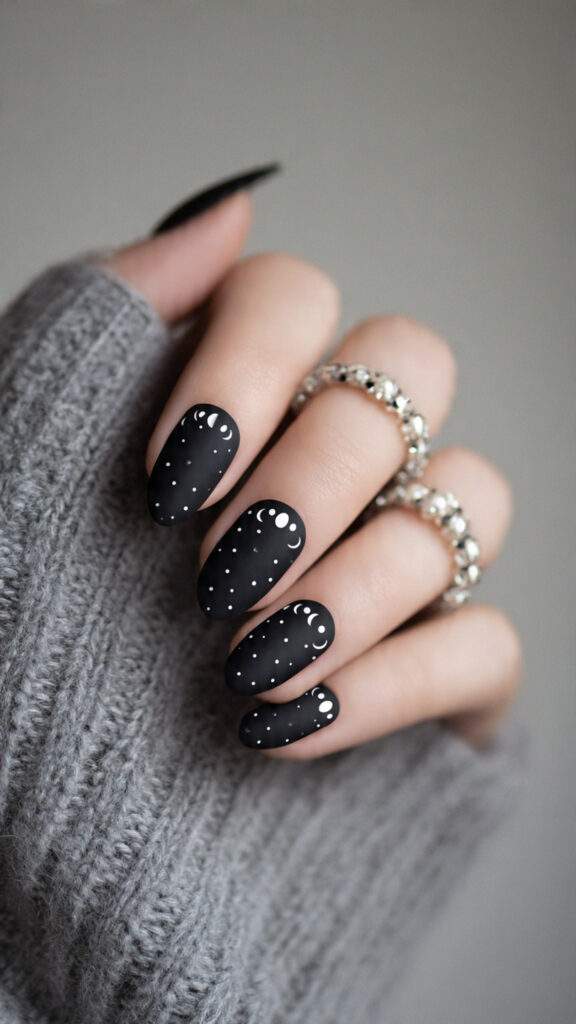
9. Understated yet Enchanting: Black Moon Phase Nails on Matte Finish
This minimalist design features black moon phases against a matte base, striking a perfect balance between simplicity and mystique. The moon phases convey growth, change, and mystery, adding a layer of depth to the nails. The matte finish creates a soft, smooth appearance, making this style ideal for those who prefer a more subtle approach to nail art. Each nail can showcase a different phase, creating a cohesive, complete look.
This design adapts to all nail lengths, and short nails in particular look clean and elegant with this style. Consider adding tiny white dots to resemble stars, or using a thin brush to create the moon shapes. With its ease of wear and versatility, this minimalist design is an excellent choice for everyday nail art, fitting seamlessly into the Hocus Pocus theme.
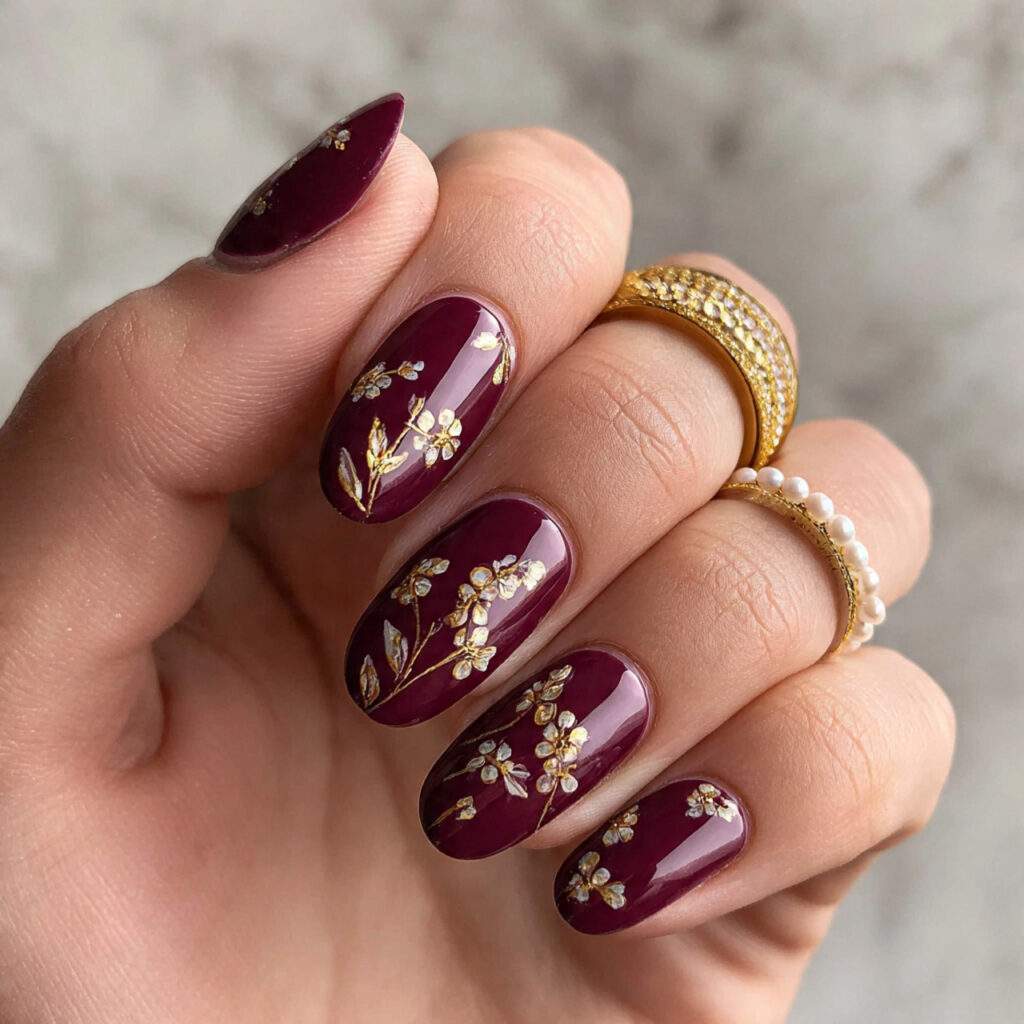
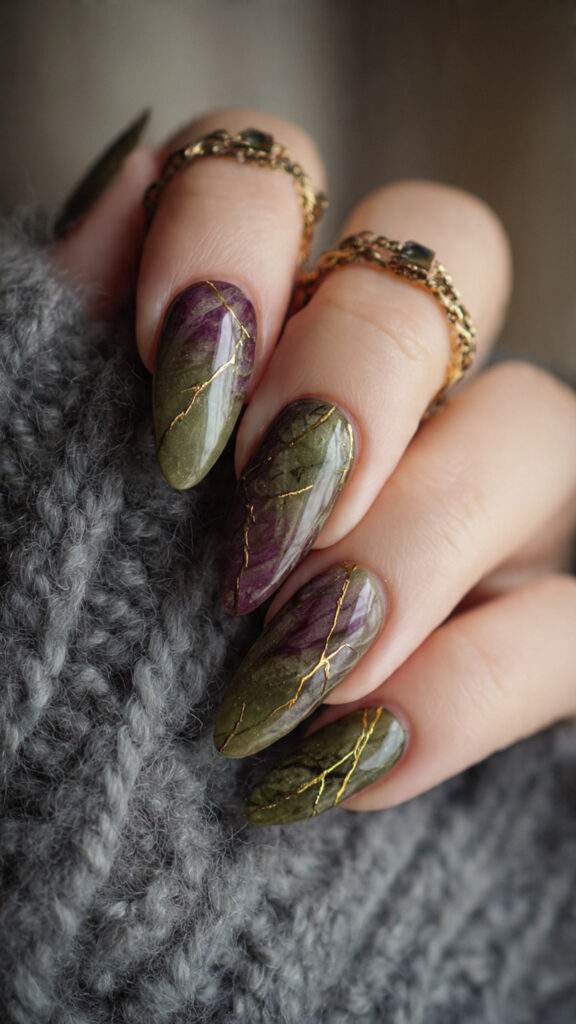
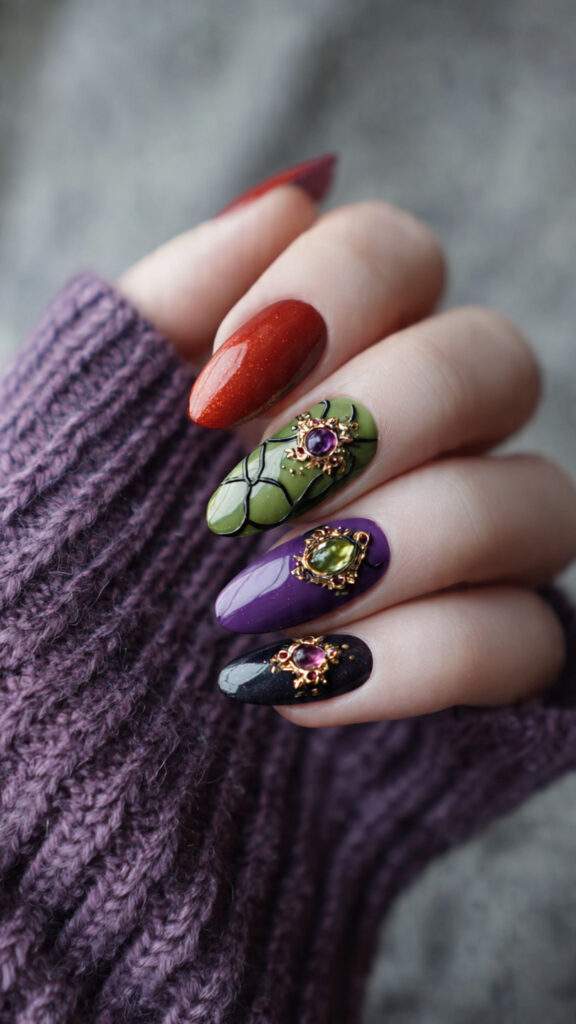
10. Enchanted Olive and Purple Hues With Gold Accents
Olive and purple tones converge to create a mysterious and captivating color combination. The subtle addition of gold accents imbues the nails with a sense of magic, reminiscent of a spellbook’s intricate pages. The gold veining adds texture and a touch of sophistication, without overpowering the design. This style is particularly well-suited for fans of darker themes, as the rich colors evoke a sense of fall’s coziness. A high-gloss top coat further enhances the gold’s luminosity.
These enchanting nails come into their own on medium or long lengths. To achieve balance, consider alternating olive and purple hues on different nails. For a more textured look, gold foil can be used, or tiny eye symbols or runes can be added to enhance the spellbook theme. This design exudes creativity, boldness, and a sense of fantasy, making it perfect for those who love to push the boundaries of nail art.
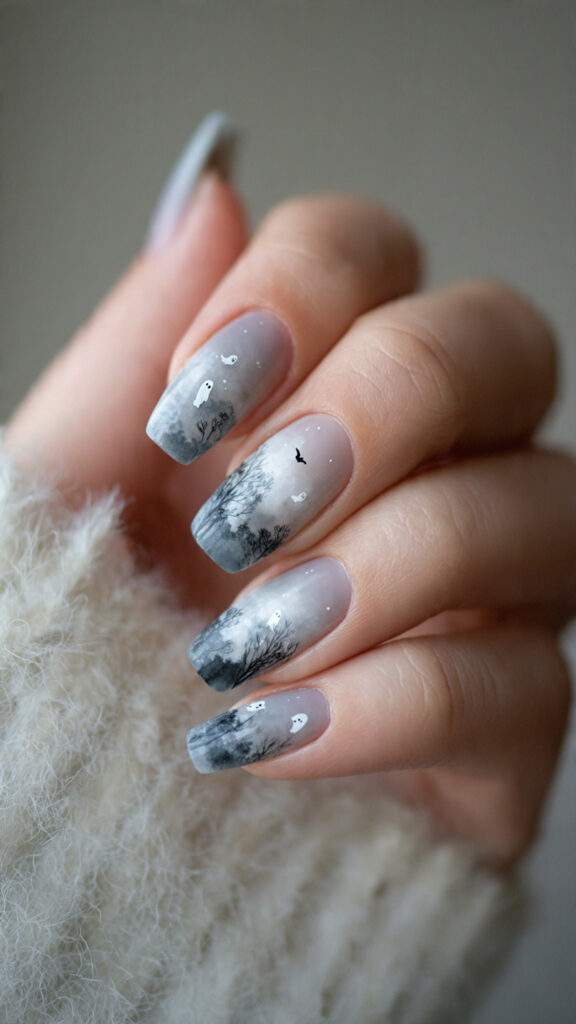
11. Whimsical Foggy Forest Nails With Floating Spirits
Foggy forest nails blend soft grays and whites to create a serene, misty effect. The addition of floating ghost accents adds a touch of playfulness and spookiness, making this design an excellent choice for Halloween enthusiasts. The forest scene appears calm and dreamy, evoking a sense of wonder. To achieve this look, a sponge can be used to create a textured, fog-like effect, while a thin brush helps paint the delicate trees.
The floating ghosts can be designed to be either cute or creepy, depending on personal style. This design looks its best on longer nails, where the forest has ample space to unfold. To add more detail, tiny stars or bats can be incorporated, creating a unique and captivating visual effect. This style is perfect for those who appreciate gentle, spooky art that’s both whimsical and enchanting.
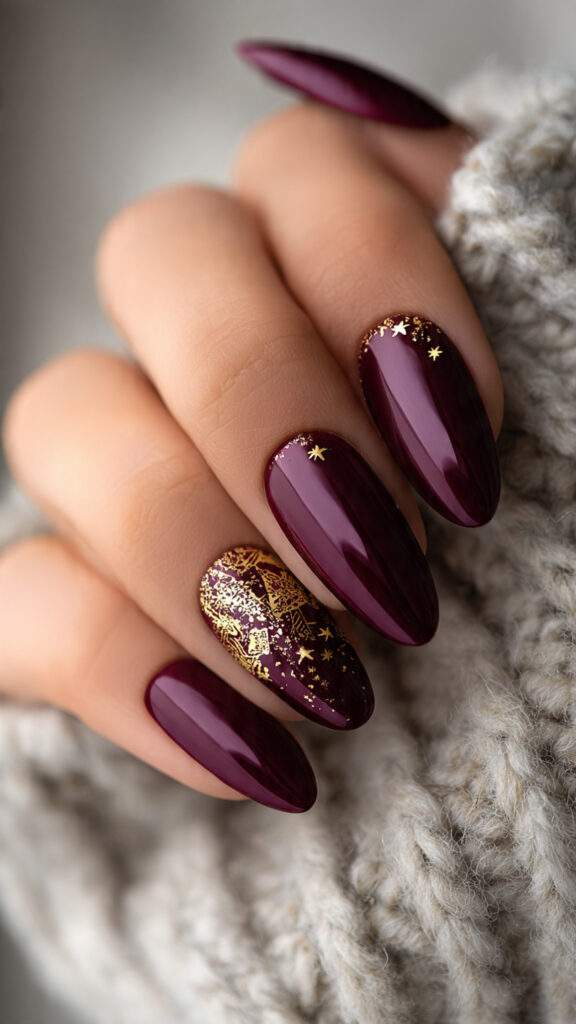
12. Regal Deep Plum Nails With Gold Witch's Cap
Deep plum tones create a rich, warm background that complements every skin tone. A gold witch’s cap on one or two nails adds a touch of whimsy and magic, elevating the design to new heights. The deep plum shade exudes elegance, making this style a great choice for those who want a sophisticated look. The addition of gold gives the nails a bright, radiant glow, further enhancing their allure.
This design works well on both short and long nails, offering versatility and ease. To add a dramatic touch, tiny stars can be arranged around the witch’s cap. A high-gloss finish brings out the plum’s depth, creating a stunning visual effect. This style is perfect for those who want witch-themed nails but still crave a soft, stylish look that’s both understated and captivating.
13. Sanderson Sister Accent Nails With 3D Embellishments
This design focuses on one or two accent nails featuring the Sanderson sisters, elevating the overall aesthetic. The 3D details add a touch of drama and sophistication, making the design truly stand out. Tiny gems, raised outlines, or textured hair pieces can be used to create depth and dimension. To balance the look, the rest of the nails can remain simple, allowing the accents to take center stage.
Choose colors that match the sisters’ iconic outfits, such as purple, red, and green. A high-gloss finish keeps the 3D elements smooth and visually appealing. This design requires a bit more time and effort, but the results are well worth it. It’s perfect for costume parties or themed events where making a statement is essential.
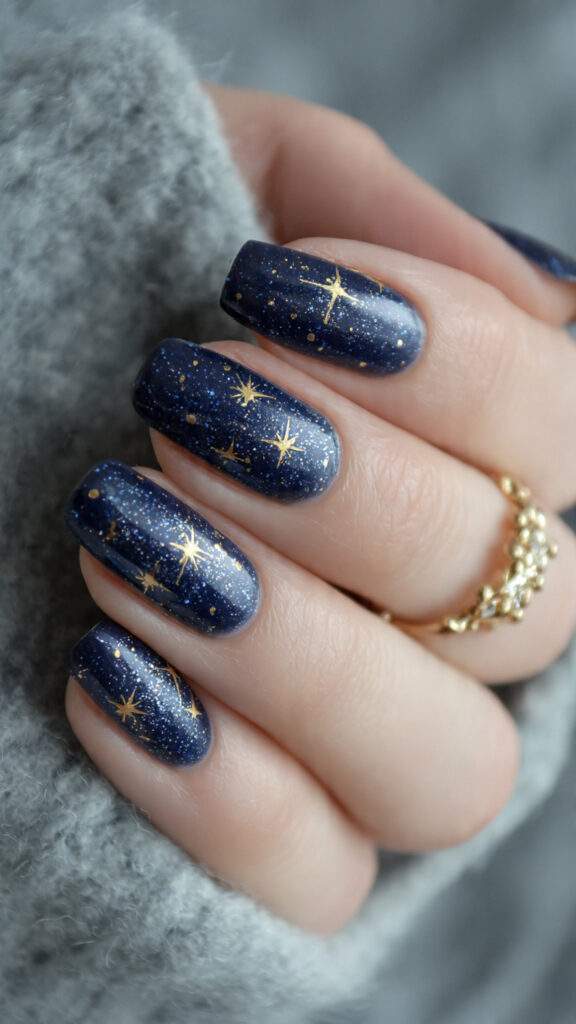
14. Navy Stardust Nails With Gold Foil Stars
A mesmerizing combination of navy and gold creates an air of mystery and allure. The subtle addition of gold foil stars adds an enchanting touch, reminiscent of a star-filled night sky. This understated yet captivating design effortlessly captures the essence of the Hocus Pocus theme without relying on character art. Its simplicity belies an undeniable visual impact that’s sure to turn heads.
The placement of gold foil can be either random or deliberate, forming small clusters that add to the overall charm. A smooth, glossy finish is achieved with a clear top coat, sealing the design and preventing any imperfections from detracting from its overall appeal. This style looks particularly stunning on almond or coffin nails, and can be tailored to suit a softer aesthetic by opting for lighter navy shades. When paired with cool-toned outfits and silver or gold jewelry, this look is sure to make a lasting impression.
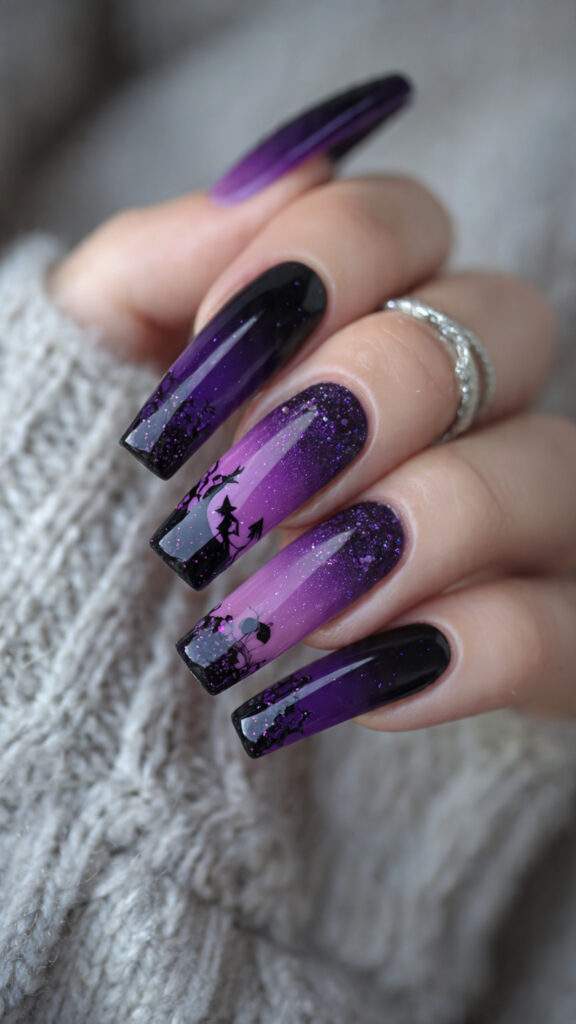
15. Black to Purple Gradient Coffin Nails With Witch Silhouette
A striking black to purple gradient creates a visual spectacle that’s both dramatic and mesmerizing. The gradual fade from one color to the next is nothing short of captivating, imbuing the nails with an air of mystery and allure. A witch silhouette adds a touch of whimsy and completes the theme, making this design perfect for Halloween photos and parties.
Adding tiny stars or glitter to the purple side of the gradient elevates the design to new heights, creating a sense of wonder and magic that’s sure to captivate from every angle. A glossy top coat helps to blend the colors seamlessly, creating a cohesive and polished look. For an added touch of personality, consider hand-painting or using a sticker to create the witch silhouette. This look is ideal for those who crave strong color and a touch of spooky charm.
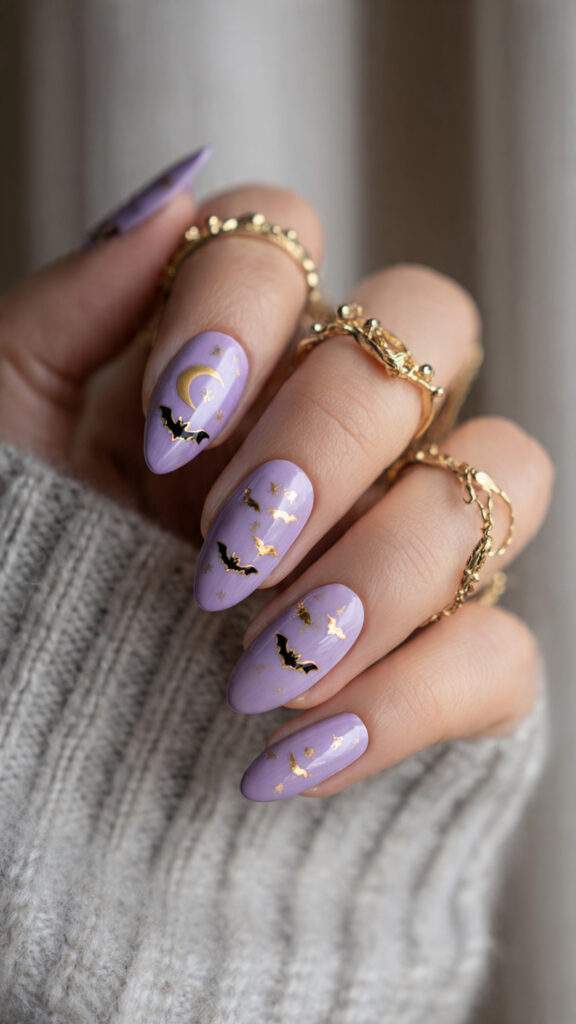
16. Lilac Nails With Gold Moons and Flying Bats
Lilac brings a soothing and calming quality to the nails, providing a gentle backdrop for the whimsical additions of gold moons and tiny flying bats. This design seamlessly blends cute and spooky elements in a delicate balance that’s both captivating and endearing. The lilac shade feels soft and inviting, making it perfect for everyday wear.
Gold adds a touch of warmth and elegance, perfectly complementing the lilac hue. Consider placing the bats near the tips for a floating effect, or position them closer to the cuticles for a more grounded look. The gold moons look stunning on the middle or ring finger, and a shiny top coat will help to bring out their sparkle. This style works beautifully on shorter nails, making it a great choice for those who want to add a touch of Halloween magic to their everyday look.
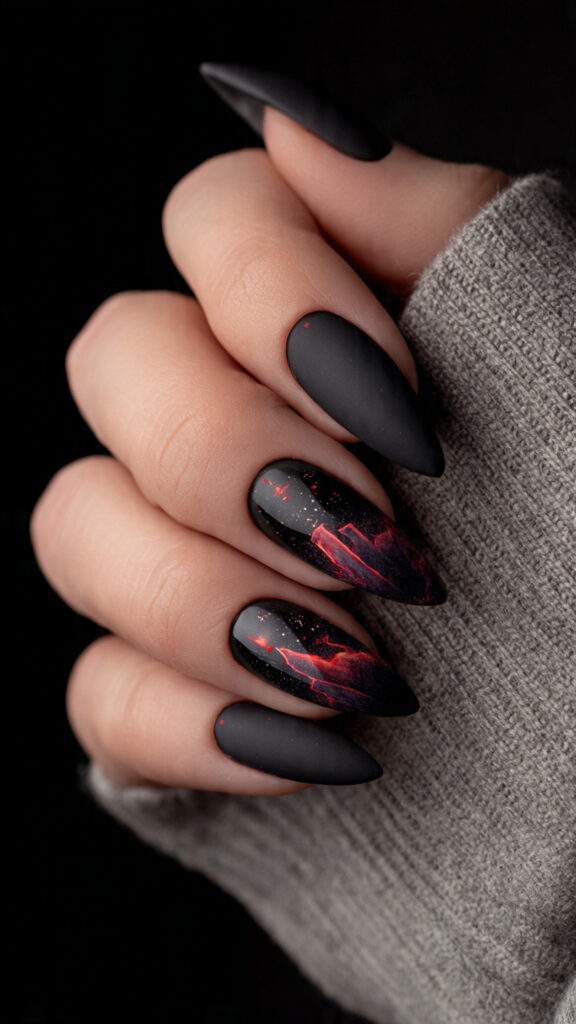
17. Matte Black Nails With Glowing Candle Design

Matte black provides the perfect backdrop for a glowing candle design, creating a dramatic and moody effect that’s both captivating and atmospheric. The candle flame can be orange or yellow, adding a pop of color that stands out against the dark background. This design effortlessly captures the essence of the darker scenes from Hocus Pocus, making it a great choice for those who crave a spooky yet elegant look.
A thin brush is ideal for creating clean, precise candle lines, while adding tiny smoke details will help to enhance the overall charm of the design. This style works particularly well on medium or long nails, where the matte finish can be fully appreciated. For an added touch of whimsy, consider placing small stars around the candle to create a sense of wonder and magic. This is a great choice for those who adore dark, moody nail art.
18. Enchanted Potion Nails With Iridescent Glitter Foam Effect
A radiant green base gives these nails a magical, bubbling potion appearance. The glitter foam effect adds texture and a mesmerizing shine. This design’s bold, playful mix of green shades perfectly captures the whimsy of the witchy theme. To make the potion look alive, consider adding tiny bubbles or sparkles.
A vibrant jelly green polish elevates the look, imbuing it with an extra touch of magic. Use a dotting tool to create the foam effect near the tips, and seal everything with a glossy top coat for a radiant finish. This design suits both short and long nails, and its bright, Halloween-inspired colors make it perfect for fans of the holiday.
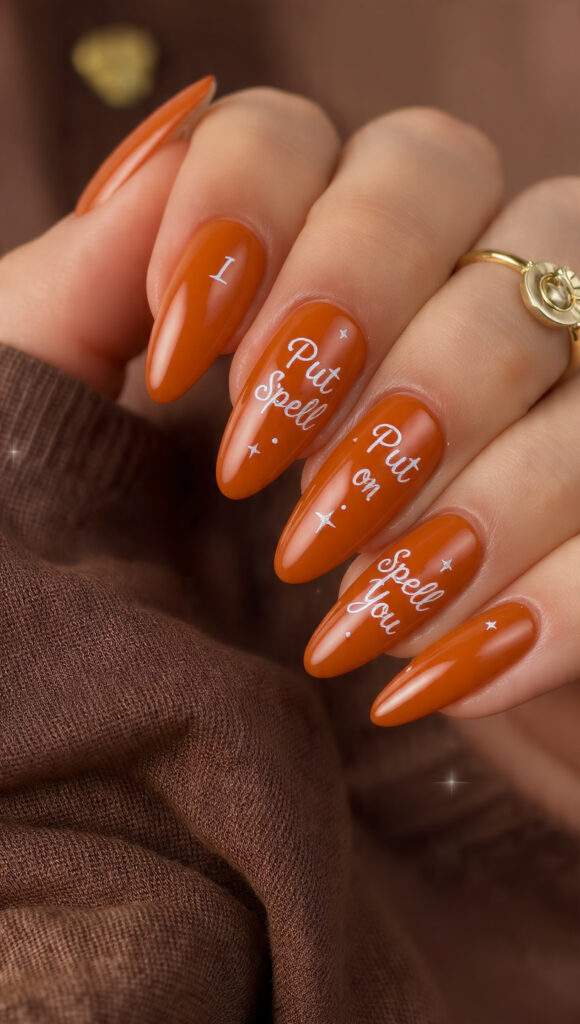
19. Autumnal Nails With Spellbinding Lettering
Burnt orange is an ideal shade for fall, exuding warmth and coziness. The addition of charming lettering adds a touch of personality to this design. The phrase “I Put a Spell on You” fits the theme perfectly, and white or black lettering stands out beautifully against the orange background. This shade feels both eye-catching and inviting.
For clean, crisp lettering, consider using a thin brush or sticker letters. Adding small stars or sparkles around the words enhances the design’s magic. This style works particularly well on almond or square nail shapes, and the warm orange shade looks stunning paired with gold or brown accessories. It’s an excellent option for fans of themed nails with words.
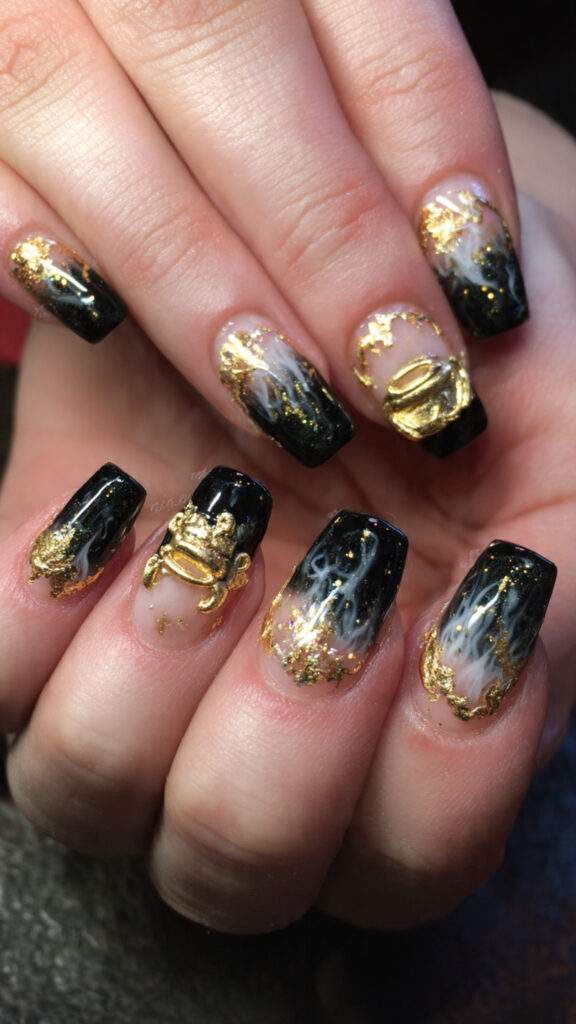
20. Luxurious Witch Cauldron Nails With Whimsical Smoke Art
These nails feature a beautifully detailed witch cauldron with gold trimmed edges, adding a touch of luxury to the design. The gold makes the cauldron feel rich and magical, while the smoke art adds movement and softness. To create the smoke effect, you can use white polish. This design strikes a perfect balance between detail and simplicity.
For maximum impact, place the cauldron on the ring finger. Use dark green or black as the base for a spooky, dramatic background. The gold trim looks stunning against darker colors. Adding tiny bubbles or stars enhances the design’s charm. This look is perfect for fans of storytelling nail art who appreciate intricate details.
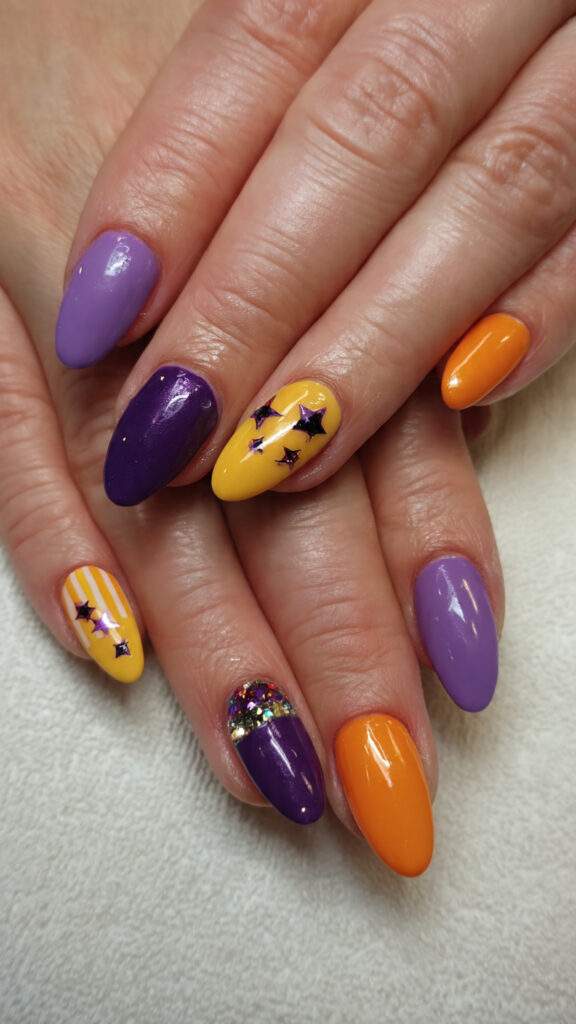
21. Hocus Pocus Icon Nails With Vibrant Accents
This design showcases the iconic Hocus Pocus logo, accompanied by bold, colorful accents. The result is a fun and eye-catching nail look that’s sure to delight fans of the movie. Purple, yellow, and orange are particularly fitting colors, capturing the film’s playful spirit. You can place the logo on one or two nails, reserving the others for simple stars or stripes.
This style suits longer nails particularly well, as it provides ample space for detail. To achieve clean lines, consider using decals. Adding glitter to the accent colors takes the design to the next level, making it perfect for fans who want a direct reference to the movie.
22. Choosing the Perfect Colors for Hocus Pocus Nails
Timeless Favorites: Witchy Purple, Midnight Blue, and Deep Green
These colors perfectly capture the movie’s magical and spooky atmosphere. The combination of purple and blue creates a captivating night sky effect, while deep green fits seamlessly into potion-themed designs. All three shades look stunning when paired with gold accents.
Classic Halloween Colors: Gold, Orange, and Black
Gold adds a touch of luxury and shine, while orange brings warmth and festivity to the design. Black creates dramatic contrast and adds depth, making these colors a winning combination in both soft and bold designs.
Captivating Finishes for a Whimsical Nail Design
Ethereal glitter infuses designs with an enchanting essence. Lustrous foil lends depth and dimension, while metallic hues evoke a mystical aura. These enchanting finishes are particularly well-suited for spellbook-inspired or celestial-themed nail art.
Mastering Whimsical Nail Art at Home
Step 1: Select Your Foundation Colors
Choose hues that resonate with your theme. Rich jewel tones such as purple, black, fiery orange, and sage green are excellent choices. Ensure your base coat is completely dry before proceeding to add intricate details.
Step 2: Integrate Decals, Stickers, or Hand-Drawn Elements
Decals offer a convenient means of achieving crisp, clean shapes. Hand-painted details allow for bespoke, one-of-a-kind flair. Commence with simple, geometric shapes such as crescent moons or five-pointed stars.
Step 3: Incorporate Glitter, Foil, or Gems for an Enchanted Look
Introduce subtle sparkles to bestow a magical quality upon your nails. Foil adds a radiant sheen, while strategically placed gems can draw attention to specific areas.
Step 4: Lock in Your Design with a Glossy or Matte Finish
A glossy top coat imbues colors with a vibrant, dynamic appearance. Conversely, a matte finish imparts a soft, ethereal quality, reminiscent of a spooky, mystical ambiance. Sealing your design with a top coat prolongs its longevity and preserves its captivating essence.